Peanuts are more than just a tasty snack—they’re a nutrient-rich legume packed with protein, healthy fats, and essential vitamins. Growing peanuts at home or on a small farm can be incredibly rewarding, but many gardeners struggle to get high yields. With the right techniques, you can not only grow healthy peanut plants but also double your harvest, producing an abundant crop of fresh, flavorful peanuts.
In this guide, we explore five surprisingly effective ways to grow peanuts that maximize yield, improve plant health, and make your gardening experience more productive.
Understanding the Basics of Peanut Cultivation
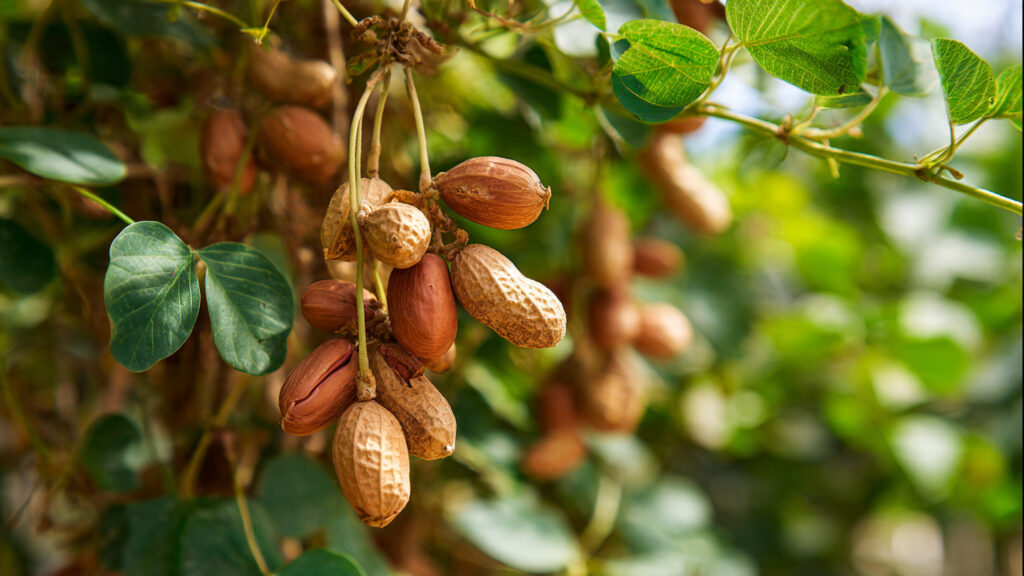
Before diving into advanced techniques, it’s important to understand the fundamental needs of peanut plants. Peanuts (Arachis hypogaea) are warm-season legumes that thrive in sandy, well-draining soils. They need full sunlight, moderate moisture, and nutrient-rich soil. Peanuts have a unique growth pattern: after flowering, their “pegs” penetrate the soil to form underground pods, which is why soil health and proper care are critical for a high yield.
1. Select High-Quality Seeds and Suitable Varieties
The first step to maximizing peanut yield is starting with the right seeds. High-quality, disease-free seeds ensure healthy plants and robust pod development.
- Variety Matters: Different peanut varieties have different yields, growth cycles, and resistance to pests. For example:
- Virginia Peanuts – Large pods, ideal for roasting.
- Valencia Peanuts – Sweet taste, multiple small pods per plant.
- Spanish Peanuts – Small pods, high oil content, and great for snacking.
- Seed Treatment: Before planting, treat seeds with fungicides or soak them in water for a few hours to encourage faster germination.
Pro Tip: Choose a variety suited to your climate and soil type. For sandy soil with good drainage, Spanish or Valencia peanuts thrive, whereas Virginia peanuts prefer slightly heavier soil.
2. Optimize Soil Preparation
Peanuts develop underground pods, so soil preparation is critical. The better the soil, the easier it is for pegs to penetrate and form healthy pods.
- Loosen the Soil: Till or loosen the soil to a depth of 12–15 inches to allow peg penetration. Avoid compacted soil that can stunt pod formation.
- Sandy, Well-Draining Soil: Peanuts prefer sandy loam rich in organic matter. Mix compost, well-rotted manure, or leaf mold to improve texture and fertility.
- pH Levels: Aim for a slightly acidic to neutral pH of 6.0–6.5. You can add lime if the soil is too acidic.
- Mounding Technique: Some gardeners plant peanuts in small mounds or ridges to improve drainage and root aeration, which enhances pod development.
Surprising Fact: Peanuts are legumes that can fix nitrogen, but adding a small amount of nitrogen-rich fertilizer early in growth can boost vegetative growth and flower formation, setting the stage for a higher yield.
3. Use Efficient Watering and Mulching Techniques
Water management is key to healthy peanut growth. Too little water can stunt pods, while overwatering can cause root rot and fungal infections.
- Watering Schedule: Water peanut plants deeply once or twice a week during dry spells, especially when flowers and pegs are developing. Avoid frequent shallow watering.
- Mulching: Apply a 2–3 inch layer of straw, dried leaves, or grass around the plants. Mulch retains soil moisture, suppresses weeds, and keeps the soil temperature stable.
- Rainy Season Considerations: In areas with heavy rainfall, ensure proper drainage to prevent waterlogging, which can damage the pods underground.
Pro Tip: Stop watering a couple of weeks before harvesting to allow the pods to mature fully and develop a rich flavor.
4. Encourage Flowering and Peg Formation
Peanut yield depends on flower production and successful peg penetration into the soil. Here’s how to maximize this stage:
- Adequate Sunlight: Peanut plants require 6–8 hours of direct sunlight daily to produce more flowers and pegs.
- Pruning and Thinning: Remove overcrowded plants early to improve airflow and sunlight exposure for remaining plants. This prevents fungal disease and encourages better pod development.
- Fertilization During Flowering: Once flowers appear, provide phosphorus and potassium-rich fertilizers to support peg formation and pod development. Avoid excess nitrogen at this stage, which can lead to leafy growth at the expense of pods.
- Supportive Soil: Lightly loosen soil around pegs to help them penetrate, especially in heavier soils.
Interesting Fact: Each peanut flower produces a peg that grows downward into the soil. Proper soil aeration and care at this stage directly influence the number of pods formed per plant.
5. Pest, Disease, and Weed Management
Healthy peanut plants produce more pods, so protecting them from pests, diseases, and weeds is essential for doubling your yield:
- Pests to Watch: Aphids, thrips, and caterpillars can damage leaves and flowers. Use neem oil or organic insecticidal soap to control infestations.
- Diseases: Leaf spots, root rot, and pod rot are common in wet or poorly drained soil. Crop rotation and well-draining soil prevent many fungal infections.
- Weeding: Weeds compete for nutrients and water. Regularly remove weeds around peanut plants, especially during flowering and pod formation.
Pro Tip: Intercropping with beans, corn, or marigolds can naturally deter pests while improving soil fertility, reducing the need for chemical interventions.
Harvesting for Maximum Yield
Timing the harvest correctly ensures that your peanuts are fully developed and flavorful:
- Maturity Check: Peanuts are usually ready to harvest 120–150 days after planting, depending on the variety. Signs include yellowing leaves and slightly dried vines.
- Harvest Method: Loosen soil gently around the plants and lift the entire plant to preserve the pods. Shake off excess soil and allow pods to dry in a sunny, well-ventilated area.
- Post-Harvest Storage: Store peanuts in a cool, dry place to prevent mold. Drying them properly can increase shelf life and preserve taste.
Surprising Fact: Harvesting slightly late can improve pod size but risks fungal infection. Monitoring the plants carefully during maturity ensures the best combination of size, flavor, and quality.
➡️ How to Grow Malabar Spinach from Cuttings for Fast, Easy Greens
➡️ How to Grow Super Delicious Cabbage at Home Without a Garden
➡️ How to Grow Bean Sprouts at Home in Plastic Bottles Easily (Step‑by‑Step Guide)
➡️ Why is Your Lemon Tree Blooming in the Heart of Winter?
➡️ Why Should Your Garden Have a Dedicated Pollinator Highway?
➡️ Why Do Your Fruit Trees Need a Winter Wash to Thrive in Spring?
➡️ How Can Rice Water Transform Your Fruits into Sweeter Delights?
➡️ Jumpstart Your Winter Garden: Seed Starting Under Lights
Bonus Tips to Double Peanut Yield
- Succession Planting – Stagger planting every 2–3 weeks to extend harvest season and increase total yield.
- Use Raised Beds – Improves drainage, reduces soil compaction, and allows more plants per area.
- Organic Fertilizers – Compost and vermicompost enhance soil fertility naturally, supporting larger pods and healthier plants.
- Companion Plants – Planting peanuts alongside crops like corn or sunflowers can boost growth and reduce pest damage.
- Regular Monitoring – Inspect plants weekly to catch pests, nutrient deficiencies, or diseases early, preventing yield loss.
Conclusion
Peanuts are not only delicious but also surprisingly easy to grow when you follow the right strategies. By choosing quality seeds, preparing the soil properly, managing water and mulch, encouraging flower and peg formation, and protecting plants from pests and diseases, you can dramatically increase your yield.
Whether you’re a backyard gardener or a small-scale farmer, these five surprisingly effective methods will help you grow larger, healthier peanut plants and enjoy a bountiful harvest. With attention, care, and a little bit of technique, you can double your peanut yield and savor the satisfaction of homegrown, nutrient-rich legumes straight from your garden.