Gardening is a magical experience, but for many beginners, limited space, expensive pots, or lack of a backyard can feel like major roadblocks. What if we told you that you could start a thriving vegetable garden right from everyday plastic bottles? Not only does this method save money and reduce waste, but it also transforms your home into a green oasis—regardless of the space you have.
This guide will take you step by step through the process, sharing essential tips, tricks, and practical advice to ensure your seedlings grow into healthy, productive vegetables.
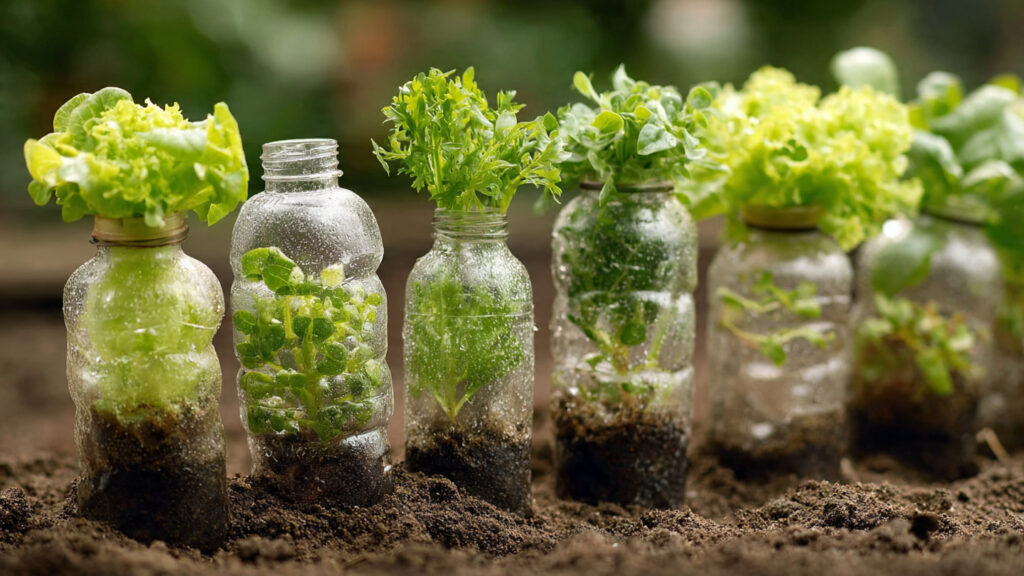
Why Plastic Bottle Gardening Works
Plastic bottles are more than just waste—they are versatile tools for urban gardening. By repurposing them, you create small, controlled environments ideal for seedlings and small vegetable plants. The benefits are numerous:
- Cost-effective: No need to buy expensive pots or planters.
- Space-saving: Perfect for balconies, windowsills, or small patios.
- Eco-friendly: Reduces plastic waste while promoting sustainable gardening.
- Portable: Easy to move plants to catch the sun or shelter from harsh weather.
Reality Check: Plastic bottles are ideal for small vegetables and herbs. Large crops like pumpkins or corn require bigger containers.
Choosing the Right Plastic Bottles
Not all plastic bottles are created equal for gardening. Here’s what to look for:
- Size matters: 1- to 2-liter bottles are perfect for most vegetables like tomatoes, lettuce, and peppers. Smaller bottles work well for herbs like basil and cilantro.
- Transparent bottles: They let you monitor root growth, but avoid prolonged direct sunlight on roots to prevent overheating.
- Clean and safe: Wash bottles thoroughly to remove residues. Avoid bottles that previously held chemicals or soft drinks with high acidity.
Tip: Cutting the bottle horizontally allows you to create two planters from one bottle—one for seedlings and another for mature plants.
Preparing Your Bottles for Planting
Creating a thriving vegetable garden from seeds starts with proper bottle preparation. Follow these steps:
- Cutting: Carefully cut the bottle horizontally or vertically, depending on your design. Ensure edges are smooth to prevent injury.
- Drainage: Punch small holes at the bottom to allow excess water to escape. Proper drainage prevents root rot and overwatering.
- Soil preparation: Use a lightweight, nutrient-rich potting mix. Add compost to provide natural nutrients for seedlings.
Pro Tip: For self-watering bottles, place a small cotton wick through the drainage hole into a water reservoir below. This allows your plants to absorb water gradually.
Selecting Seeds
The secret to a thriving plastic bottle garden starts with the right seeds. Beginners should choose vegetables that are easy to grow and resilient:
- Leafy greens: Lettuce, spinach, and kale grow quickly and thrive in small spaces.
- Herbs: Basil, parsley, coriander, and mint are low-maintenance and useful in cooking.
- Fruiting vegetables: Cherry tomatoes, peppers, and radishes adapt well to container gardening.
Reality Check: Slow-growing or large-rooted vegetables like carrots, beets, or pumpkins may not thrive in small bottles.
Planting Your Seeds
Planting seeds correctly is crucial to encourage healthy germination:
- Depth: Check the seed packet for recommended planting depth—too deep or too shallow can prevent sprouting.
- Spacing: Don’t overcrowd your bottles. Crowded seedlings compete for water and nutrients.
- Watering: Mist the soil lightly after planting. Keep it consistently moist but never soggy.
Pro Tip: Label each bottle with the seed type and planting date to track growth and care requirements.
Caring for Your Bottle Garden
Once your seeds sprout, consistent care is key. Here’s how to nurture them:
- Sunlight: Most vegetables need 4–6 hours of sunlight daily. Place bottles near windows or use grow lights for indoor gardening.
- Watering: Water regularly but avoid waterlogging. Self-watering bottles can simplify this process.
- Fertilizing: Use liquid fertilizer every 2–3 weeks once seedlings have a few sets of true leaves. Organic options like compost tea or diluted fish emulsion work wonders.
Reality Check: Overwatering is a common mistake among beginners. Check soil moisture with your finger before watering.
Transplanting Seedlings
As your plants grow, some may outgrow their bottles. Transplanting allows continued growth without stunting:
➡️ How to Grow Malabar Spinach from Cuttings for Fast, Easy Greens
➡️ How to Grow Super Delicious Cabbage at Home Without a Garden
➡️ How to Grow Bean Sprouts at Home in Plastic Bottles Easily (Step‑by‑Step Guide)
➡️ Why is Your Lemon Tree Blooming in the Heart of Winter?
➡️ Why Should Your Garden Have a Dedicated Pollinator Highway?
➡️ Why Do Your Fruit Trees Need a Winter Wash to Thrive in Spring?
➡️ How Can Rice Water Transform Your Fruits into Sweeter Delights?
➡️ Jumpstart Your Winter Garden: Seed Starting Under Lights
- Choose larger bottles or pots: 2–3 liter bottles or small planters work for mature vegetables.
- Handle carefully: Gently remove seedlings with roots intact to reduce transplant shock.
- Acclimate: Place transplanted seedlings in partial shade for a few days before exposing them fully to sun.
Pro Tip: Avoid transplanting on hot days or during harsh sunlight to prevent stress.
Creative Bottle Garden Designs
Plastic bottle gardening isn’t just functional—it can be beautiful! Get creative with these designs:
- Vertical gardens: Stack bottles using ropes, shelves, or wall mounts for a space-saving setup.
- Hanging planters: Use cut bottles as hanging pots for herbs or trailing vegetables.
- Tiered gardens: Arrange bottles in tiers to maximize sunlight and air circulation.
These designs are perfect for small spaces, apartments, and urban environments.
Pest and Disease Management
Even in container gardens, pests and diseases can threaten plants. Common issues include aphids, fungal infections, and mold growth due to high humidity.
Tips for management:
- Inspect plants regularly for pests or discolored leaves.
- Maintain airflow between bottles to reduce fungal risks.
- Use natural pest control options like neem oil or insecticidal soap.
Reality Check: Plastic bottle gardens are not immune to pests. Vigilance and early intervention are key to keeping your plants healthy.
Harvesting Your Vegetables
The reward of all your hard work comes at harvest. Knowing when to pick is essential for flavor and plant productivity:
- Leafy greens: Pick outer leaves first, allowing inner leaves to grow.
- Herbs: Snip leaves as needed; frequent harvesting encourages bushy growth.
- Fruiting vegetables: Harvest tomatoes, peppers, and radishes at the right size and color for optimal taste.
Pro Tip: Regular harvesting stimulates more growth and prolongs the life of your vegetable plants.
Sustainability and Fun
Plastic bottle gardening isn’t just about growing vegetables—it’s about creating a sustainable, enjoyable hobby. By reusing bottles, you reduce plastic waste, teach children about gardening, and enjoy fresh, homegrown produce. Plus, the satisfaction of seeing seeds turn into thriving plants is nothing short of magical.
Conclusion
Starting a vegetable garden from plastic bottles is an accessible, affordable, and sustainable way to embrace gardening, even for beginners. By understanding the fundamentals—choosing the right bottles, preparing soil, planting seeds correctly, and providing consistent care—you can transform everyday waste into a flourishing source of fresh vegetables and herbs.
The magic of gardening lies in patience, observation, and creativity. With your bottles ready, seeds planted, and care routine in place, you are well on your way to creating a thriving vegetable garden that not only beautifies your space but also nourishes your body.
Remember, even the smallest bottle can hold the potential for big growth. So gather your plastic bottles, plant your seeds, and watch the magic unfold!