Amaranth, often hailed as a superfood for its nutritional richness and stunning ornamental qualities, is a versatile plant that can be grown in home gardens, urban plots, or larger agricultural setups. Known for its striking foliage, vibrant flower heads, and edible seeds and leaves, amaranth is a plant that offers both beauty and sustenance. However, achieving a prolific and long-lasting harvest requires understanding the plant’s growth habits and applying the right techniques. One of the most effective strategies is the cut-and-come-again method, a technique that maximizes yield while keeping plants healthy and productive. This comprehensive guide will take you through everything you need to know about growing amaranth and making the most of this method.
Understanding Amaranth: A Versatile Plant
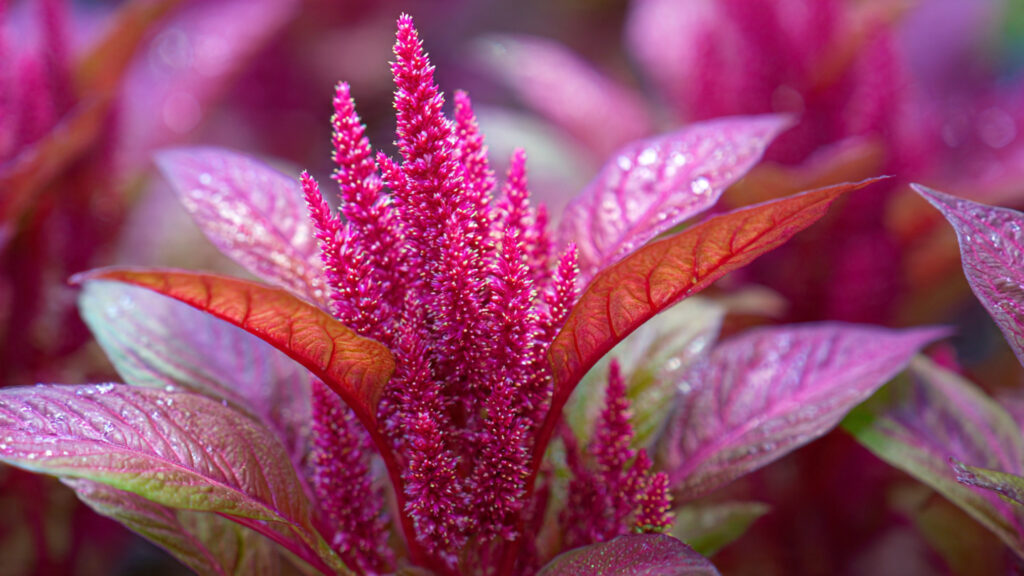
Amaranth belongs to the Amaranthus genus, which includes hundreds of species, some grown for ornamental purposes, others for edible leaves, and still others for grain production. What sets amaranth apart is its dual functionality: the leaves are rich in vitamins A, C, and K, as well as minerals like iron and calcium, while the seeds are protein-rich and gluten-free, making them an excellent choice for modern diets.
Depending on your gardening goals, you may choose leaf amaranth (commonly harvested like spinach) or grain amaranth (harvested for seeds). Both types benefit greatly from cut-and-come-again harvesting, which allows you to harvest leaves repeatedly without damaging the plant’s long-term growth potential.
Preparing to Grow Amaranth
Before diving into cutting techniques, it’s important to set up optimal growing conditions for your amaranth plants.
1. Choosing the Right Variety
Selecting the right variety is the first step toward successful amaranth cultivation. For leaf harvest, look for varieties such as ‘Red Garnet’ or ‘Green Calaloo,’ which produce tender leaves with rich color and flavor. For seed production, varieties like ‘Golden Giant’ or ‘Plainsman’ are known for high yields.
2. Soil Requirements
Amaranth is not particularly fussy but thrives in well-drained, fertile soil with a neutral to slightly acidic pH (6.0–7.0). Enrich the soil with compost or organic matter to promote robust growth. Good drainage is key, as soggy roots can lead to disease.
3. Sunlight and Space
Amaranth loves sunlight and needs at least 6–8 hours of direct sun per day. While it tolerates some shade, the flavor and color of leaves are most vibrant under full sun. Space plants 10–12 inches apart for leafy varieties and up to 18–24 inches apart for grain varieties to allow proper airflow and prevent overcrowding.
4. Watering Needs
While amaranth is drought-tolerant, consistent watering ensures tender leaves and steady growth. Avoid overwatering; instead, aim for deep, infrequent watering to encourage strong root development.
The Cut-and-Come-Again Method: Maximizing Your Harvest
The cut-and-come-again method is a sustainable harvesting technique that involves picking leaves while allowing the plant to continue growing. This method not only prolongs the harvest season but also encourages the plant to produce more foliage, creating a win-win for gardeners.
Step 1: Knowing When to Start
Start harvesting when plants are 6–8 inches tall. At this stage, leaves are tender and packed with nutrients. Avoid cutting too early, as seedlings need time to establish strong roots.
Step 2: How to Cut
Use sharp scissors or garden shears to snip leaves. Always cut the outer leaves first, leaving the central growing tip intact. This ensures that the plant can continue producing new leaves from its crown. Never remove more than one-third of the plant at a time, as overharvesting can stress the plant and slow regrowth.
Step 3: Encouraging Regrowth
After each cut, continue regular watering and apply a light feeding of compost or liquid fertilizer. Healthy soil and adequate nutrients help the plant bounce back faster, giving you multiple harvests from a single sowing. Most amaranth varieties can provide 3–4 harvests before the growing season ends.
Step 4: Timing Successive Harvests
You can begin a second harvest approximately 2–3 weeks after the first, depending on growth rate and climate. Warmer temperatures accelerate regrowth, while cooler periods may require a slightly longer interval. By using the cut-and-come-again approach, you can enjoy a steady supply of fresh leaves for months.
Additional Tips for High-Yield Amaranth
1. Succession Planting
To ensure continuous harvest, practice succession planting by sowing seeds every 2–3 weeks. This way, even if one plant is finishing its cycle, another is just reaching harvestable size.
2. Pest and Disease Management
Amaranth is generally resilient, but common pests like aphids, flea beetles, and caterpillars can occasionally appear. Regularly inspect plants, use organic deterrents like neem oil or insecticidal soap, and remove damaged leaves promptly. Proper spacing and airflow reduce the risk of fungal diseases such as powdery mildew.
➡️ How to Grow Malabar Spinach from Cuttings for Fast, Easy Greens
➡️ How to Grow Super Delicious Cabbage at Home Without a Garden
➡️ How to Grow Bean Sprouts at Home in Plastic Bottles Easily (Step‑by‑Step Guide)
➡️ Why is Your Lemon Tree Blooming in the Heart of Winter?
➡️ Why Should Your Garden Have a Dedicated Pollinator Highway?
➡️ Why Do Your Fruit Trees Need a Winter Wash to Thrive in Spring?
➡️ How Can Rice Water Transform Your Fruits into Sweeter Delights?
➡️ Jumpstart Your Winter Garden: Seed Starting Under Lights
3. Companion Planting
Amaranth grows well alongside beans, corn, and cucumbers, which can benefit from its height and shade. Avoid planting near other heavy feeders that may compete for nutrients.
Beyond Leaves: Harvesting Seeds
For gardeners interested in grain amaranth, the cut-and-come-again method can also complement seed harvesting. While leaf amaranth is cut repeatedly, grain varieties can be allowed to mature for seed collection. Timing is crucial: seeds are ready when the flower heads start to dry and change color. By staggering leaf and seed harvesting, you can enjoy dual purposes from the same plants.
Common Challenges and Solutions
Even experienced gardeners face challenges when growing amaranth. Here’s how to overcome them:
- Bolting too early: In hot climates, amaranth may bolt (flower prematurely). Regular leaf harvesting delays flowering in leaf varieties, allowing extended production.
- Leggy growth: If plants grow tall and thin, it may indicate insufficient sunlight. Move containers or thin seedlings to improve air circulation and light exposure.
- Leaf bitterness: Over-mature leaves can taste bitter. Harvest regularly while leaves are young and tender to maintain flavor.
Storing and Using Amaranth Leaves
Freshly harvested amaranth leaves can be used immediately in salads, stir-fries, soups, and smoothies. For longer storage:
- Refrigeration: Store leaves in a sealed container or plastic bag for up to a week.
- Freezing: Blanch leaves in boiling water for 2–3 minutes, cool in ice water, and freeze in airtight bags for 6–12 months.
- Drying: Dry leaves in a low-temperature oven or dehydrator for use in teas, soups, or powders.
Conclusion: Why Cut-and-Come Works Wonders
The cut-and-come-again method transforms amaranth from a single-use plant into a continuous source of nutritious greens. By carefully harvesting outer leaves, maintaining proper care, and encouraging regrowth, gardeners can enjoy months of fresh produce from just a few plants. Beyond sustainability, this approach maximizes yield, keeps plants healthy, and allows gardeners to experiment with multiple culinary uses.
Whether you are a beginner or an experienced gardener, amaranth offers a rewarding combination of beauty, nutrition, and productivity. With the right techniques and a little patience, you can turn a small patch of amaranth into a thriving garden staple, supplying your family with fresh greens and even seeds for future planting. By embracing the cut-and-come-again approach, you not only grow a plant but cultivate a reliable, ongoing source of nourishment and color in your garden.