Parsley (Petroselinum crispum) is a beloved culinary herb, prized for its bright green leaves and fresh, slightly peppery flavor. A staple in salads, sauces, garnishes, and soups, parsley is an essential ingredient in kitchens around the world. While it is commonly available in stores, growing parsley from seeds in your own garden guarantees a fresh, flavorful supply and allows you to enjoy the satisfaction of nurturing the herb from seed to harvest.
Despite being a hardy and versatile plant, parsley has a reputation for slow germination, which can discourage beginners. However, with the right preparation, soil, and care, you can easily grow parsley successfully from seeds. This guide will walk you step by step through the process, helping you achieve a lush, healthy parsley crop for culinary use.
Why Grow Parsley from Seeds?
Starting parsley from seeds offers several advantages over purchasing seedlings:
- Genetic Variety: You can choose from flat-leaf (Italian) parsley or curly-leaf parsley, each with unique flavors and uses.
- Cost-Effective: Seeds are inexpensive and can produce dozens of plants.
- Extended Harvest: Staggered sowing allows for continuous harvesting throughout the growing season.
- Control Over Growth: You can cultivate your parsley organically, without chemicals or pesticides.
Growing parsley from seeds may take patience, but the rewards of fresh, flavorful leaves are well worth it.
Step 1: Choosing the Right Parsley Variety
Parsley comes in two main varieties:
- Flat-Leaf (Italian) Parsley: Preferred by chefs for its stronger flavor and ease of use in cooking.
- Curly-Leaf Parsley: Often used as a garnish, with a milder flavor.
Select a variety based on your culinary preferences. Consider local climate and soil conditions, as some varieties may perform better in certain regions.
Step 2: Preparing Seeds for Germination
Parsley seeds have a tough outer shell, which can slow germination. Pre-soaking the seeds improves success:
- Soak Seeds: Place parsley seeds in a bowl of lukewarm water for 12–24 hours.
- Optional Scarification: Lightly crush the seed coat with a clean tool or sandpaper to encourage water absorption.
- Drain: Remove seeds from water and prepare them for sowing.
Pre-soaking softens the seed coat, accelerating germination and improving the chances of healthy seedlings.
Step 3: Choose the Right Location in Your Garden
Parsley thrives in sunny, well-drained areas. Key considerations:
- Sunlight: Provide at least 6–8 hours of sunlight daily. Parsley can tolerate partial shade but grows more slowly.
- Soil: Loamy, fertile soil rich in organic matter is ideal. Parsley prefers slightly acidic to neutral soil (pH 6.0–7.0).
- Drainage: Avoid waterlogged areas, as parsley roots are prone to rot.
A well-chosen site ensures optimal growth and a steady supply of flavorful leaves.
Step 4: Preparing the Soil
Healthy soil is essential for successful germination:
- Loosen the Soil: Break up compacted soil to a depth of 6–8 inches to allow roots to establish easily.
- Add Organic Matter: Incorporate compost, aged manure, or leaf mold to enrich nutrients.
- Smooth Surface: Rake soil to create a level seedbed for even germination.
Well-prepared soil provides a favorable environment for parsley seeds to sprout and grow.
Step 5: Sowing Parsley Seeds
Parsley seeds are small and require careful handling:
- Planting Depth: Sow seeds ¼ inch (0.5–0.6 cm) deep. Cover lightly with soil.
- Spacing: For direct sowing, plant seeds about 6–8 inches apart to allow room for mature growth.
- Seed Trays (Optional): You can start seeds in trays or pots and transplant seedlings later.
Parsley seeds germinate best when soil is consistently moist and temperatures are moderate.
Step 6: Watering and Moisture Management
Consistent moisture is key for parsley seed germination:
➡️ How to Grow Malabar Spinach from Cuttings for Fast, Easy Greens
➡️ How to Grow Super Delicious Cabbage at Home Without a Garden
➡️ How to Grow Bean Sprouts at Home in Plastic Bottles Easily (Step‑by‑Step Guide)
➡️ Why is Your Lemon Tree Blooming in the Heart of Winter?
➡️ Why Should Your Garden Have a Dedicated Pollinator Highway?
➡️ Why Do Your Fruit Trees Need a Winter Wash to Thrive in Spring?
➡️ How Can Rice Water Transform Your Fruits into Sweeter Delights?
➡️ Jumpstart Your Winter Garden: Seed Starting Under Lights
- Initial Stage: Water gently after sowing to avoid washing away seeds.
- Keep Soil Moist: Mist soil lightly every day to maintain dampness until germination.
- Avoid Overwatering: Too much water can cause seeds to rot or wash away.
Proper moisture management encourages faster germination and stronger seedlings.
Step 7: Germination Timeline
Parsley seeds are slow to germinate, often taking 2–4 weeks:
- Early Signs: Tiny green sprouts appear above the soil surface.
- Patience is Key: Do not disturb soil or seedlings prematurely.
- Temperature Consideration: Ideal germination occurs at 60–70°F (15–21°C). Cooler temperatures may delay sprouting.
Understanding the slow nature of parsley germination prevents frustration and ensures careful nurturing.
Step 8: Thinning Seedlings
Once seedlings develop their first true leaves (after 3–4 weeks):
- Thin Crowded Seedlings: Keep the strongest plants 6–8 inches apart.
- Cut, Don’t Pull: Snip weaker seedlings at soil level to avoid disturbing roots of remaining plants.
Thinning ensures each parsley plant has enough space, nutrients, and sunlight to develop fully.
Step 9: Transplanting (Optional)
If you started seeds in trays:
- Harden Off: Gradually expose seedlings to outdoor conditions for 7–10 days before transplanting.
- Transplant Carefully: Dig a small hole and place seedlings, covering roots with soil.
- Water Immediately: Helps seedlings settle and reduces transplant shock.
Transplanting allows for earlier control over spacing and layout in your garden beds.
Step 10: Fertilizing for Healthy Growth
Parsley benefits from moderate feeding for lush leaves:
- Balanced Fertilizer: Apply compost or slow-release fertilizer 2–3 weeks after germination.
- Liquid Fertilizer: Use diluted liquid fertilizer every 3–4 weeks for ongoing growth.
- Avoid Over-Fertilizing: Excess nitrogen encourages leafy growth but may reduce flavor intensity.
Regular nutrition supports healthy, flavorful parsley ready for culinary use.
Step 11: Sunlight and Temperature Management
Parsley prefers moderate climates:
- Optimal Temperature: 60–75°F (15–24°C) for ideal growth.
- Partial Shade in Hot Regions: Protect from intense afternoon sun to prevent wilting.
- Consistent Light: Even in partial shade, parsley requires 4–6 hours of light daily for optimal leaf production.
Proper sunlight ensures vibrant, nutrient-rich leaves.
Step 12: Mulching for Moisture Retention
Mulching provides multiple benefits:
- Retains Moisture: Reduces watering frequency and maintains consistent soil moisture.
- Weed Suppression: Keeps competing plants from crowding parsley.
- Soil Temperature Regulation: Protects roots from extreme heat or cold.
Apply a thin layer of straw, shredded leaves, or compost around seedlings to protect young plants.
Step 13: Pest and Disease Management
Parsley is generally hardy but may encounter minor pests and diseases:
- Common Pests: Aphids, caterpillars, and slugs.
- Common Diseases: Powdery mildew, leaf spot.
- Control Methods: Use neem oil, insecticidal soap, or natural predators for pest control. Maintain proper spacing and airflow to reduce fungal infections.
Healthy plants are more likely to produce dense, flavorful leaves.
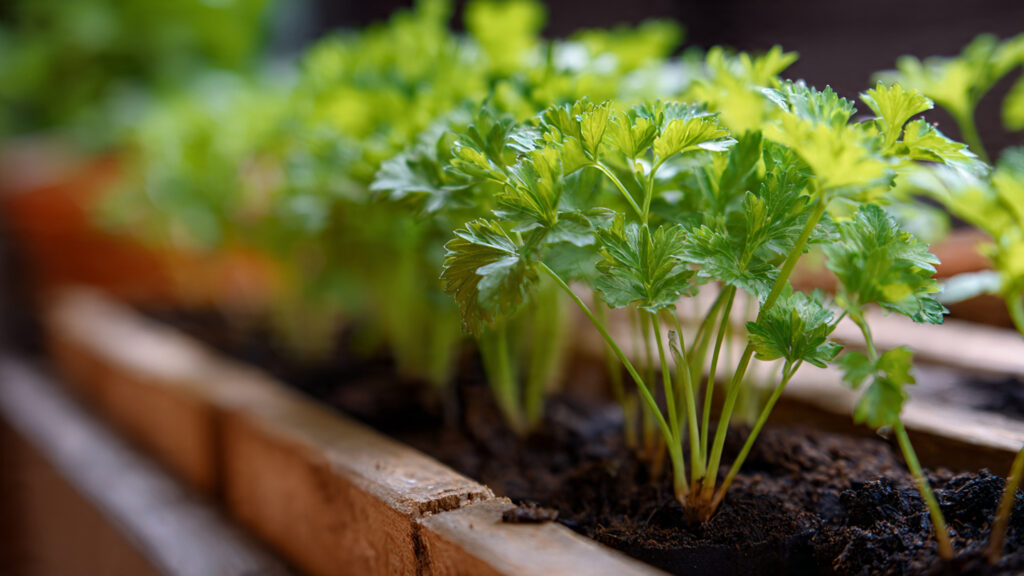
Step 14: Harvesting Parsley
Parsley can be harvested once plants reach 6–8 inches in height:
- Cut Leaves: Snip outer leaves at the base, leaving inner leaves to continue growing.
- Regular Harvesting: Encourages continuous growth and prevents the plant from bolting.
- Culinary Use: Use fresh in salads, sauces, soups, or as a garnish.
Proper harvesting maintains plant vigor and ensures a steady supply of fresh parsley.
Step 15: Tips for Continuous Supply
To enjoy parsley year-round:
- Stagger Planting: Sow new seeds every 3–4 weeks.
- Succession Harvest: Harvest outer leaves regularly while inner leaves mature.
- Indoor Growing: Grow parsley in pots indoors during winter for year-round access.
By following these strategies, you can maintain a continuous supply of fresh, flavorful parsley for your kitchen.
Step 16: Companion Planting
Parsley pairs well with other garden plants:
- Tomatoes, Carrots, and Asparagus: Enhance growth and flavor.
- Flowers: Marigolds and nasturtiums attract beneficial insects.
- Herbs: Basil, chives, and oregano thrive alongside parsley in herb gardens.
Companion planting improves overall garden health and productivity.
Step 17: Troubleshooting Common Problems
Slow Germination
- Cause: Cold soil, tough seed coat
- Solution: Pre-soak seeds, provide warmth, and be patient
Leggy Seedlings
- Cause: Insufficient light
- Solution: Ensure 6–8 hours of sunlight daily or provide grow lights
Yellow Leaves
- Cause: Nutrient deficiency or overwatering
- Solution: Adjust watering and fertilize with balanced nutrients
Careful monitoring ensures healthy, productive parsley plants.
Final Thoughts
Germinating parsley seeds successfully requires patience, proper preparation, and consistent care. By choosing healthy seeds, preparing fertile soil, managing moisture, and providing adequate sunlight, gardeners can achieve lush parsley plants perfect for fresh culinary use.
Key steps to remember:
- Choose the right parsley variety.
- Pre-soak seeds for faster germination.
- Prepare a sunny, well-drained seedbed with rich soil.
- Sow seeds at the proper depth and spacing.
- Maintain consistent moisture and temperature for germination.
- Thin seedlings and fertilize for healthy growth.
- Harvest regularly to encourage continuous leaf production.
By following these easy steps, you can enjoy the satisfaction of growing your own parsley, ensuring fresh, aromatic leaves for cooking and garnishing all season long. A thriving parsley patch not only enhances your culinary creations but also adds lush greenery to your garden, making it both functional and beautiful.