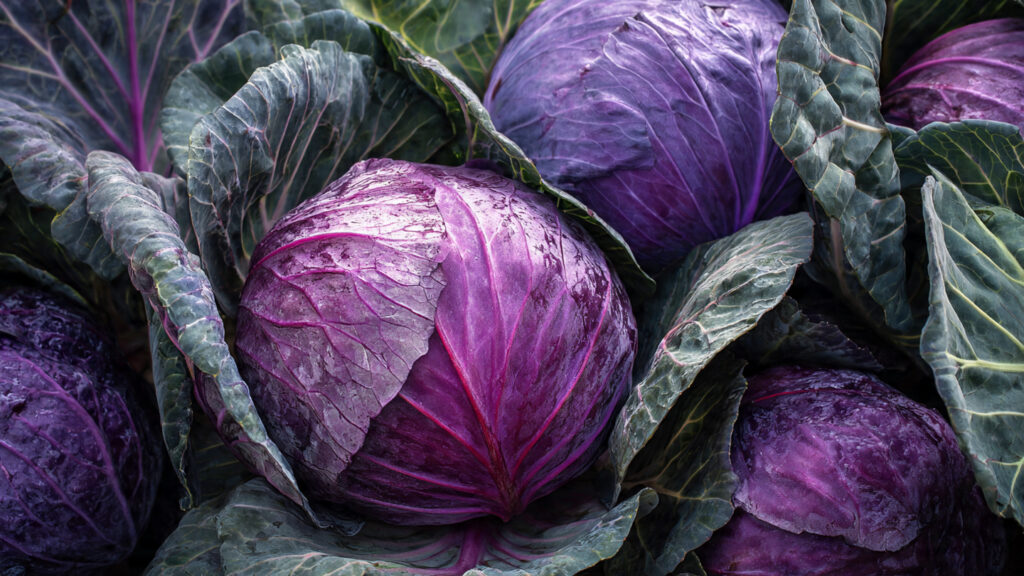
Queen cabbage, known for its dark, glossy leaves and rich flavor, is one of the most prized specialty cabbages for home gardeners. Unlike ordinary green cabbages, Queen cabbage offers a striking appearance, nutritional benefits, and exceptional taste, making it ideal for salads, stir-fries, or pickling. The good news? You can grow Queen cabbage at home easily, even if you’re new to gardening. With a few simple steps, proper care, and the right environment, you can enjoy fresh, dark, specialty cabbage straight from your garden.
This guide will walk you through everything you need to know about growing Queen cabbage at home, from selecting seeds to harvesting and storing your crop.
Why Grow Queen Cabbage at Home?
Growing Queen cabbage at home comes with multiple benefits:
- Nutritional value – Dark leafy cabbages are rich in vitamins C, K, and antioxidants, supporting a healthy diet.
- Freshness and flavor – Homegrown cabbage tastes sweeter and crisper than store-bought varieties.
- Cost-effective – Growing your own vegetables reduces grocery bills, especially for specialty varieties.
- Gardening satisfaction – Cultivating a specialty crop adds beauty to your garden and a sense of accomplishment.
- Year-round availability – With careful planning, you can harvest cabbage leaves multiple times during the season.
Queen cabbage is especially suitable for container gardening, raised beds, or traditional garden plots, offering flexibility for urban and rural gardeners alike.
Selecting the Right Seeds
Choosing high-quality seeds is the first step toward a successful crop. Queen cabbage seeds are often labeled as dark cabbage, specialty cabbage, or heirloom cabbage.
Tips for selecting seeds:
- Opt for certified seeds – This ensures good germination and disease-free plants.
- Choose fast-growing varieties – Ideal for beginners or short growing seasons.
- Select appropriate type – Queen cabbage can be leafy or heading; choose based on your culinary preferences.
By investing in quality seeds, you lay the foundation for healthy, flavorful cabbage plants.
Preparing the Soil
Queen cabbage thrives in nutrient-rich, well-draining soil. Follow these soil preparation steps:
- Loosen soil – Till or turn over the soil to a depth of 12–15 inches to allow roots to grow freely.
- Add compost or organic matter – Enriches the soil with essential nutrients and improves moisture retention.
- Maintain pH – Cabbage prefers slightly acidic to neutral soil (pH 6.0–7.0). You can adjust pH with lime (to raise) or sulfur (to lower).
- Add mulch – Helps regulate soil temperature, retain moisture, and reduce weed growth.
Proper soil preparation ensures strong root development, vibrant leaves, and a longer harvesting period.
Choosing the Right Container or Garden Bed
Queen cabbage can be grown both in traditional garden beds and containers:
- Garden beds – Ideal for multiple plants. Space plants 12–18 inches apart to accommodate growth.
- Containers – Choose pots at least 12–15 inches deep to provide enough room for roots. Ensure good drainage to prevent waterlogging.
- Raised beds – Enhance drainage, prevent soil compaction, and make it easier to manage nutrients.
The right planting location should have full sunlight for 6–8 hours a day, as Queen cabbage requires ample light for optimal growth.
Planting Queen Cabbage
You can start Queen cabbage from seeds indoors or sow them directly outdoors, depending on your climate:
Indoor Seed Starting:
- Sow seeds ¼–½ inch deep in seed trays or small pots.
- Keep soil evenly moist and maintain a temperature of 65–75°F (18–24°C).
- Seeds typically germinate in 7–14 days.
- Transplant seedlings outdoors when they are 4–6 weeks old and have at least 4–6 true leaves.
Direct Outdoor Sowing:
- Sow seeds directly in prepared soil at ½ inch depth.
- Space seeds 2–3 inches apart; thin seedlings after germination to maintain 12–18 inches between plants.
- Water gently but consistently to keep soil moist.
Watering and Fertilizing
Queen cabbage needs consistent moisture and nutrients to thrive:
- Watering – Keep the soil evenly moist. Avoid letting it dry out, as this can result in bitter leaves or stunted growth. Water at the base to prevent leaf disease.
- Fertilizing – Use a balanced fertilizer rich in nitrogen for leafy growth. Apply every 3–4 weeks or as needed.
- Organic options – Compost tea, fish emulsion, or seaweed extract can boost growth naturally.
Regular watering and fertilization result in dark, lush leaves and strong plants capable of producing dense heads or abundant leaf harvests.
Managing Pests and Diseases
Queen cabbage, like other cabbages, can attract pests such as aphids, caterpillars, and cabbage worms. It is also prone to diseases like black rot or powdery mildew.
➡️ How to Grow Malabar Spinach from Cuttings for Fast, Easy Greens
➡️ How to Grow Super Delicious Cabbage at Home Without a Garden
➡️ How to Grow Bean Sprouts at Home in Plastic Bottles Easily (Step‑by‑Step Guide)
➡️ Why is Your Lemon Tree Blooming in the Heart of Winter?
➡️ Why Should Your Garden Have a Dedicated Pollinator Highway?
➡️ Why Do Your Fruit Trees Need a Winter Wash to Thrive in Spring?
➡️ How Can Rice Water Transform Your Fruits into Sweeter Delights?
➡️ Jumpstart Your Winter Garden: Seed Starting Under Lights
Tips for pest and disease management:
- Use floating row covers – Prevents pests from reaching plants while allowing light and moisture.
- Handpick pests – For minor infestations, remove insects manually.
- Companion planting – Planting herbs like dill or thyme nearby can repel pests.
- Proper spacing – Ensures good airflow and reduces fungal disease.
- Organic sprays – Neem oil or insecticidal soap can be applied safely to control infestations.
Preventative care is easier than treatment, so regularly monitor plants for early signs of trouble.
Harvesting Queen Cabbage
Queen cabbage can be harvested for leaves or full heads:
- Leaf harvest – Pick outer leaves once they are 6–8 inches long, leaving inner leaves to continue growing.
- Head harvest – For heading varieties, harvest when the head feels firm and dense.
- Continuous harvesting – Frequent leaf picking encourages new growth and extends the harvest period.
Harvesting in the morning when leaves are crisp ensures maximum freshness and flavor.
Storing and Using Queen Cabbage
After harvesting, Queen cabbage can be stored and used in multiple ways:
- Refrigeration – Keep leaves in a plastic bag in the fridge for up to a week.
- Freezing – Blanch leaves before freezing to preserve nutrients.
- Culinary uses – Perfect for salads, stir-fries, soups, fermented dishes, and wraps.
- Juicing – Dark cabbage leaves are ideal for nutritious smoothies.
Having fresh Queen cabbage at hand enhances your meals with flavor, color, and nutrition.
Tips for Success
- Rotate crops – Avoid planting cabbage in the same spot repeatedly to reduce soil-borne disease.
- Mulch heavily – Keeps soil moist and cool while reducing weeds.
- Support growth – Use stakes for taller varieties to prevent bending or damage.
- Monitor for bolting – Remove flowers early to encourage more leaf growth.
By following these tips, you can maximize both yield and leaf quality in your home garden.
Benefits of Growing Specialty Cabbage at Home
Growing Queen cabbage at home is rewarding beyond taste:
- Health benefits – Rich in antioxidants, vitamins, and fiber.
- Decorative appeal – Dark, glossy leaves enhance garden aesthetics.
- Sustainable practice – Reduces the need for packaged or transported vegetables.
- Educational opportunity – Great for teaching children about plant growth and nutrition.
Specialty cabbages like Queen cabbage combine culinary, nutritional, and ornamental value, making them a standout choice for home gardens.
Conclusion
Growing Queen cabbage at home is both simple and rewarding. With the right seeds, soil, containers, and care, anyone can cultivate dark, nutritious, and flavorful cabbage with minimal effort. Regular watering, proper sunlight, pest management, and timely harvesting ensure a continuous supply of specialty cabbage for salads, cooking, and even pickling.
Whether you have a backyard garden, balcony, or container setup, Queen cabbage allows you to experience the satisfaction of homegrown, gourmet vegetables. By following these simple steps, you can enjoy fresh, dark cabbage leaves all year round, adding health, flavor, and elegance to your meals.
Start today, and discover how easy and rewarding growing Queen cabbage at home can be.