Imagine stepping up to your window and plucking fresh, crisp salad greens straight from your own garden — no supermarket trips, no pesticides, just pure, healthy flavor. Growing your own organic salad greens in a window box is not only possible, but it’s also incredibly rewarding. Whether you live in a city apartment or a small suburban home, this method allows you to enjoy fresh, nutritious greens year-round. In this article, we’ll guide you step-by-step to grow thriving organic salad greens in a window box, covering everything from choosing seeds to harvesting.
Why Choose a Window Box for Organic Salad Greens?
Window boxes are an ideal choice for small-space gardening because they are compact, accessible, and perfect for controlled, organic cultivation. Here’s why a window box is the perfect home for your salad greens:
- Space Efficiency: If you have limited space, a window box can fit neatly on any windowsill or balcony railing, allowing even apartment dwellers to grow fresh vegetables.
- Convenient Sunlight: Placing your box near a window ensures your greens get the sunlight they need, which is crucial for healthy growth.
- Controlled Environment: Growing in a contained space lets you manage soil quality, water, and nutrients, making organic gardening easier.
- Aesthetic Appeal: Window boxes are visually pleasing and can enhance the look of your home while providing fresh food.
Now, let’s explore the practical steps to make your window box garden flourish.
Step 1: Selecting the Right Window Box
Not all containers are created equal, and choosing the right window box is the first key to success. Here’s what to consider:
- Size and Depth: Salad greens have shallow roots, but your box should be at least 6–8 inches deep to allow proper root growth. Lengthwise, the more space, the better, as it lets you grow multiple varieties.
- Material: Wooden or resin boxes are ideal for insulation and moisture retention. Avoid metal boxes in direct sunlight, as they can overheat the roots.
- Drainage: Ensure the box has holes at the bottom. Good drainage prevents waterlogging and root rot, which are common issues in small containers.
Step 2: Choosing Organic Seeds
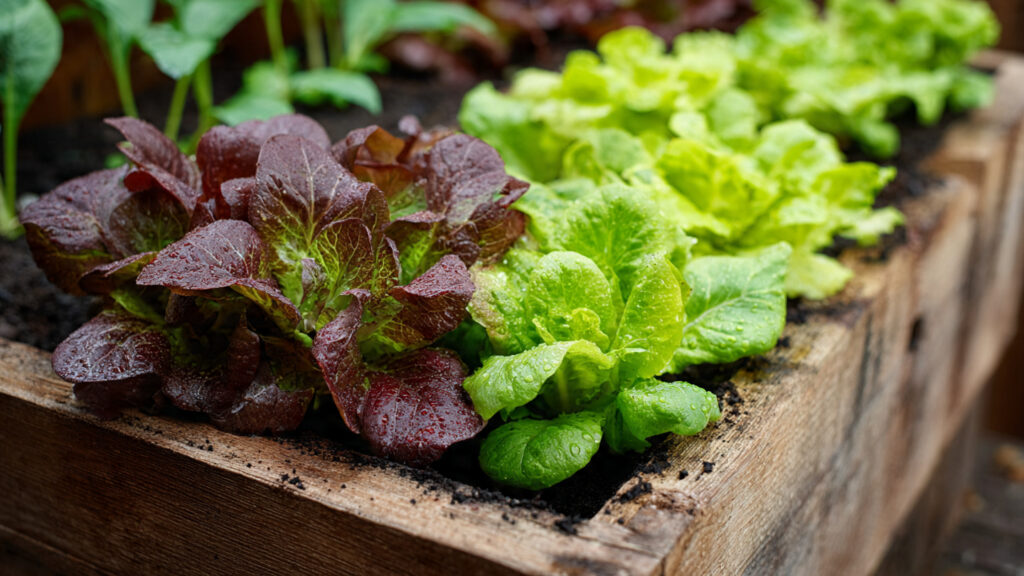
Selecting the right seeds is critical for healthy, vibrant salad greens. Some popular varieties for window boxes include:
- Lettuce: Butterhead, Romaine, and Looseleaf are ideal for container gardening.
- Spinach: Thrives in partial shade and grows quickly.
- Arugula: Adds a peppery flavor and is fast-growing.
- Kale: Baby kale works well in smaller containers.
- Mixed Salad Greens: Pre-mixed seed packs are perfect for a diverse harvest.
Opt for certified organic seeds to ensure your greens are free from synthetic chemicals, which aligns with your goal of a truly organic garden.
Step 3: Preparing the Soil
Healthy soil is the foundation of any successful garden. For organic salad greens in a window box, use:
- Organic Potting Mix: Lightweight, well-draining soil enriched with organic compost.
- pH Balance: Greens prefer slightly acidic to neutral soil (pH 6.0–7.0).
- Nutrients: Mix in slow-release organic fertilizer or compost for sustained nourishment.
Avoid regular garden soil, which may compact in a container and carry pests or diseases.
Step 4: Planting Your Salad Greens
Planting in a window box is simple but requires some strategy:
- Sowing Seeds: Follow the spacing guidelines on the seed packet. Generally, lettuce and spinach seeds can be sown closely and thinned later.
- Depth: Cover seeds lightly with soil, usually ¼–½ inch deep. Too deep and they may struggle to emerge.
- Companion Planting: Mix fast-growing greens like arugula with slower varieties like kale for a continuous harvest.
Tip: Stagger planting every 2–3 weeks to ensure a steady supply of fresh leaves.
Step 5: Providing Adequate Light
Light is a critical factor for window box success:
- Sunlight Needs: Most salad greens require 4–6 hours of direct sunlight daily. South-facing windows are perfect.
- Artificial Light: If natural light is limited, use LED grow lights for 12–14 hours per day.
- Rotate the Box: To prevent uneven growth, rotate your box every few days so all plants receive adequate light.
Healthy sunlight ensures your greens are vibrant, nutrient-rich, and flavorful.
Step 6: Watering Correctly
Watering is an art in container gardening. Salad greens need consistent moisture but not soggy soil.
- Check Soil Daily: Stick your finger into the soil; if the top inch feels dry, it’s time to water.
- Bottom Watering: Place the box in a shallow tray of water to allow roots to absorb moisture evenly.
- Avoid Overwatering: Waterlogged soil encourages root rot and fungal problems.
Tip: Morning watering is ideal, as it allows excess moisture to evaporate during the day, preventing disease.
Step 7: Fertilizing Organically
Even in nutrient-rich soil, container plants benefit from extra nourishment:
➡️ How to Grow Malabar Spinach from Cuttings for Fast, Easy Greens
➡️ How to Grow Super Delicious Cabbage at Home Without a Garden
➡️ How to Grow Bean Sprouts at Home in Plastic Bottles Easily (Step‑by‑Step Guide)
➡️ Why is Your Lemon Tree Blooming in the Heart of Winter?
➡️ Why Should Your Garden Have a Dedicated Pollinator Highway?
➡️ Why Do Your Fruit Trees Need a Winter Wash to Thrive in Spring?
➡️ How Can Rice Water Transform Your Fruits into Sweeter Delights?
➡️ Jumpstart Your Winter Garden: Seed Starting Under Lights
- Liquid Fertilizers: Organic liquid fertilizers like fish emulsion or seaweed extract boost growth.
- Frequency: Feed your greens every 2–3 weeks during the growing season.
- Avoid Chemicals: Stick to organic options to maintain a chemical-free garden.
Step 8: Pest Management Naturally
Window box gardens are relatively protected, but pests can still pose a problem. Use organic, eco-friendly methods:
- Handpicking: Regularly inspect leaves for insects. Remove pests by hand.
- Neem Oil: Acts as a natural insect repellent.
- Companion Plants: Herbs like basil or chives can deter pests.
- Cleanliness: Remove fallen leaves and debris to reduce disease risk.
Organic gardening is all about prevention and natural remedies, not synthetic pesticides.
Step 9: Harvesting Your Salad Greens
The ultimate reward is harvesting your fresh, organic greens. Here’s how:
- Baby Greens: Snip leaves when they reach 2–3 inches for tender salads.
- Mature Leaves: For larger greens like Romaine or kale, harvest outer leaves first, allowing the inner leaves to continue growing.
- Continuous Harvest: By staggering planting and picking selectively, your window box can provide greens for months.
Tip: Use scissors rather than pulling leaves to avoid damaging the plant.
Step 10: Maintaining Your Window Box Garden
Consistent care ensures your garden remains productive:
- Prune Regularly: Remove yellow or damaged leaves to promote healthy growth.
- Soil Refresh: Every few months, replace the top layer of soil or mix in compost.
- Rotate Crops: Experiment with different varieties to prevent soil depletion and maintain interest.
Bonus Tips for Thriving Organic Salad Greens
- Microgreens: For quick harvests, grow microgreens in shallow trays inside the window box.
- Seasonal Adaptation: In winter, choose cold-tolerant varieties like spinach and kale.
- Water Conservation: Use self-watering window boxes or add mulch to retain moisture.
- Creative Flavors: Mix herbs like parsley, cilantro, or dill with greens for diverse salads.
Conclusion
Growing organic salad greens in a window box is an incredibly rewarding experience that combines health, flavor, and sustainability. By carefully selecting seeds, preparing nutrient-rich soil, providing adequate light and water, and maintaining organic practices, anyone can enjoy fresh greens right at their windowsill. Not only does this practice save money and reduce reliance on store-bought produce, but it also connects you with the natural joy of growing your own food.
Start small, experiment with different greens, and watch your window box transform into a thriving, organic salad oasis. With patience, care, and a little love, your homegrown salad greens will be so fresh and flavorful that you’ll never look at store-bought salads the same way again.