Imagine stepping outside your door and snipping fresh arugula, crisp romaine, peppery radishes, and tender baby spinach — all from a sleek, vertical system mounted along your fence or balcony. No sprawling beds. No heavy digging. Just a streamlined, space-saving garden made from something surprisingly simple: a repurposed rain gutter.
Turning an old rain gutter into a gourmet salad bar is not just creative — it’s practical, sustainable, and incredibly productive. With the right setup, you can grow a continuous harvest of fresh greens in even the smallest spaces.
Let’s explore how this clever gardening trick works and how you can build your own elevated salad station.
Why Rain Gutters Make Perfect Salad Planters
Rain gutters are long, narrow, lightweight, and designed to handle water efficiently — exactly what shallow-rooted greens need.
Most salad crops, such as lettuce, arugula, and baby greens, have relatively shallow root systems. They don’t require deep soil like tomatoes or squash. A 4-inch-deep channel is often more than enough for:
- Leaf lettuce
- Spinach
- Arugula
- Mustard greens
- Microgreens
- Green onions
- Radishes (short varieties)
The elongated shape of gutters also makes harvesting easy. Instead of bending over a garden bed, your greens can grow at eye level.
Benefits of a Gutter Salad System
Transforming a rain gutter into a vertical salad bar offers several advantages:
1. Space Efficiency
Perfect for balconies, patios, fences, or small backyards.
2. Improved Drainage
With proper drainage holes, excess water flows out easily, preventing root rot.
3. Easy Maintenance
You can water, harvest, and replant without kneeling.
4. Pest Reduction
Elevated systems often experience fewer soil-based pests like slugs.
5. Sustainable Upcycling
Repurposing materials reduces waste and gives new life to old hardware.
Choosing the Right Gutter Material
Vinyl gutters are lightweight and easy to drill. Aluminum gutters are durable but may require more effort to modify.
Before planting, ensure the gutter is:
- Clean and free from chemicals
- Structurally intact
- Properly capped at both ends
If using old gutters, wash them thoroughly to remove debris or residues.
➡️ How to Grow Malabar Spinach from Cuttings for Fast, Easy Greens
➡️ How to Grow Super Delicious Cabbage at Home Without a Garden
➡️ How to Grow Bean Sprouts at Home in Plastic Bottles Easily (Step‑by‑Step Guide)
➡️ Why is Your Lemon Tree Blooming in the Heart of Winter?
➡️ Why Should Your Garden Have a Dedicated Pollinator Highway?
➡️ Why Do Your Fruit Trees Need a Winter Wash to Thrive in Spring?
➡️ How Can Rice Water Transform Your Fruits into Sweeter Delights?
➡️ Jumpstart Your Winter Garden: Seed Starting Under Lights
Step-by-Step: Building Your Gutter Salad Bar
Step 1: Drill Drainage Holes
Space small holes every 6–8 inches along the bottom. Proper drainage is critical.
Step 2: Mount Securely
Attach gutters to a fence, railing, or wall using sturdy brackets. Slightly tilt them to encourage water flow.
Step 3: Add a Quality Soil Mix
Use a lightweight potting mix enriched with compost. Avoid heavy garden soil, which can compact in shallow containers.
Step 4: Plant Strategically
Sow seeds directly or transplant seedlings. Space them according to mature size.
Step 5: Water Gently
Because gutters are shallow, soil dries faster. Regular but moderate watering keeps roots consistently moist.
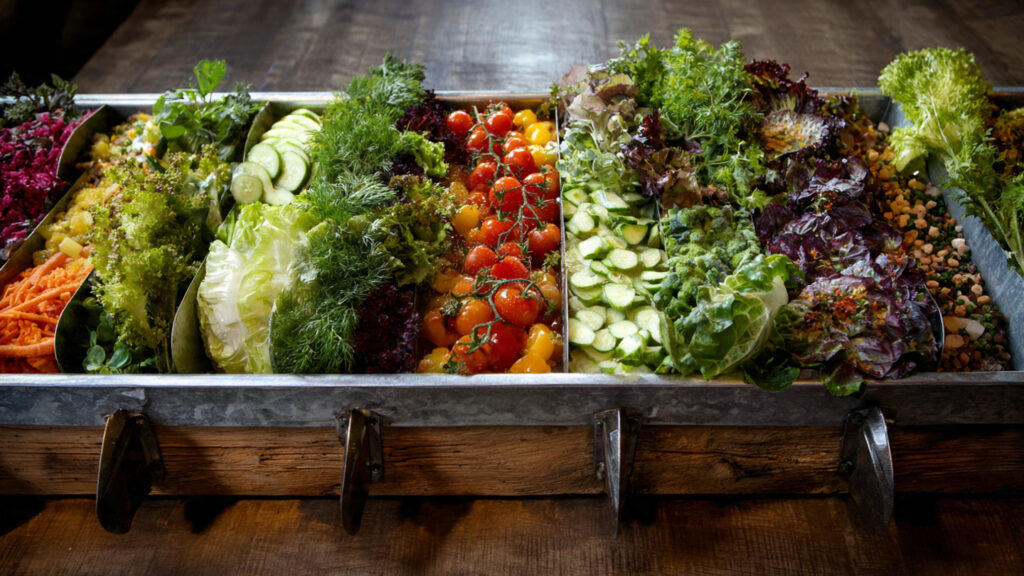
Designing Your Gourmet Salad Selection
The beauty of a gutter garden lies in diversity. You can dedicate each gutter row to a different flavor profile.
Classic Greens Row
- Romaine lettuce
- Butterhead lettuce
- Spinach
Peppery & Bold Row
- Arugula
- Mustard greens
- Mizuna
Crunch & Texture Row
- Radishes
- Baby kale
- Green onions
By planting multiple varieties, you create a layered flavor experience right outside your kitchen.
Succession Planting for Continuous Harvest
One of the secrets to a thriving salad bar is succession planting.
Instead of planting everything at once:
- Sow seeds every 1–2 weeks.
- Harvest outer leaves rather than entire plants.
- Replant immediately after clearing space.
This ensures a steady supply rather than one overwhelming harvest.
Sunlight and Placement
Leafy greens thrive in 4–6 hours of sunlight daily. In hotter climates, partial shade during the afternoon prevents bolting (premature flowering).
Balcony gardeners can mount gutters on sun-facing railings. Backyard gardeners may install them along fences.
Monitor sun patterns before installation to ensure optimal placement.
Watering Wisely
Because soil volume is limited, moisture management is essential.
Tips:
- Check soil daily during hot weather.
- Water slowly until moisture drains from the bottom.
- Consider drip irrigation tubing for automated watering.
- Add mulch (like fine straw) to reduce evaporation.
Consistency prevents bitterness in leafy greens.
Fertilizing for Flavor
Leafy greens grow quickly and benefit from gentle feeding.
Use:
- Diluted liquid organic fertilizer every 2–3 weeks.
- Compost tea for natural nutrient boosts.
- Worm castings mixed into soil before planting.
Avoid heavy fertilization, which can cause overly lush but weak growth.
Keeping Your Salad Bar Healthy
Watch for common issues:
Aphids
Spray gently with water or use mild insecticidal soap.
Bolting
Harvest regularly and provide shade in extreme heat.
Nutrient Deficiencies
Yellowing leaves may signal nitrogen deficiency. Light feeding typically resolves this quickly.
Because the system is elevated, monitoring and intervention are simple.
Seasonal Adaptability
Rain gutter salad systems shine in cooler seasons.
Spring and fall are ideal for:
- Lettuce
- Spinach
- Radishes
- Asian greens
In warmer months, switch to heat-tolerant varieties or use shade cloth.
In mild climates, year-round harvesting is possible.
Expanding the Concept
Once you see success, you can expand vertically.
Install multiple rows stacked above each other, leaving enough space for sunlight penetration. Create a cascading green wall that doubles as edible décor.
Some gardeners even incorporate decorative elements — painting gutters to match outdoor aesthetics or labeling each row with herb markers.
Your salad bar becomes both functional and visually appealing.
Cost and Sustainability
Compared to raised beds or large planters, gutter systems are affordable.
Costs include:
- Gutters
- Brackets
- Potting mix
- Seeds
Because you’re repurposing materials, the environmental footprint is low. You also reduce plastic packaging and transportation emissions associated with store-bought greens.
Freshly harvested greens travel just a few steps — from garden to plate.
The Culinary Advantage
Homegrown salad greens taste noticeably better.
Why?
- They’re harvested at peak freshness.
- Nutrients haven’t degraded during transport.
- You can mix multiple textures instantly.
- Leaves are crisp, vibrant, and intensely flavored.
Instead of buying pre-packaged mixes, you customize each bowl to your liking.
Add cherry tomatoes, herbs, edible flowers, or even small trailing strawberries in adjacent gutters for variety.
A Family-Friendly Project
This project is ideal for families.
Children enjoy:
- Planting seeds
- Watching growth progress
- Harvesting leaves
- Creating their own salads
It teaches sustainability, nutrition, and responsibility in a hands-on way.
Common Mistakes to Avoid
- Skipping drainage holes
- Overcrowding seedlings
- Using heavy soil
- Forgetting consistent watering
- Mounting in full scorching sun without shade
Small adjustments make a big difference.
From Hardware to Harvest
The transformation from rain gutter to gourmet salad bar is a perfect example of creative gardening. What was once part of a roofing system becomes a living, productive food source.
With minimal space, moderate effort, and thoughtful planning, you create a vertical kitchen garden that delivers flavor, nutrition, and satisfaction.
Final Thoughts
Transforming a repurposed rain gutter into a gourmet salad bar proves that gardening doesn’t require sprawling land or expensive infrastructure. With shallow-rooted greens, proper drainage, consistent watering, and succession planting, you can enjoy a steady supply of fresh, vibrant produce right outside your door.