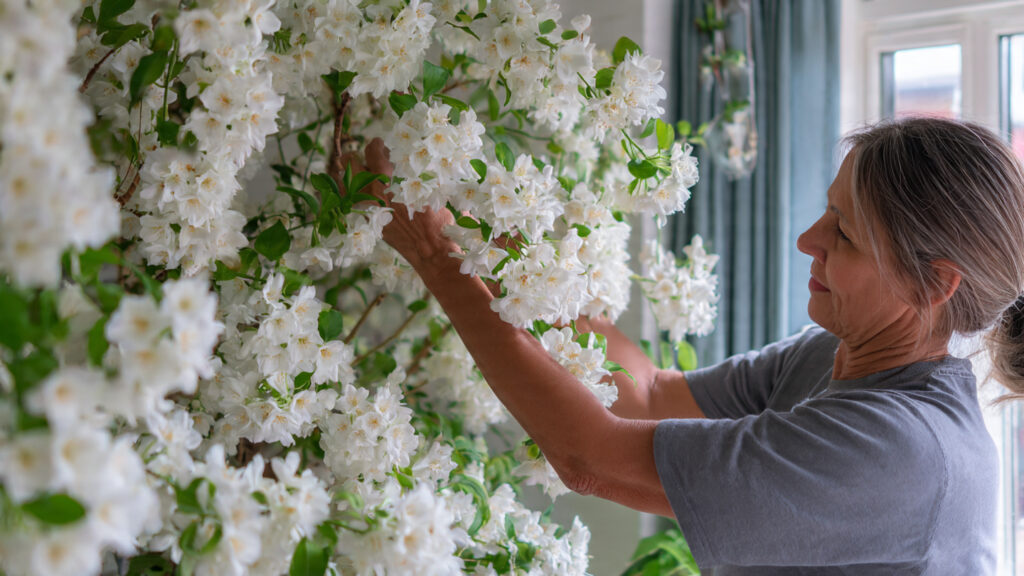
Jasmine is beloved worldwide for its intoxicating fragrance, delicate flowers, and elegant climbing vines. For gardeners, propagating jasmine is a rewarding way to expand your plant collection without buying new saplings. While traditional methods like cuttings work, air layering is a highly effective technique that produces strong, mature plants ready to thrive in new locations. With patience and proper care, you can achieve jasmine air layering success at home. This complete guide walks you through the method, materials, care tips, and troubleshooting to ensure your jasmine layers flourish.
What is Air Layering and Why Use It for Jasmine?
Air layering is a propagation technique that encourages roots to form on a stem while it is still attached to the parent plant. Once roots develop, the stem is cut and planted as a new, independent plant.
Benefits of air layering jasmine include:
- Stronger Plants: Unlike cuttings, air-layered stems remain attached to the parent plant while rooting, ensuring a continuous supply of water and nutrients.
- Faster Establishment: Air-layered plants typically adapt faster to their new environment than seedlings or cuttings.
- Preservation of Traits: Air layering preserves the genetic traits of the parent plant, ensuring flowers, fragrance, and growth patterns remain identical.
- High Success Rate: With proper technique, air layering offers a higher success rate than traditional propagation methods.
Understanding the concept of air layering helps you see why it is ideal for jasmine, a plant that benefits from robust roots before being separated from its parent.
Materials You’ll Need
To successfully air layer jasmine, gather these materials in advance:
- A healthy jasmine plant with strong, semi-woody stems
- Sharp pruning shears or a utility knife
- Sphagnum moss (moist and clean)
- Plastic wrap or polyethylene sheet
- Twine, plant tape, or rubber bands
- Rooting hormone (optional but recommended)
- Small scissors for trimming roots
Having the right tools ensures a smooth propagation process and increases your chances of success.
Step 1: Select the Right Stem
The first step in jasmine air layering is choosing a healthy, suitable stem.
Tips for selection:
- Choose a semi-woody stem approximately one-year-old; young shoots may bend too easily, and older wood roots more slowly.
- Look for a healthy, disease-free stem with no signs of pests, yellowing, or damage.
- The stem should be flexible enough to manipulate but strong enough to support itself while rooting.
Selecting the right stem is crucial, as the wrong choice can result in failed rooting despite perfect technique.
Step 2: Prepare the Stem
Once a suitable stem is chosen, it needs to be prepared for rooting.
Steps:
- Identify a section of the stem about 6–12 inches long where you want roots to form.
- About 12 inches from the tip, make a diagonal cut or a small wound around one-third of the stem’s circumference.
- Optionally, dust the wounded area with rooting hormone to encourage faster root growth.
- Remove any leaves or lateral shoots near the wounded section to prevent rotting and focus energy on root formation.
Creating a proper wound is essential because it stimulates the plant to produce roots at that point.
Step 3: Apply Moist Sphagnum Moss
Sphagnum moss provides the moisture and aeration necessary for root development.
Steps:
- Moisten the moss with water until it is damp but not dripping.
- Wrap the moss around the wounded area, covering it completely.
- Ensure the moss stays in place and forms a thick cushion around the stem.
The moss maintains humidity, allowing roots to grow efficiently while preventing fungal issues.
➡️ How to Grow Malabar Spinach from Cuttings for Fast, Easy Greens
➡️ How to Grow Super Delicious Cabbage at Home Without a Garden
➡️ How to Grow Bean Sprouts at Home in Plastic Bottles Easily (Step‑by‑Step Guide)
➡️ Why is Your Lemon Tree Blooming in the Heart of Winter?
➡️ Why Should Your Garden Have a Dedicated Pollinator Highway?
➡️ Why Do Your Fruit Trees Need a Winter Wash to Thrive in Spring?
➡️ How Can Rice Water Transform Your Fruits into Sweeter Delights?
➡️ Jumpstart Your Winter Garden: Seed Starting Under Lights
Step 4: Wrap with Plastic
Plastic wrap or polyethylene keeps the moss moist and protects the developing roots.
Steps:
- Wrap the moss-covered section tightly with plastic, covering it completely.
- Secure both ends with twine, plant tape, or rubber bands to prevent moisture loss.
- Check periodically to ensure the moss remains damp. If it dries out, carefully open the wrap and moisten the moss again.
This “mini greenhouse” ensures roots develop quickly and stay protected from external stressors.
Step 5: Provide Proper Care While Air Layering
While the stem is forming roots, proper care of the parent plant is essential for success.
Tips:
- Watering: Keep the parent plant well-watered but not waterlogged. Stress on the main plant can slow root development.
- Sunlight: Jasmine thrives in bright, indirect sunlight. Avoid harsh midday sun on the air-layered stem.
- Humidity: Maintain high humidity around the moss; misting the moss occasionally helps.
- Monitoring: Check weekly for root growth, ensuring moss remains damp and free from mold.
Consistent care during this phase significantly increases the chance of a successful air layering.
Step 6: Detect Root Formation
Roots usually begin developing within 4–8 weeks, depending on the variety, climate, and season.
How to know when roots are ready:
- Gently unwrap a small section of the moss and look for white, healthy roots.
- Ensure the roots are thick enough to support the stem independently.
- If roots are sparse, give them additional time while keeping the moss moist.
Patience is key—rushing the process can damage the delicate roots and result in failure.
Step 7: Remove and Plant the Air-Layered Stem
Once the roots are well-developed, it’s time to transplant your new jasmine plant.
Steps:
- Carefully cut below the rooted section, separating it from the parent plant.
- Remove the plastic and moss gently, taking care not to damage roots.
- Plant the new jasmine in a pot or directly in your garden using well-draining soil mixed with compost.
- Water lightly and place the plant in indirect sunlight for the first few weeks until it acclimates.
- Gradually introduce it to full sunlight as the plant strengthens.
Transplanting with care ensures your air-layered jasmine thrives as an independent plant.
Additional Tips for Success
- Seasonal Timing: Spring or early summer is ideal for air layering because the plant is actively growing.
- Stem Selection: Multiple stems can be layered simultaneously to increase propagation success.
- Soil Choice: Use fertile, well-draining soil to help the new plant establish quickly.
- Fertilization: Light feeding with a balanced fertilizer after transplanting encourages vigorous growth.
- Pest Control: Keep an eye out for pests during the air layering process and treat them promptly.
These extra precautions and tips help maximize the success rate and produce healthy, flowering jasmine plants.
Common Mistakes to Avoid
- Using Weak or Old Stems: Weak stems may break or fail to root.
- Drying Out Moss: Roots need constant moisture; dry moss prevents successful rooting.
- Overwatering Parent Plant: Excess water can cause stem rot at the wound site.
- Exposing Moss to Harsh Sunlight: Direct sun can dry out moss or damage young roots.
- Cutting Too Early: Removing the stem before roots are mature can result in failure.
Avoiding these mistakes ensures your air layering efforts yield a strong, healthy new jasmine plant.
Benefits of Jasmine Air Layering at Home
Air layering jasmine at home has several advantages:
- Cost-Effective: No need to purchase new plants from nurseries.
- Rapid Propagation: Produces a mature, fruiting or flowering plant faster than growing from seeds.
- Preserves Desired Traits: Ensures the new plant retains the parent’s fragrance, flower color, and growth habit.
- Educational: A hands-on way to learn about plant propagation and root development.
By following proper air layering techniques, you can expand your jasmine collection efficiently and enjoy more blooms throughout your home or garden.
Conclusion
Achieving jasmine air layering success at home is simple when you follow a structured method. From selecting the right stem and preparing it properly to wrapping with moss, maintaining moisture, and monitoring root development, each step plays a vital role in producing a healthy, independent plant. Patience, proper care, and attention to detail will ensure your air-layered jasmine thrives, producing fragrant, beautiful flowers year after year.
Whether you’re a beginner gardener or an experienced enthusiast, air layering is a rewarding way to propagate jasmine, allowing you to enjoy more plants without purchasing new ones. By implementing the steps outlined in this guide, you can confidently propagate jasmine at home and enjoy the satisfaction of seeing your garden filled with fragrant, flowering vines.