Bean sprouts are a nutritious and delicious addition to your meals, packed with protein, vitamins, and minerals. They are crunchy, fresh, and perfect for salads, stir-fries, sandwiches, and soups. The best part? You can grow fresh bean sprouts at home quickly and easily using something as simple as a plastic bottle.
Growing bean sprouts at home is not only economical, but it also gives you control over the freshness and hygiene of the sprouts. In this guide, we’ll walk you step-by-step on how to grow bean sprouts in plastic bottles, making it simple for anyone to enjoy homegrown sprouts year-round.
1. Why Grow Bean Sprouts at Home?
Homegrown bean sprouts have several advantages:
- Fresh and Healthy: You avoid chemicals and preservatives found in store-bought sprouts.
- Cost-Effective: A small packet of beans can produce large quantities of sprouts.
- Fast Growth: Bean sprouts typically take only 3–5 days to grow.
- Space-Saving: You don’t need a garden—just a small space on your kitchen counter or windowsill.
With these benefits, growing bean sprouts at home is a fun and practical activity for any household.
2. What You Need to Grow Bean Sprouts in Plastic Bottles
Before starting, gather the following simple materials:
- Plastic bottles: 1–2 liter bottles work best. Cut them in half or use the top portion as a funnel.
- Beans: Mung beans, adzuki beans, or lentils are ideal for sprouting.
- Water: Clean, room-temperature water for soaking and rinsing.
- Strainer or mesh: To drain water easily.
- Rubber bands or cotton: Optional, to secure the bottle halves if needed.
These everyday items make growing sprouts a sustainable and low-cost project.
3. Selecting the Right Beans
The type of beans you choose affects the taste, texture, and growth speed of your sprouts:
- Mung beans: Most common, fast-growing, and produce long, crunchy sprouts.
- Adzuki beans: Slightly sweeter sprouts, ideal for salads.
- Lentils: Smaller sprouts, perfect for soups or sandwiches.
Always use good-quality, untreated beans for best results. Organic beans are ideal, as they are free from chemicals that may hinder sprouting.
4. Preparing Your Plastic Bottle
Your plastic bottle becomes a mini sprouting container. Here’s how to prepare it:
- Clean thoroughly with warm water and soap.
- Cut the bottle in half: Keep the top portion with the neck to act as a funnel.
- Optional drainage: Poke small holes in the bottle cap or bottom half for easy water drainage.
- Position for sprouting: Invert the top half over the bottom half, creating a self-draining container.
This simple setup allows water to flow freely while keeping your bean sprouts clean and healthy.
5. Soaking the Beans
Before sprouts can grow, beans need to be soaked to trigger germination:
- Rinse your chosen beans thoroughly.
- Soak them in a bowl of water for 8–12 hours (overnight works best).
- Ensure beans are fully submerged and allow them to swell.
Soaking softens the bean coat and prepares them for rapid sprouting once placed in the bottle.
6. Planting the Beans in the Bottle
After soaking, it’s time to transfer the beans into your bottle:
- Pour the soaked beans into the top half of the bottle.
- Rinse and drain daily: Add fresh water twice a day, gently shaking the bottle to rinse beans.
- Invert the bottle to drain completely after each rinse.
Maintaining proper moisture without waterlogging is essential to prevent mold growth and promote healthy sprout development.
7. Providing the Right Environment
Bean sprouts grow fastest under warm, dark, and humid conditions:
➡️ How to Grow Malabar Spinach from Cuttings for Fast, Easy Greens
➡️ How to Grow Super Delicious Cabbage at Home Without a Garden
➡️ How to Grow Bean Sprouts at Home in Plastic Bottles Easily (Step‑by‑Step Guide)
➡️ Why is Your Lemon Tree Blooming in the Heart of Winter?
➡️ Why Should Your Garden Have a Dedicated Pollinator Highway?
➡️ Why Do Your Fruit Trees Need a Winter Wash to Thrive in Spring?
➡️ How Can Rice Water Transform Your Fruits into Sweeter Delights?
➡️ Jumpstart Your Winter Garden: Seed Starting Under Lights
- Temperature: 65–75°F (18–24°C) is ideal.
- Light: Keep the bottle in indirect sunlight; direct sun can overheat and damage sprouts.
- Airflow: Ensure the bottle is slightly open to allow fresh air and prevent mold.
The right environment ensures crisp, tender sprouts and reduces the risk of bacterial growth.
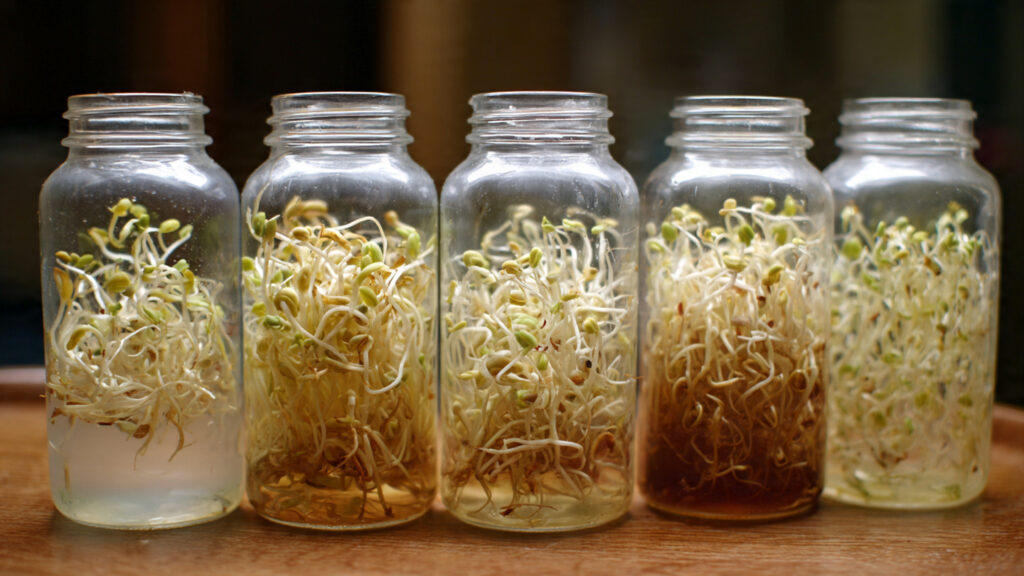
8. Monitoring Growth
Bean sprouts grow quickly, so it’s important to monitor daily:
- Check for roots and shoots: Within 24–48 hours, you should see small white roots emerging.
- Avoid overcrowding: If beans start to clump together, gently separate them.
- Remove spoiled beans: Discard any beans that turn dark or slimy.
Within 3–5 days, your bean sprouts will reach 2–3 inches, perfect for harvest.
9. Harvesting Your Bean Sprouts
Harvesting is simple once sprouts are tender and crisp:
- Rinse thoroughly with cold water.
- Trim roots if desired for a cleaner presentation.
- Use immediately or store in a sealed container in the fridge for up to 3 days.
Homegrown bean sprouts are fresher, more flavorful, and more nutritious than store-bought versions.
10. Tips for Healthy, Crunchy Bean Sprouts
To maximize growth and flavor, follow these tips:
- Rinse regularly: Twice-daily rinsing prevents mold and ensures fresh, crunchy sprouts.
- Avoid overcrowding: Give beans room to grow; overcrowding can cause uneven growth.
- Maintain warmth: Keep the bottle in a consistent temperature environment.
- Rotate the bottle: Gently turn the bottle to allow even growth and light exposure.
- Harvest promptly: Don’t wait too long; sprouts can become bitter or stringy.
Following these tips guarantees a successful sprouting experience every time.
Bonus Ideas for Bean Sprouts
- Mix varieties: Combine mung beans and lentils for a colorful, nutritious mix.
- Sprout salads: Add directly to salads, sandwiches, or stir-fries for crunch and flavor.
- Smoothies and soups: Blend or add sprouts to soups for extra protein.
- Educational project: Great for teaching kids about plant growth and nutrition.
Why Growing Bean Sprouts in Plastic Bottles Works
Plastic bottles are perfect sprouting containers because:
- They recycle everyday waste, making this eco-friendly.
- Their transparent sides allow you to monitor root growth.
- They’re compact and portable, perfect for indoor kitchens.
- Drainage is easy, preventing water stagnation and promoting healthy growth.
It’s a simple, cost-effective way to produce fresh, nutritious sprouts year-round.
Conclusion
Growing bean sprouts at home in plastic bottles is a fun, easy, and rewarding gardening project. From selecting the right beans and preparing your bottle to soaking, rinsing, and harvesting, every step is simple and effective.
With just a glass of water, a few beans, and a plastic bottle, you can enjoy fresh, crunchy, and nutritious sprouts in just a few days. Whether you use them in salads, soups, or smoothies, homegrown bean sprouts are healthier, tastier, and more satisfying than anything store-bought.
Start your sprouting journey today, and discover the joy of growing your own fresh greens—even in small spaces. With regular care and attention, your plastic bottle garden will produce delicious, crisp bean sprouts all year round!