Jicama, also known as Mexican yam bean, is a crunchy, mildly sweet root vegetable that has gained popularity in gardens and kitchens worldwide. Its crisp texture and slightly nutty flavor make it a perfect addition to salads, stir-fries, and snacking. Growing jicama at home can be highly rewarding, especially when you follow the right techniques to produce big, sweet, and healthy tubers. This guide will walk you through every step to ensure a successful harvest, even if you’re a beginner gardener.
Understanding Jicama
Before planting, it’s essential to understand the plant. Jicama (Pachyrhizus erosus) is a tropical root crop native to Mexico. It thrives in warm climates with plenty of sunlight and well-drained soil. Jicama grows as a climbing vine, producing tubers underground while the leafy vine sprawls above. The tubers are the edible part, while the leaves and seeds are generally not consumed as they can be mildly toxic.
Jicama has a long growing season—usually 5 to 9 months from planting to harvest. While patience is required, the payoff is a crunchy, sweet tuber that can grow impressively large, sometimes reaching up to 3–4 pounds per plant under ideal conditions.
Choosing the Right Location
Jicama loves warmth and sunshine. Choose a planting location that receives at least 6–8 hours of direct sunlight per day. If you live in a cooler climate, you can start your seeds indoors to extend the growing season. Ensure the soil is loose and well-drained because compact soil can hinder tuber growth and cause misshapen roots.
Soil Requirements
- Soil type: Sandy loam or loamy soil is ideal.
- pH level: Slightly acidic to neutral (6.0–7.5).
- Nutrients: Rich in organic matter. Adding compost or well-rotted manure before planting enhances fertility.
- Drainage: Good drainage is crucial to prevent rot. Raised beds are a perfect solution for regions with heavier soils.
Getting Jicama Seeds
Jicama is grown from seeds, not tuber cuttings. You can buy jicama seeds online or from local seed suppliers. Look for certified seeds to ensure they are disease-free. One interesting tip: jicama seeds have a hard coat and can take longer to germinate, so pre-soaking them in water for 24 hours before planting can help speed up sprouting.
Starting Seeds Indoors
Starting jicama seeds indoors is highly recommended in areas with a short growing season. Here’s how:
- Containers: Use seed trays or small pots filled with a light, well-draining seed-starting mix.
- Planting depth: Sow seeds about 1 inch deep.
- Watering: Keep the soil consistently moist but not waterlogged.
- Temperature: Jicama seeds germinate best in warm conditions, around 70–85°F (21–29°C).
- Germination time: Expect sprouts in 2–4 weeks.
Once seedlings are 3–4 inches tall and the outdoor temperature is consistently warm, you can transplant them into the garden.
Planting Jicama in the Garden
When transplanting or sowing directly in the garden, space is key. Jicama vines can grow 10–15 feet long, so give each plant enough room to spread.
- Spacing: Plant seeds or seedlings about 12–18 inches apart in rows that are 3–4 feet apart.
- Support: Provide a trellis or stake for the vines to climb. While jicama can grow on the ground, supporting the vines reduces disease risk and makes harvesting easier.
- Planting depth: If transplanting, plant at the same depth as the seedlings were in the pots.
Watering and Fertilization
Jicama requires regular watering to develop large, sweet tubers. However, overwatering can cause tuber rot. Here’s a watering and feeding schedule:
- Watering: Keep soil evenly moist, especially during dry periods. Reduce watering as the plant matures to prevent waterlogged tubers.
- Fertilization: Use a balanced fertilizer or compost tea every 4–6 weeks. High-nitrogen fertilizers encourage leafy growth but limit tuber size, so switch to a fertilizer higher in phosphorus and potassium once the plant is established.
Caring for Jicama Vines
Jicama vines are hardy, but regular care ensures bigger, healthier tubers:
- Weeding: Keep the area free of weeds to reduce competition for nutrients.
- Mulching: Apply organic mulch to retain soil moisture and regulate temperature.
- Pruning: Trim excessive vine growth if necessary to direct energy toward tuber development.
- Pest control: Jicama is relatively pest-resistant, but watch for aphids, leaf miners, or fungal diseases. Neem oil or insecticidal soap can help manage infestations.
Encouraging Big and Sweet Tubers
The secret to large, sweet jicama tubers lies in patience and proper care:
- Length of season: Jicama requires 5–9 months to mature fully. Avoid harvesting early.
- Soil depth: Loose, deep soil encourages long, straight tubers.
- Consistent watering: Maintain moisture without flooding.
- Fertilizer balance: High potassium and phosphorus support tuber growth.
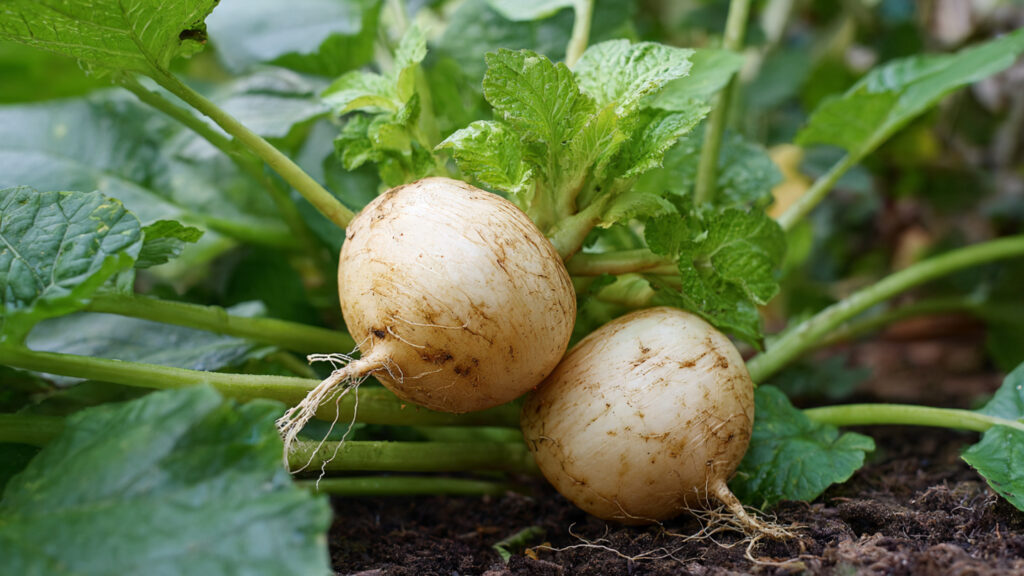
Harvesting Jicama
Timing is crucial. Jicama is ready to harvest when the leaves start to yellow and die back. This usually occurs 7–9 months after planting.
- Method: Gently dig around the base to lift the tuber. Avoid cutting or bruising, as damaged tubers store poorly.
- Size: Mature tubers should be firm and crisp, weighing 1–4 pounds depending on growth conditions.
- Storage: Keep tubers in a cool, dry place. Properly harvested jicama can last 2–4 weeks at room temperature or up to 2–3 months in the refrigerator.
Enjoying Your Homegrown Jicama
Freshly harvested jicama is crunchy, juicy, and slightly sweet. Here are a few ways to enjoy it:
- Raw: Slice and eat as a snack or in salads.
- Cooked: Stir-fry with vegetables or add to soups.
- Juiced: Blend into refreshing drinks or smoothies.
- Pickled: Cut into sticks and pickle for a tangy treat.
Troubleshooting Common Problems
Even beginner gardeners can face challenges. Here are some common issues and solutions:
- Small tubers: Usually caused by overcrowding, shallow soil, or nutrient deficiency. Ensure proper spacing and fertilization.
- Rotting tubers: Caused by overwatering or poor drainage. Improve soil drainage and water carefully.
- Pests: Aphids and leaf miners can damage vines. Use organic insecticides or introduce beneficial insects like ladybugs.
Tips for Success
- Start early indoors if you live in cooler climates to extend the growing season.
- Rotate crops each year to prevent soil-borne diseases.
- Use organic compost to boost soil fertility and encourage sweet, large tubers.
- Be patient: Rushing harvests reduces size and sweetness.
- Harvest carefully: Avoid damaging tubers to extend storage life.
Conclusion
Growing jicama at home can be a fun and rewarding experience, even for beginners. By understanding the plant, providing optimal soil, water, and sunlight, and giving it the long, patient care it needs, you can enjoy large, sweet, and crunchy tubers straight from your garden. Not only will you have a fresh and nutritious addition to your meals, but you’ll also gain the satisfaction of growing a tropical treasure in your own backyard.
➡️ How to Grow Malabar Spinach from Cuttings for Fast, Easy Greens
➡️ How to Grow Super Delicious Cabbage at Home Without a Garden
➡️ How to Grow Bean Sprouts at Home in Plastic Bottles Easily (Step‑by‑Step Guide)
➡️ Why is Your Lemon Tree Blooming in the Heart of Winter?
➡️ Why Should Your Garden Have a Dedicated Pollinator Highway?
➡️ Why Do Your Fruit Trees Need a Winter Wash to Thrive in Spring?
➡️ How Can Rice Water Transform Your Fruits into Sweeter Delights?
➡️ Jumpstart Your Winter Garden: Seed Starting Under Lights
With these tips and techniques, your jicama harvest can become a highlight of your home garden, impressing friends and family with its size, flavor, and crisp texture. So grab some seeds, prepare your soil, and start your jicama-growing journey today!