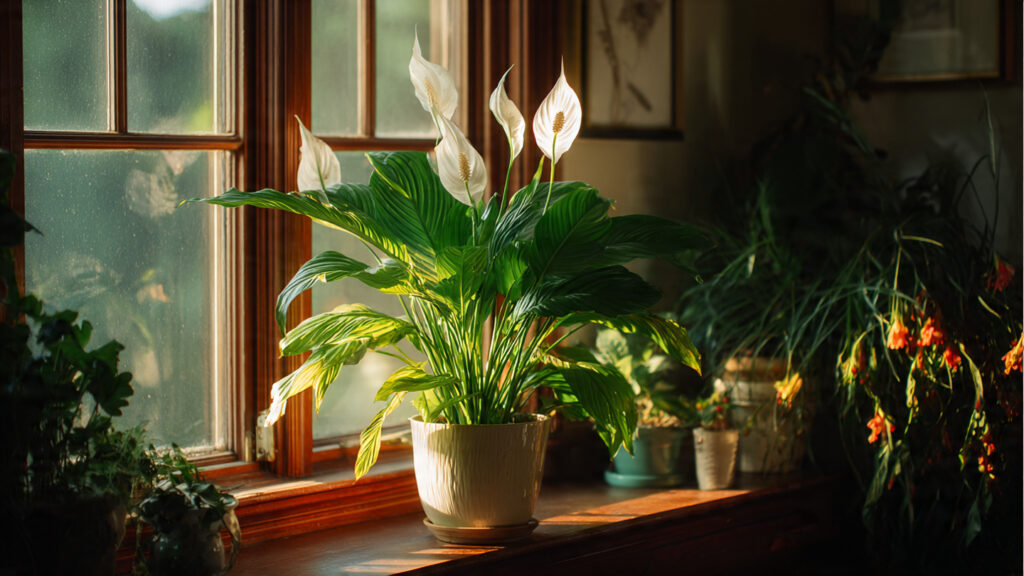
Peace lilies are one of the most loved houseplants in the world—and for good reason. With their glossy green leaves and elegant white blooms, they bring calm beauty to any room. Even better, they’re known for being low-maintenance and forgiving.
But there comes a time when even the easiest plant needs a fresh start.
If your peace lily is drooping more often, growing slowly, or bursting out of its pot, it may be telling you something important:
It’s time to repot.
Don’t worry—repotting sounds intimidating, but it’s actually simple when done the right way. In this guide, you’ll learn exactly how to repot a peace lily properly in just 5 easy steps, so your plant stays healthy, lush, and blooming beautifully.
Let’s get started!
Why Repotting a Peace Lily Matters
Repotting isn’t just about giving your plant a bigger container. It’s about renewing the environment where the roots live.
Over time:
- Soil becomes compact and loses nutrients
- Roots outgrow the pot
- Water stops draining properly
- The plant becomes stressed
Repotting helps your peace lily:
✅ Grow faster
✅ Produce more flowers
✅ Stay upright and healthy
✅ Avoid root rot and poor drainage
Most peace lilies need repotting every 1–2 years, especially during their active growing season.
Signs Your Peace Lily Needs Repotting
Before grabbing a new pot, check for these common signs:
- Roots growing out of the drainage holes
- The plant dries out quickly after watering
- Leaves droop often even with proper care
- Growth slows down or stops
- The plant looks top-heavy or unstable
- Soil appears packed down or old
If you notice one or more of these, repotting is the perfect next step.
How to Repot a Peace Lily the Right Way — 5 Simple Steps
Now let’s walk through the process in a clear, beginner-friendly way.
Step 1: Choose the Right Pot
The first rule of repotting peace lilies is this:
➡️ How to Grow Malabar Spinach from Cuttings for Fast, Easy Greens
➡️ How to Grow Super Delicious Cabbage at Home Without a Garden
➡️ How to Grow Bean Sprouts at Home in Plastic Bottles Easily (Step‑by‑Step Guide)
➡️ Why is Your Lemon Tree Blooming in the Heart of Winter?
➡️ Why Should Your Garden Have a Dedicated Pollinator Highway?
➡️ Why Do Your Fruit Trees Need a Winter Wash to Thrive in Spring?
➡️ How Can Rice Water Transform Your Fruits into Sweeter Delights?
➡️ Jumpstart Your Winter Garden: Seed Starting Under Lights
Bigger isn’t always better.
Peace lilies like being slightly snug in their pots. A pot that is too large holds excess moisture, which can lead to root rot.
Pick a pot that is:
- 1–2 inches wider than the current one
- Has drainage holes (very important!)
- Made of plastic, ceramic, or terracotta depending on your watering habits
Terracotta pots dry faster and are great if you tend to overwater.
Step 2: Prepare Fresh Soil
Peace lilies thrive in soil that is light, airy, and moisture-retentive without becoming soggy.
The best soil mix includes:
- High-quality indoor potting mix
- Perlite or pumice for drainage
- A little peat moss or coco coir for moisture retention
A simple DIY mix:
- 2 parts potting soil
- 1 part perlite
- 1 part coco coir or peat
Avoid heavy garden soil—it compacts too easily indoors.
Step 3: Gently Remove the Plant
Now comes the hands-on part.
To remove your peace lily safely:
- Water it lightly the day before (this helps loosen the roots)
- Tilt the pot sideways
- Support the base of the plant
- Gently slide it out
If it’s stuck, tap the pot or squeeze the sides to loosen it.
Check the roots:
Healthy roots are:
- White or light tan
- Firm
- Not mushy or smelly
If you see black, soft roots, trim them with clean scissors.
Step 4: Repot and Position Correctly
Now it’s time to give your peace lily its new home.
How to repot properly:
- Add a layer of fresh soil to the bottom of the new pot
- Place the plant in the center
- Make sure it sits at the same height as before
- Fill soil around the sides
- Gently press down (don’t pack tightly)
Leave about an inch of space at the top so watering doesn’t overflow.
Pro Tip:
If your peace lily is very large, you can divide it during repotting to create multiple plants.
Simply separate root clumps gently and pot them individually.
Step 5: Water and Aftercare
Once repotted, your peace lily needs a little recovery time.
Right after repotting:
- Water thoroughly until excess drains out
- Place the plant in bright, indirect light
- Avoid direct sun for the first week
What to expect:
Your peace lily may droop slightly for a few days—this is normal transplant shock.
Aftercare tips:
- Don’t fertilize for at least 4–6 weeks
- Keep soil lightly moist, not soggy
- Mist leaves occasionally for humidity
- Watch for new growth in 2–3 weeks
Soon, your plant will perk up even stronger than before.
Common Repotting Mistakes to Avoid
Even though repotting is simple, a few mistakes can stress your peace lily.
Avoid these:
❌ Using a pot without drainage
❌ Jumping to a pot that’s too large
❌ Overwatering right after repotting
❌ Packing soil too tightly
❌ Repotting during winter dormancy
The best time to repot is spring or early summer, when the plant is actively growing.
How Often Should You Repot a Peace Lily?
Here’s a quick guideline:
- Small peace lilies: every 1–2 years
- Large mature plants: every 2–3 years
- If rootbound or unhealthy: repot immediately
If your plant is happy and blooming, you may not need to repot right away.
Final Thoughts: A Fresh Start for Your Peace Lily
Repotting your peace lily doesn’t have to be complicated.
With the right pot, fresh soil, and gentle care, you can refresh your plant in just minutes and help it thrive for years.
Remember these 5 simple steps:
- Choose the right pot
- Prepare fresh, airy soil
- Remove the plant gently
- Repot at the correct depth
- Water and provide proper aftercare
Your peace lily will reward you with lush leaves, stronger growth, and beautiful blooms once again.