Hibiscus plants are a favorite among gardeners worldwide, thanks to their stunning blooms, vibrant colors, and the ability to thrive in a variety of climates. While buying new hibiscus plants from nurseries is an option, nothing beats the satisfaction of growing your own plants organically from cuttings. Propagating hibiscus through cuttings is not only cost-effective but also allows you to replicate the exact beauty of the parent plant. In this comprehensive guide, we’ll walk you through the ultimate organic hibiscus cutting propagation process, ensuring your new plants flourish naturally.
Understanding Hibiscus Cutting Propagation
Hibiscus plants can be propagated in several ways, including seeds, layering, and grafting. However, cutting propagation is the most efficient method for beginners and experienced gardeners alike.
Cuttings are portions of the parent plant, usually stems or branches, that can grow roots and develop into independent plants. This method preserves the traits of the parent plant—color, bloom size, and growth habits—perfect for gardeners who want uniformity in their garden.
Choosing the Right Time for Propagation
Timing is crucial for successful hibiscus propagation. The best period is spring or early summer, when the plant is actively growing. During this period, the stems are tender but mature enough to produce roots. Avoid propagating in winter, as low temperatures can slow root development or even kill the cutting.
Selecting Healthy Parent Plants
The success of your propagation largely depends on the health of the parent hibiscus plant. Choose a plant that:
- Has vibrant leaves – yellowing or wilting leaves indicate stress or disease.
- Is pest-free – check for aphids, mealybugs, or spider mites.
- Shows strong growth – mature stems with visible nodes are ideal.
Choosing the Right Cutting
Once you’ve selected a healthy parent plant, the next step is choosing the right stem. Here’s how:
- Length: Cuttings should be 4 to 6 inches long.
- Type of stem: Use semi-hardwood stems, which are firm but still flexible. Avoid very soft, new growth and very old, woody stems.
- Node presence: Each cutting must have at least 2-3 nodes, as roots develop from these nodes.
Use a sharp, sterilized knife or pruning shears to make a clean cut. A clean cut prevents infection and promotes faster rooting.
Preparing the Cutting
Before planting, preparation is key:
- Remove excess leaves: Strip off leaves from the bottom half of the cutting. This reduces water loss and directs energy toward root development.
- Optional: Use rooting hormone: Although organic gardeners often prefer natural methods, a small amount of organic rooting powder or honey can help stimulate root growth. Honey has natural antibacterial properties and encourages root development.
- Make a clean cut at the base: Cut just below a node at a 45-degree angle. This increases the surface area for roots to grow.
Selecting an Organic Growing Medium
Hibiscus cuttings require a well-draining, nutrient-rich medium. Avoid heavy garden soil, which can retain excess water and cause rotting. Some excellent organic options include:
- Coco peat: Lightweight, retains moisture without waterlogging.
- Perlite: Adds aeration and prevents compaction.
- Compost-rich soil: Provides nutrients for initial growth.
A common organic mix is 1 part coco peat, 1 part perlite, and 1 part compost. This combination ensures moisture retention, good drainage, and nutrient availability.
Planting the Cutting
Planting is where your cutting begins its journey into a full-grown hibiscus. Here’s the proper method:
- Fill a small pot or seed tray with your chosen medium.
- Make a small hole using a pencil or stick to avoid damaging the cutting.
- Insert the cutting so that at least one node is buried in the medium.
- Firmly press the soil around the base to eliminate air pockets.
- Water lightly to settle the soil.
Creating the Perfect Rooting Environment
Hibiscus cuttings thrive in a warm, humid environment. Here’s how to replicate that organically:
- Humidity dome: Cover the pot with a clear plastic bag or bottle to maintain moisture. Make sure the bag doesn’t touch the leaves to prevent mold.
- Indirect sunlight: Place cuttings in bright, indirect light. Direct sunlight may scorch the tender stems.
- Temperature: Maintain a warm environment around 70–80°F (21–27°C). Avoid cold drafts or excessive heat.
- Moisture: Keep the soil consistently damp but not waterlogged. Mist the cuttings daily if the air is dry.
Caring for Cuttings During Rooting
Root development typically takes 4 to 8 weeks. During this time:
- Check for rot: Remove any cuttings that develop black or mushy stems.
- Avoid overwatering: Too much water can cause fungal infections.
- Watch for root signs: Gently tug on the cutting after a few weeks. Resistance indicates root growth.
- Acclimatize gradually: Once roots form, gradually remove the humidity cover to prepare the cutting for outdoor conditions.
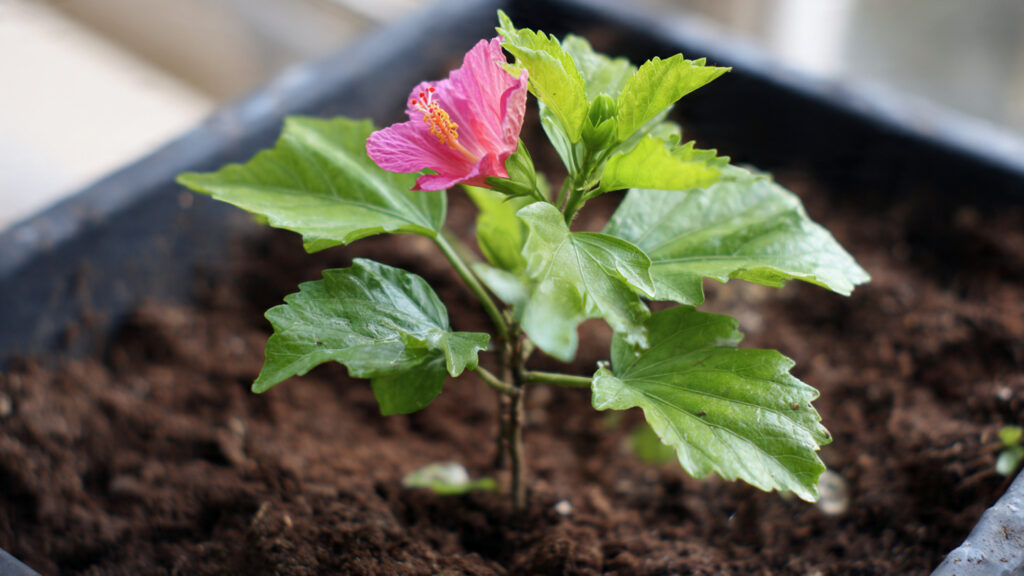
Transplanting Your New Hibiscus Plant
Once your cuttings develop strong roots (usually visible at the bottom of the pot), it’s time to transplant:
- Choose a pot slightly larger than the current one.
- Prepare nutrient-rich organic soil or a garden bed with compost.
- Carefully remove the cutting from its pot, preserving the root system.
- Plant at the same depth as before, firming the soil gently around it.
- Water thoroughly and provide light shade for a few days to reduce transplant shock.
Ongoing Care for Young Hibiscus Plants
Young hibiscus plants require consistent care to thrive:
➡️ How to Grow Malabar Spinach from Cuttings for Fast, Easy Greens
➡️ How to Grow Super Delicious Cabbage at Home Without a Garden
➡️ How to Grow Bean Sprouts at Home in Plastic Bottles Easily (Step‑by‑Step Guide)
➡️ Why is Your Lemon Tree Blooming in the Heart of Winter?
➡️ Why Should Your Garden Have a Dedicated Pollinator Highway?
➡️ Why Do Your Fruit Trees Need a Winter Wash to Thrive in Spring?
➡️ How Can Rice Water Transform Your Fruits into Sweeter Delights?
➡️ Jumpstart Your Winter Garden: Seed Starting Under Lights
- Watering: Keep the soil consistently moist, especially during dry periods.
- Fertilizing: Use organic fertilizers like compost tea, seaweed extract, or well-rotted manure to support healthy growth.
- Pruning: Pinch new growth tips to encourage bushier plants and more blooms.
- Pest control: Monitor for pests like aphids, whiteflies, and spider mites. Use natural remedies like neem oil or garlic spray.
Common Problems and Solutions
Even with careful propagation, cuttings can face challenges. Here’s a quick troubleshooting guide:
- Wilting or yellow leaves: Check watering—either too much or too little can cause stress.
- No root growth: Ensure the cutting was taken from semi-hardwood stems and kept in proper humidity.
- Fungal infection: Remove affected cuttings and improve air circulation.
- Leggy growth: Provide sufficient light and pinch back tips to encourage compact growth.
Benefits of Organic Propagation
By using organic methods, you not only grow healthy hibiscus plants but also protect the environment. Organic propagation:
- Reduces chemical usage.
- Promotes natural soil fertility.
- Produces stronger, disease-resistant plants.
- Ensures a sustainable gardening practice that is safe for pollinators and wildlife.
Conclusion
Growing new hibiscus plants from cuttings is a rewarding and sustainable way to expand your garden. By following this ultimate organic propagation guide, you can create beautiful, healthy hibiscus plants that will bloom year after year. Remember: success comes from careful selection of parent plants, proper cutting techniques, suitable organic soil, and attentive care during the rooting process.
With patience, love, and attention to detail, your garden can flourish with vibrant hibiscus blooms, making your outdoor space a tropical paradise. Start small, observe closely, and enjoy the magic of nurturing new life from a simple cutting. The joy of seeing your hibiscus cuttings grow into thriving plants is an experience every gardener treasures.
This article is rich with step-by-step guidance, practical tips, and organic methods to ensure successful hibiscus propagation.