Mint is one of the most versatile and aromatic herbs you can grow at home. From refreshing teas to garnishing desserts, fresh mint adds flavor and fragrance to everyday dishes. The best part? Mint is extremely easy to propagate, making it perfect for beginner gardeners and indoor plant enthusiasts.
If you’ve ever wondered how to root mint cuttings quickly in a water glass, this guide will walk you through every step—from selecting healthy stems to transferring thriving roots into soil. With patience and proper care, you’ll have a lush supply of mint ready for culinary and ornamental use.
1. Why Root Mint Cuttings in Water?
Rooting mint in water is one of the fastest and most reliable propagation methods. Here’s why:
- Visible Growth: You can watch the roots develop in real-time, which is both satisfying and educational.
- Low Maintenance: No special soil or pots are required during the initial rooting phase.
- Fast Results: Most mint cuttings develop roots within 7–14 days.
- Disease Control: Water propagation reduces the risk of soil-borne diseases affecting young cuttings.
By rooting mint in a water glass, you can quickly multiply your plants and enjoy a fresh, aromatic harvest all year round.
2. Choosing the Right Mint Cuttings
The first step to successful rooting is selecting healthy mint cuttings.
- Pick Strong Stems: Choose non-flowering stems with vibrant green leaves. Avoid stems that are woody or yellowing.
- Length Matters: Cuttings should be 3–6 inches long. Too short may reduce rooting success, while too long can stress the plant.
- Trim Leaves: Remove leaves from the lower half of the cutting to prevent rotting in water. Keep the top leaves intact to support photosynthesis.
Selecting the right cuttings sets the stage for fast and healthy root growth.
3. Preparing Your Water Glass
Your rooting environment matters just as much as the cutting itself. Here’s how to prepare your water glass:
- Choose a Clean Glass: Use a clear glass to monitor root development. Wash it thoroughly to eliminate bacteria.
- Add Fresh Water: Fill the glass with room-temperature water. Avoid chlorinated water if possible; let tap water sit for a few hours to allow chlorine to dissipate.
- Optional Rooting Boosters: Add a few drops of liquid fertilizer or a pinch of honey to encourage faster rooting, but it’s not strictly necessary.
A properly prepared glass ensures your mint cuttings develop roots quickly and stay healthy.
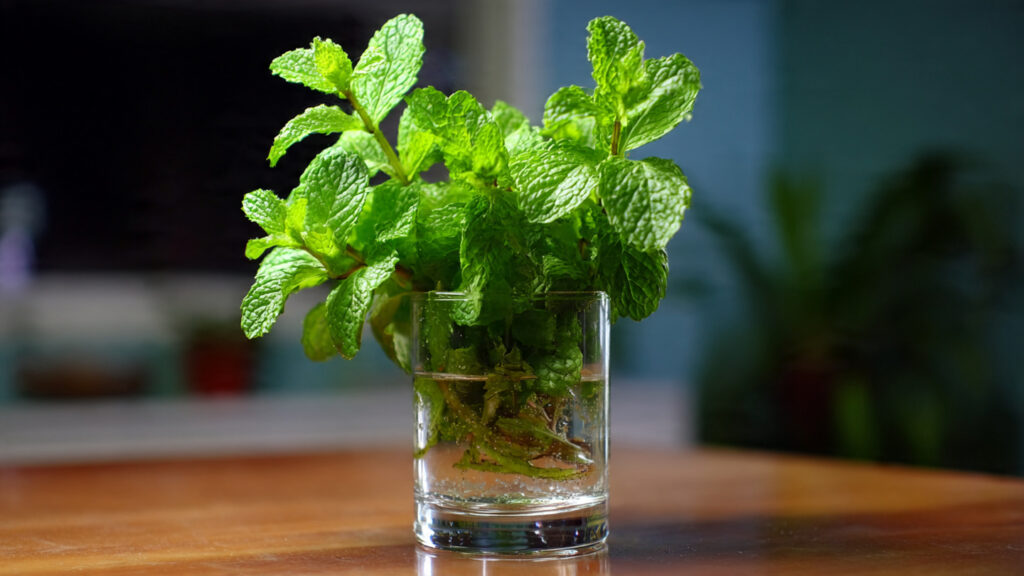
4. Placing the Cuttings in Water
Now it’s time to root your mint cuttings:
- Insert the trimmed mint stem into the water, making sure the cut end is fully submerged.
- Keep the top leaves above water to prevent decay.
- Place the glass in a bright, indirect light location. Avoid direct sunlight, which can overheat the water and damage the stem.
Proper placement encourages strong root growth while keeping the leaves healthy.
5. Monitoring Root Development
Mint cuttings are fast growers, but monitoring is key to success.
- Check Water Level Daily: Roots need constant moisture, so top up the water as needed.
- Change Water Regularly: Replace the water every 2–3 days to prevent bacterial growth.
- Look for Roots: Tiny white roots should start forming in about 7 days. Within 2 weeks, they can reach 2–3 inches long, ready for planting.
Watching the roots develop is not only exciting but also allows you to catch any issues early.
6. Common Issues and How to Fix Them
Even with the easiest herbs like mint, problems can occur. Here are some common issues:
- Rotting Stems: Usually caused by submerged leaves or stagnant water. Fix by trimming leaves and refreshing the water.
- Slow Root Growth: Could be due to low light or cold temperatures. Move the glass to a brighter spot with stable warmth (65–75°F).
- Leggy Growth: Tall, weak stems may indicate insufficient light. Rotate the glass daily or move closer to a light source.
By addressing these issues promptly, your mint cuttings will root successfully and grow into healthy plants.
7. Transferring to Soil
Once roots are 2–3 inches long, it’s time to plant your mint cutting in soil.
➡️ How to Grow Malabar Spinach from Cuttings for Fast, Easy Greens
➡️ How to Grow Super Delicious Cabbage at Home Without a Garden
➡️ How to Grow Bean Sprouts at Home in Plastic Bottles Easily (Step‑by‑Step Guide)
➡️ Why is Your Lemon Tree Blooming in the Heart of Winter?
➡️ Why Should Your Garden Have a Dedicated Pollinator Highway?
➡️ Why Do Your Fruit Trees Need a Winter Wash to Thrive in Spring?
➡️ How Can Rice Water Transform Your Fruits into Sweeter Delights?
➡️ Jumpstart Your Winter Garden: Seed Starting Under Lights
- Choose a Pot or Garden Spot: Mint thrives in pots or garden beds. Select well-draining soil enriched with compost.
- Plant Carefully: Dig a small hole, place the rooted cutting, and gently cover with soil. Firm lightly and water thoroughly.
- Acclimate Gradually: Keep the plant in indirect light for a few days to reduce transplant shock before moving it to full sun.
Transferring to soil allows your mint to establish a permanent home and flourish with proper care.
8. Caring for Your Mint Plant
Once planted, caring for mint ensures healthy growth and abundant harvest:
- Watering: Keep soil consistently moist but not waterlogged. Mint loves hydration.
- Sunlight: Provide 4–6 hours of sunlight daily. Partial shade works well in hot climates.
- Pruning: Regularly trim leaves to encourage bushy growth and prevent flowering, which can reduce leaf production.
- Fertilizing: Apply a balanced, all-purpose fertilizer monthly during the growing season.
A little daily attention keeps your mint thriving and aromatic all year.
9. Harvesting Mint
The best part of growing mint is harvesting fresh leaves for culinary use:
- Pick Regularly: Harvest leaves as needed, starting from the top. Frequent picking encourages new growth.
- Avoid Flowering: Snip off flowers if they appear, as they reduce leaf production.
- Use Immediately or Preserve: Fresh mint can be used in teas, desserts, or cooking. Freeze or dry excess leaves to enjoy year-round.
Freshly harvested mint adds flavor and aroma that store-bought herbs can’t match.
10. Advantages of Water Propagation
Rooting mint in a water glass has several advantages:
- Cost-Effective: Multiply your mint plants without buying new seedlings.
- Fast Results: Root development is quick compared to soil propagation.
- Safe for Indoors: Minimal mess and easy monitoring make it perfect for windowsills or kitchen counters.
- Fun and Educational: Watch roots grow, making it ideal for kids or beginner gardeners learning propagation.
It’s one of the easiest ways to expand your mint garden and enjoy a constant supply of fresh herbs.
Bonus Tips for Mint Lovers
- Use different mint varieties like spearmint, peppermint, or chocolate mint to diversify flavors.
- Label each glass or pot with the variety and date to track growth.
- Companion plant mint near vegetables or flowers to naturally deter pests.
- Rotate water glasses occasionally to ensure even light exposure and balanced root development.
Conclusion
Rooting mint cuttings in a water glass is an easy, fast, and rewarding way to propagate this versatile herb. From selecting healthy stems and preparing a clean water glass to watching roots develop and transferring cuttings to soil, each step is simple yet satisfying.
By following this guide, you can enjoy lush, aromatic mint plants all year long, perfect for teas, cooking, or simply freshening up your home with greenery. Start today, and discover how quickly mint cuttings can grow from a simple stem in water to a thriving plant ready for harvest.
With just a glass of water, a few healthy cuttings, and a little patience, your indoor or backyard garden will soon be bursting with fragrant, flavorful mint—fresh, fast, and flourishing.