Chia seeds, once revered by the Aztecs for their nutritional and medicinal properties, have made a huge comeback in modern diets. Packed with omega-3 fatty acids, fiber, protein, and antioxidants, chia seeds are more than just a health food—they’re a versatile garden crop that home gardeners can grow with minimal effort. If you’ve ever wondered how to cultivate your own chia plants at home, this no-fuss guide will walk you through everything from planting to harvesting, ensuring success even for beginners.
Why Grow Chia at Home?
Homegrown chia offers several benefits beyond convenience and nutrition:
- Freshness: Seeds harvested from your garden are fresher and more potent than store-bought options.
- Cost-Effective: Growing your own chia reduces the need to buy expensive pre-packaged seeds.
- Eco-Friendly: Reduces packaging waste and supports sustainable gardening practices.
- Beautiful Foliage: Chia plants produce lush, green leaves and delicate purple or white flowers, enhancing garden aesthetics.
- Pollinator-Friendly: Chia flowers attract bees and butterflies, helping your overall garden ecosystem.
With these advantages, chia is an ideal addition for gardeners seeking both health benefits and ornamental appeal.
Understanding Chia Plants
Chia (Salvia hispanica) is an annual flowering plant native to Central and South America. It belongs to the mint family and grows best in warm climates. Some key characteristics include:
- Height: Can grow 3–4 feet tall.
- Leaves: Oval-shaped, green, and slightly hairy.
- Flowers: Tiny, purple or white blooms in spikes during late summer to fall.
- Seeds: Small, oval, and highly nutritious, forming after flowering.
Understanding these traits helps gardeners plan for space, sunlight, and care requirements.
Step 1: Selecting a Planting Site
Chia plants thrive in sunny conditions with well-draining soil. Ideal planting conditions include:
- Full Sun Exposure: At least 6–8 hours of sunlight per day ensures strong growth and abundant flowering.
- Soil Requirements: Loamy or sandy soil with a pH of 6–8 is best.
- Good Drainage: Avoid waterlogged areas, as chia roots are prone to rot.
If you’re growing chia in a container or raised bed, choose a pot at least 12 inches deep and ensure proper drainage holes.
Step 2: Sowing Chia Seeds
Chia seeds are tiny and require minimal preparation for sowing.
- Seed Preparation: No pre-soaking is necessary, though lightly moistening seeds can improve germination.
- Sowing Depth: Scatter seeds on the soil surface and lightly press them into the soil. Avoid burying seeds more than ¼ inch deep.
- Spacing: Space seeds 12–18 inches apart to allow for proper airflow and growth.
- Watering: Keep the soil consistently moist until seedlings emerge, usually within 10–14 days.
Chia seeds are fast germinators, and seedlings will quickly form a dense patch of greenery if conditions are right.
Step 3: Caring for Chia Plants
Chia plants are low-maintenance, but a few simple steps ensure vibrant growth and maximum seed production.
Watering
- Keep soil evenly moist but not waterlogged during the first few weeks.
- Mature plants are drought-tolerant and only require supplemental watering in prolonged dry periods.
Fertilization
- Chia thrives in fertile soil, but over-fertilizing can reduce seed production.
- Use a balanced, slow-release fertilizer at planting or compost to support healthy growth.
Mulching
- Apply a light layer of mulch to retain soil moisture and suppress weeds.
- Avoid thick mulch near stems to prevent rot.
Pest and Disease Control
- Chia is relatively pest-free. Occasionally, aphids or spider mites may appear.
- Use insecticidal soap or neem oil if infestations occur.
- Ensure proper spacing and airflow to prevent fungal issues.
Step 4: Flowering and Pollination
Chia plants bloom in late summer to fall, producing spikes of purple or white flowers.
Tips for Encouraging Flowering
- Ensure full sunlight exposure throughout the day.
- Avoid excessive nitrogen, which promotes leafy growth over flowering.
- Remove competing weeds and maintain soil fertility.
Chia flowers attract pollinators like bees and butterflies, which are essential for seed formation. Even though chia is largely self-pollinating, pollinator activity improves yield and seed quality.
Step 5: Harvesting Chia Seeds
Harvesting is the most rewarding part of growing chia. The process requires timing and care:
- Seed Maturity: Wait until flowers fade and seed heads turn brown and dry. This indicates seeds are fully mature.
- Cutting Seed Heads: Use scissors or pruning shears to cut mature seed spikes from the plant.
- Drying Seeds: Spread seed heads on a tray in a warm, dry place for several days to ensure complete drying.
- Threshing: Gently rub or shake dried seed heads to release seeds. Use a fine sieve to separate seeds from debris.
Storage Tips
- Store seeds in an airtight container in a cool, dry place.
- Properly dried chia seeds can remain viable for 1–2 years.
Step 6: Using Chia Leaves
While seeds are the main attraction, chia leaves are edible and nutrient-rich. Young leaves can be added to salads, smoothies, or cooked dishes.
Tips for Leaf Harvesting
- Pick tender leaves early in the plant’s growth cycle.
- Avoid harvesting too many leaves at once, as this can reduce seed yield later.
This allows gardeners to enjoy dual harvests from a single plant—fresh leaves and nutrient-dense seeds.
➡️ How to Grow Malabar Spinach from Cuttings for Fast, Easy Greens
➡️ How to Grow Super Delicious Cabbage at Home Without a Garden
➡️ How to Grow Bean Sprouts at Home in Plastic Bottles Easily (Step‑by‑Step Guide)
➡️ Why is Your Lemon Tree Blooming in the Heart of Winter?
➡️ Why Should Your Garden Have a Dedicated Pollinator Highway?
➡️ Why Do Your Fruit Trees Need a Winter Wash to Thrive in Spring?
➡️ How Can Rice Water Transform Your Fruits into Sweeter Delights?
➡️ Jumpstart Your Winter Garden: Seed Starting Under Lights
Step 7: Tips for Boosting Yield
To maximize chia production, consider these simple hacks:
- Succession Planting: Sow seeds every 2–3 weeks for continuous harvest throughout the growing season.
- Pruning: Remove older stems and flowers that have completed their cycle to redirect energy to new growth.
- Companion Plants: Pair chia with sun-loving vegetables like tomatoes, peppers, or squash to utilize space efficiently.
- Soil Fertility: Top-dress with compost mid-season to maintain nutrient levels.
- Protect from Wind: Chia stems can be tall and slightly fragile. Use stakes or plant in sheltered areas to prevent breakage.
Following these tips ensures fast growth and abundant seed production without complex interventions.
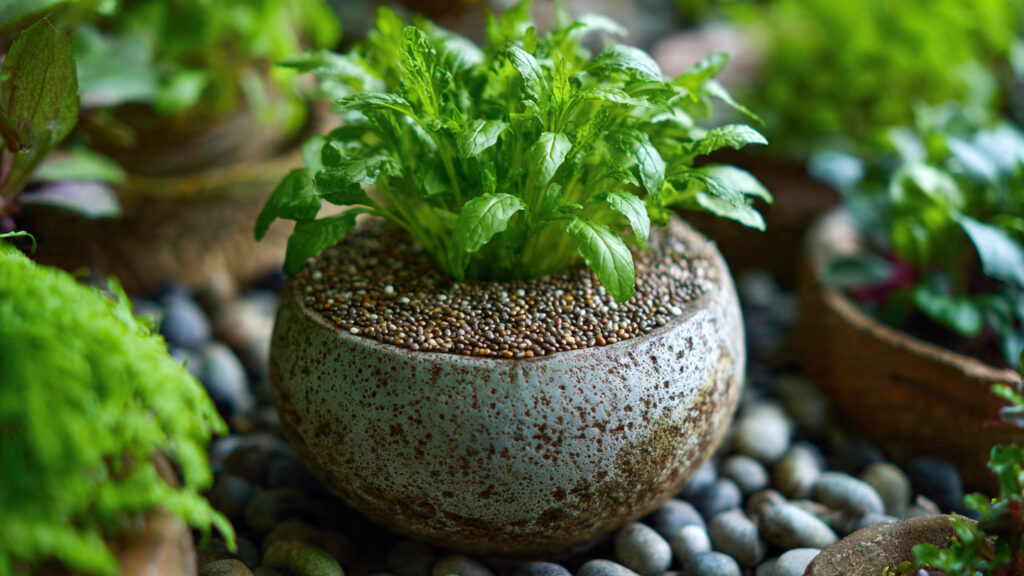
Step 8: Growing Chia Indoors or in Containers
For gardeners in cooler climates or with limited outdoor space, chia can also be grown indoors.
Indoor Growing Tips
- Use a large pot (at least 12 inches deep) with well-draining potting mix.
- Place near a sunny window or supplement with grow lights for 12–16 hours per day.
- Maintain moderate humidity and consistent moisture for optimal germination and growth.
Container-grown chia produces smaller yields than field planting but allows for year-round experimentation and fresh greens.
Step 9: Common Challenges and Solutions
While chia is generally easy to grow, gardeners may encounter:
- Slow Germination: Often caused by dry soil. Keep soil lightly moist until seedlings emerge.
- Leggy Seedlings: Caused by insufficient light. Provide full sun or supplemental lighting.
- Low Seed Production: Over-fertilization with nitrogen can inhibit flowering. Switch to balanced fertilizer before flowering.
- Pests or Fungal Issues: Maintain airflow, space plants adequately, and apply organic pest control if needed.
With attentive care, these issues are usually minor and easily corrected.
Conclusion
Chia is an ideal plant for home gardeners seeking a low-maintenance, nutrient-rich, and aesthetically pleasing crop. By understanding its growth requirements and applying simple techniques—fertile soil, full sun, consistent moisture, careful harvesting, and optional succession planting—you can enjoy fast-growing plants and abundant seeds.
Not only will growing chia enhance your diet, but it also supports pollinators, improves garden biodiversity, and adds ornamental beauty. Whether in a garden bed or container, this resilient plant proves that even beginner gardeners can successfully cultivate a health-boosting superfood at home.
With this no-fuss guide, your garden can now produce homegrown chia seeds and leaves quickly and efficiently, allowing you to enjoy fresh, healthy, and sustainable harvests all season long.