In today’s world, sustainability is no longer just a choice; it’s a lifestyle. One of the simplest ways to embrace eco-friendly practices while also enjoying fresh, homegrown produce is by recycling plastic bottles to grow vegetables. This innovative approach not only reduces plastic waste but also allows anyone—regardless of space—to cultivate a mini vegetable garden right at home. Whether you live in an apartment with limited balcony space or have a backyard to spare, using plastic bottles as planters is an inexpensive, creative, and highly practical solution.
Why Choose Plastic Bottle Gardening?
Plastic bottles are everywhere—from water bottles to soda bottles—and they often end up polluting rivers and landfills. Repurposing them for gardening offers several benefits:
- Cost-Effective – Plastic bottles are free once used, eliminating the need for expensive pots or garden beds.
- Eco-Friendly – Reduces waste and contributes to a greener planet by keeping plastic out of landfills.
- Space-Saving – Perfect for vertical gardening, balcony gardens, and small indoor spaces.
- Customizable – Bottles come in various sizes, so they can accommodate different vegetable types.
- Portable – Light and easy to move, allowing you to adjust sunlight exposure and rearrange your garden anytime.
Choosing the Right Bottles
Not all plastic bottles are created equal when it comes to gardening. The best options are sturdy bottles with wide openings, such as 1-2 liter soda bottles or large water bottles. Avoid very thin bottles that may collapse under soil weight. Make sure to clean them thoroughly to remove any chemical residues that could affect plant growth.
Preparing Your Plastic Bottles for Planting
Turning a plastic bottle into a vegetable planter is simple, but a few preparations are essential for healthy growth:
- Cutting the Bottle – Depending on your method, you can cut the bottle horizontally to create an open-top planter or vertically for a hanging or vertical garden. Leave enough space for soil and root development.
- Drainage Holes – Drill or poke 3-5 small holes at the bottom of the bottle to allow excess water to escape. Proper drainage prevents root rot and promotes healthy plant growth.
- Adding a Base Layer – Start with a small layer of pebbles or broken ceramic pieces to enhance drainage. This helps prevent waterlogging in the soil.
- Filling with Soil – Use a good-quality potting mix enriched with compost. For leafy vegetables, a light, nutrient-rich soil works best; for root vegetables, use deeper soil to allow roots to expand.
Best Vegetables for Plastic Bottle Gardens
While many vegetables can thrive in recycled bottle gardens, some are particularly suited to this setup:
- Lettuce – Fast-growing, shallow-rooted, and perfect for small containers.
- Spinach – Requires minimal soil depth and provides a nutritious leafy harvest.
- Radishes – Quick-growing root vegetable that fits well in narrow bottles.
- Carrots – Choose small or short carrot varieties that won’t require deep soil.
- Tomatoes – Cherry or dwarf varieties work well; ensure the bottle is large enough to accommodate the root system.
- Herbs – Basil, mint, coriander, and parsley thrive in small bottles and are easy to manage indoors.
Planting Step by Step
Here’s a simple guide to planting vegetables in recycled plastic bottles:
- Prepare the Bottle – Cut and drill holes as explained above.
- Layer the Bottom – Add pebbles for drainage.
- Add Soil – Fill the bottle two-thirds with a high-quality potting mix.
- Sow Seeds or Transplant Seedlings – Follow spacing guidelines for each vegetable.
- Water Gently – Moisten the soil without overwatering. Plastic bottles can retain moisture, so monitor soil consistently.
- Place in Sunlight – Most vegetables need 5-6 hours of sunlight per day. A balcony, windowsill, or small garden space works perfectly.
- Regular Care – Fertilize weekly with organic liquid fertilizer, remove yellowing leaves, and check for pests.
Vertical Bottle Gardening: Maximizing Space
One of the most innovative ways to use plastic bottles is by creating a vertical garden. This is particularly useful for small apartments or homes with limited outdoor space. Here’s how you can do it:
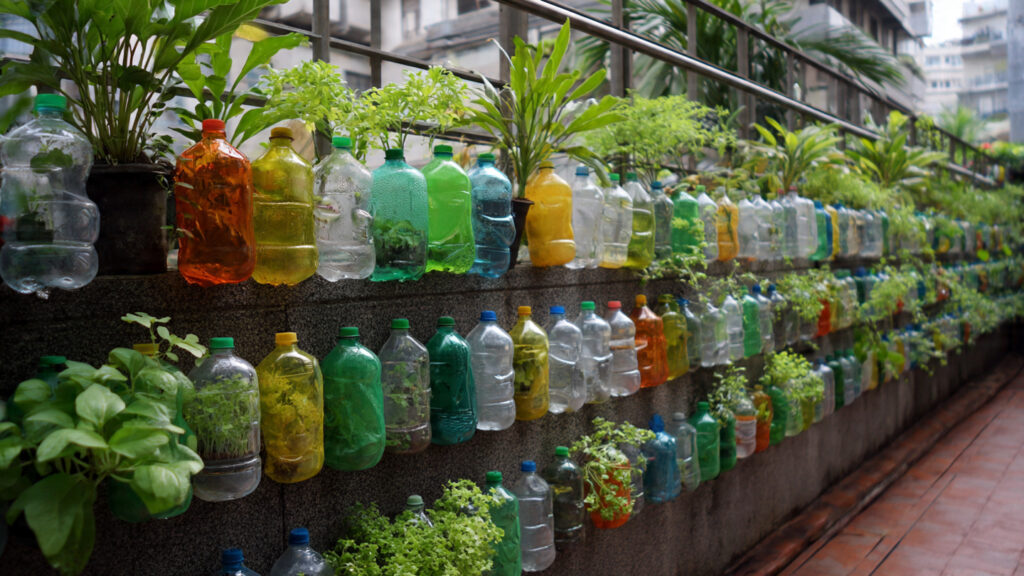
- Choose a Wall or Fence – Use a railing, wall, or balcony fence as the base.
- Attach the Bottles – Cut the bottles as described and hang them with ropes, strings, or hooks. Horizontal stacking is also possible with a wooden frame.
- Plant Your Vegetables – Fill the bottles with soil and plant as usual. Watering from the top ensures water trickles down, nourishing lower bottles as well.
Vertical bottle gardens are not only space-efficient but also visually appealing, creating a green wall that adds beauty to your home.
Caring for Your Bottle Garden
Even though bottle gardening is low-maintenance, vegetables still need attention:
- Watering – Plastic bottles can dry out quickly in warm weather. Check soil moisture daily and water when the top layer feels dry.
- Fertilizing – Use organic fertilizers like compost tea or diluted liquid seaweed every 1-2 weeks to boost growth.
- Pruning – Remove dead or yellow leaves to encourage new growth.
- Pest Management – Spray natural insecticides like neem oil to keep pests away. Avoid chemical pesticides that can accumulate in small containers.
Harvesting Your Vegetables
One of the most rewarding parts of bottle gardening is harvesting fresh vegetables. Leafy greens like lettuce and spinach can be harvested continuously by picking outer leaves, allowing the plant to regrow. Root vegetables such as radishes and carrots are harvested once they reach full size. Herbs can be snipped regularly, which also encourages bushier growth.
Benefits Beyond Gardening
Growing vegetables in recycled bottles offers more than just fresh produce:
- Educational – Teach children about recycling, sustainability, and healthy eating.
- Therapeutic – Gardening reduces stress and improves mental health.
- Aesthetic – Vertical bottle gardens can double as decorative features.
- Community Impact – Encourage neighbors or friends to adopt bottle gardening, promoting eco-conscious living.
Tips for Success
- Rotate bottles periodically to ensure even sunlight exposure.
- Avoid placing bottles in direct, harsh sunlight for extended periods as they can overheat.
- Label your bottles to track different vegetables and planting dates.
- Reuse old bottles as much as possible, but replace them if they crack or degrade.
Conclusion
Recycling plastic bottles to grow vegetables at home is a win-win solution: it reduces environmental waste while providing fresh, nutritious produce. This approach is accessible, affordable, and highly rewarding for anyone interested in sustainable living, regardless of the size of their living space. By following simple steps—preparing bottles, selecting suitable vegetables, planting, and caring—you can transform ordinary plastic waste into a vibrant, productive garden.
Start small, experiment with different vegetables, and watch your plastic bottle garden flourish. In the process, you’ll not only contribute to a cleaner environment but also enjoy the unparalleled satisfaction of harvesting your own homegrown vegetables. With creativity and care, your recycled bottle garden can become a lush, green haven, a testament to how simple, thoughtful practices can make a meaningful difference in both your home and the planet.