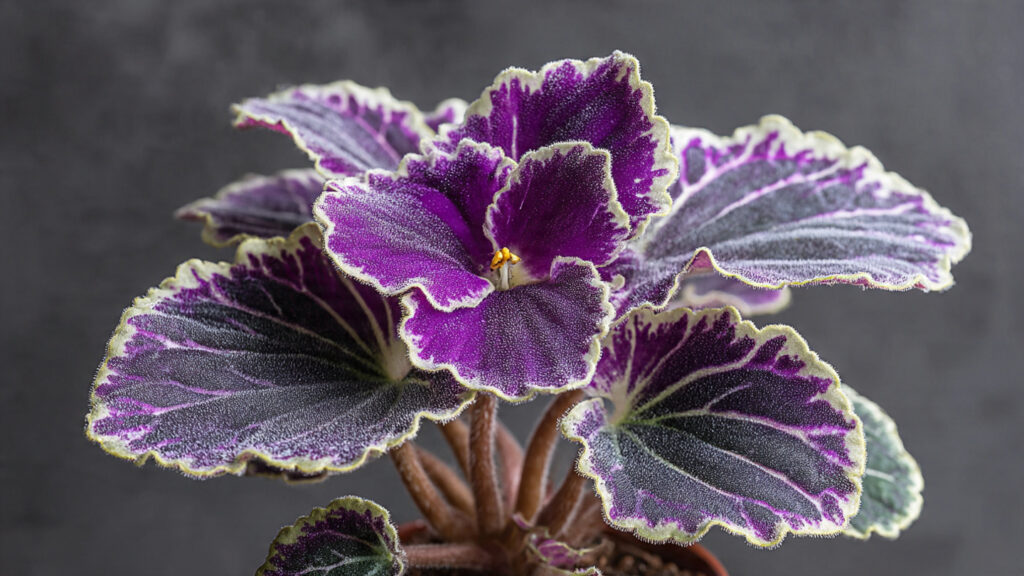
African violets (Saintpaulia ionantha) are among the most popular houseplants worldwide, celebrated for their delicate, colorful flowers, soft velvety leaves, and compact size that suits indoor spaces. While many people purchase mature plants from nurseries, one of the most rewarding aspects of growing African violets is learning how to propagate them. Propagating from a single leaf is a simple and efficient method that allows even beginners to multiply their plants at home. With patience and careful attention, you can transform one leaf into multiple flourishing plants.
This guide will walk you through the steps, from selecting the right leaf to nurturing new plantlets, ensuring your African violets thrive and produce beautiful blooms year after year.
Understanding African Violet Leaf Propagation
African violet propagation relies on the plant’s natural ability to regenerate from its leaves. Each leaf contains meristematic tissue—cells capable of developing roots and eventually growing into a full plant. Key points to understand include:
- Leaf selection matters: Only healthy, mature leaves will successfully produce new plants.
- Rooting potential: The petiole, or leaf stem, must remain intact and viable.
- Timeframe: Rooting may take several weeks, and small plantlets will appear at the base of the leaf before they can be transplanted.
By grasping these basics, beginners can approach propagation confidently and increase their success rate.
Step 1: Choosing the Right Leaf
Selecting a healthy leaf is the foundation of successful propagation:
- Mature leaves: Choose leaves that are fully grown but not old or damaged. Young leaves may lack sufficient energy, while old leaves may decay before producing new plantlets.
- Disease-free: Avoid leaves with spots, yellowing, or signs of pest infestation.
- Medium-sized leaves: Leaves that are too small may produce weak plantlets, while excessively large leaves may rot during rooting.
Typically, leaves from the middle of the rosette work best because they have the ideal balance of vigor and maturity.
Step 2: Preparing the Leaf for Propagation
Once you’ve selected a suitable leaf, preparation is critical:
- Cutting the leaf: Use a clean, sharp knife or scissors to cut the leaf with about 1–1.5 inches of petiole attached. A clean cut prevents infection and ensures the leaf has sufficient tissue to generate roots.
- Optional trimming: Remove any damaged or irregular parts of the leaf edge to reduce stress and potential decay.
- Allowing callus formation (optional): Some gardeners let the cut end of the leaf sit for a few hours to a day to callus over, which can reduce the risk of rot when planted.
Proper preparation helps the leaf focus energy on root and plantlet development.
Step 3: Selecting the Growing Medium
African violets are sensitive to overly wet or dense soils. The right medium encourages healthy root development:
- Soilless mix: Use a light mix such as equal parts peat moss and perlite. This ensures drainage while retaining moisture.
- Avoid garden soil: Heavy soils can suffocate roots and increase rot risk.
- Optional rooting media: Vermiculite, coconut coir, or specialized African violet mix works well for leaf propagation.
The growing medium should be moist but not waterlogged, providing the perfect environment for roots to establish.
Step 4: Planting the Leaf
Planting technique impacts rooting success:
- Insert the petiole: Place the cut end of the leaf about ½ inch into the medium. Firm the soil gently around the base to provide support.
- Depth caution: Do not bury the leaf too deep; excessive burial may lead to rot.
- Container selection: Use small pots or trays with drainage holes to prevent excess moisture buildup.
Correct planting ensures the leaf stays upright and encourages roots to grow effectively.
Step 5: Creating a Humid Environment
African violet leaf cuttings root best in a humid, stable environment:
- Covering: Use a clear plastic bag or a small plastic dome to create a mini-greenhouse effect.
- Air circulation: Leave a small opening to prevent mold and fungus growth.
- Temperature: Maintain a warm environment between 70–75°F (21–24°C). Avoid cold drafts or direct sunlight.
A controlled, humid microclimate minimizes stress on the leaf and accelerates rooting.
Step 6: Watering and Moisture Management
Moisture is essential, but overwatering can kill the cutting:
➡️ How to Grow Malabar Spinach from Cuttings for Fast, Easy Greens
➡️ How to Grow Super Delicious Cabbage at Home Without a Garden
➡️ How to Grow Bean Sprouts at Home in Plastic Bottles Easily (Step‑by‑Step Guide)
➡️ Why is Your Lemon Tree Blooming in the Heart of Winter?
➡️ Why Should Your Garden Have a Dedicated Pollinator Highway?
➡️ Why Do Your Fruit Trees Need a Winter Wash to Thrive in Spring?
➡️ How Can Rice Water Transform Your Fruits into Sweeter Delights?
➡️ Jumpstart Your Winter Garden: Seed Starting Under Lights
- Initial watering: Lightly moisten the medium before inserting the leaf.
- Ongoing care: Mist occasionally or keep the soil consistently damp. Avoid waterlogging.
- Observation: Check the soil regularly; if the medium begins to dry out, water lightly.
Balanced moisture ensures root formation without promoting rot.
Step 7: Monitoring Rooting Progress
Roots usually develop within 3–6 weeks:
- Signs of success: Slight swelling at the base of the petiole and resistance when gently tugged indicate root formation.
- Patience: Avoid disturbing the cutting too early; premature handling can damage delicate roots.
- Plantlet emergence: Small leaves or baby rosettes may appear at the base of the leaf after 6–8 weeks, depending on conditions.
Monitoring without unnecessary interference is key to successful propagation.
Step 8: Transplanting New Plantlets
Once plantlets develop, they need to be separated from the mother leaf:
- Wait for sufficient size: Ensure plantlets have 2–3 true leaves and a small root system.
- Separation: Gently cut or twist plantlets away from the parent leaf.
- Potting: Plant each young violet in individual pots with a light, well-draining soil mix.
- Care after transplanting: Provide bright, indirect light, maintain consistent moisture, and avoid overfertilization.
Proper transplantation helps young African violets establish quickly and thrive.
Step 9: Fertilization for Growth
Once plantlets are established, light fertilization encourages strong growth:
- Diluted fertilizer: Use a balanced liquid fertilizer at ¼ strength every 2–3 weeks.
- Avoid overfeeding: Too much fertilizer can damage roots and stunt growth.
- Slow-release options: Small slow-release pellets can supplement nutrients if desired.
Balanced feeding ensures healthy foliage and prepares plantlets for future flowering.
Step 10: Maintaining Healthy African Violets
After propagation, consistent care is essential to grow vibrant plants:
- Light: Provide bright, indirect sunlight. Too little light results in leggy growth; too much direct sun can burn leaves.
- Watering: Bottom watering is ideal to prevent water on leaves, which can cause spotting or rot.
- Humidity: Maintain moderate indoor humidity levels to support growth.
- Pruning: Remove damaged or yellow leaves to promote healthy development.
Proper ongoing care helps young plants transition into mature, flowering African violets.
Common Problems and Solutions
Even with careful propagation, challenges may arise:
- Rotting leaf: Usually caused by overwatering or poor drainage. Remove affected leaves and adjust watering practices.
- Slow growth: Insufficient light or cold temperatures may inhibit plantlet development. Move to a brighter, warmer location.
- Pests: Aphids or mealybugs can infest young plants. Treat with mild insecticidal soap if necessary.
Early intervention and careful monitoring prevent minor issues from becoming serious problems.
Advantages of Leaf Propagation
Leaf propagation offers several benefits for beginners:
- Cost-effective: Multiply African violets without purchasing new plants.
- Preserve genetics: Maintain the characteristics of the parent plant.
- Easy and rewarding: Even beginners can succeed with minimal equipment.
- Continuous growth: Allows gardeners to create multiple plants from a single leaf.
This method is ideal for indoor gardeners with limited space or those wishing to expand their collection.
Final Thoughts
Propagating African violets from a leaf is a simple, effective, and highly rewarding method for both beginners and experienced plant enthusiasts. By selecting healthy leaves, planting them correctly, maintaining humidity and moisture, and patiently nurturing new plantlets, anyone can create multiple thriving African violets from a single leaf.
This technique not only saves money but also deepens your connection with your plants as you witness the transformation from leaf to full, blooming plant. With consistent care and attention to detail, your propagated African violets will flourish, producing beautiful flowers and adding lasting beauty to your indoor spaces.