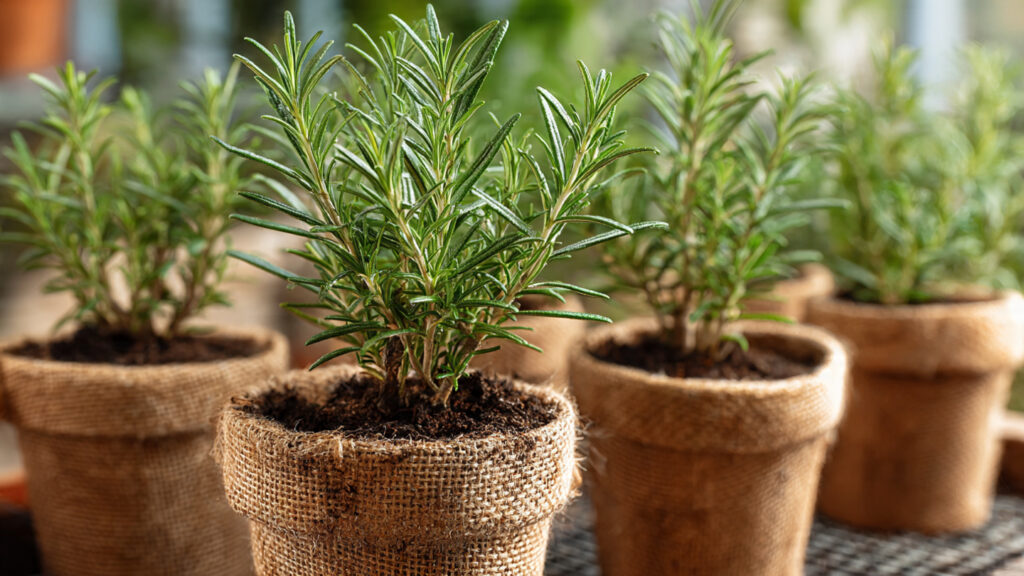
Rosemary (Rosmarinus officinalis) is one of the most versatile and rewarding herbs to grow at home. Its fragrant, needle-like leaves are prized in culinary dishes, teas, and homemade remedies, while its aromatic scent and evergreen nature add charm to any garden or balcony. Growing rosemary from softwood cuttings is a simple and cost-effective way for beginners to propagate this aromatic plant, ensuring a steady supply of fresh herbs year-round.
Softwood cuttings, taken from the tender, young growth of an existing plant, root more quickly than hardwood cuttings, making this an ideal method for new gardeners. This comprehensive step-by-step guide will walk you through the entire process — from selecting the right cutting to nurturing a healthy, thriving rosemary plant.
Why Choose Softwood Cuttings?
Softwood cuttings offer several advantages over seeds or hardwood cuttings:
- Faster Rooting: Softwood cuttings root in 2–6 weeks, compared to months for seeds.
- Genetic Consistency: The new plant is identical to the parent, preserving flavor and growth characteristics.
- Beginner-Friendly: Requires minimal tools and space.
- Continuous Growth: Allows you to expand your garden or share plants with friends.
Softwood cuttings are taken from fresh, tender shoots that are actively growing, which contain higher concentrations of hormones that encourage root formation.
Step 1: Select a Healthy Parent Plant
The first step is to choose a robust, disease-free rosemary plant. Look for a plant that:
- Has healthy green stems and leaves
- Shows active growth (not woody or old)
- Is free from pests or fungal infections
Avoid using stressed or recently pruned plants, as these may have lower success rates for rooting.
Step 2: Identify the Right Cutting
Softwood cuttings should be taken from the current season’s growth. Ideally, select:
- New, flexible shoots (not woody)
- 4–6 inches in length
- Free from flowers, as blooms divert energy away from root development
Use a clean pair of pruning shears or scissors to make a neat cut just below a leaf node. The leaf node is where roots are most likely to form.
Step 3: Prepare the Cutting
Proper preparation of the cutting is crucial for successful rooting:
- Trim the Leaves: Remove the lower leaves, leaving 2–3 inches of bare stem at the bottom. This prevents rot and focuses energy on root formation.
- Optional: Lightly scrape the bottom of the stem with a knife to expose fresh tissue. This increases rooting potential.
- Use Rooting Hormone (Optional): Dip the cut end in powdered or liquid rooting hormone. While not strictly necessary, this can accelerate root growth and increase success rates.
Step 4: Select a Suitable Potting Medium
Softwood cuttings root best in a light, well-draining medium. Recommended mixes include:
- Equal parts peat moss and perlite
- A mix of vermiculite and sand
- Commercial seed-starting mix with added perlite
Avoid heavy garden soil, which can retain too much moisture and cause rot. Fill small pots or trays with the medium, gently firming it but leaving it loose enough for the roots to penetrate easily.
Step 5: Plant the Cutting
- Make a small hole in the potting medium with a pencil or your finger.
- Insert the prepared cutting about 1–2 inches deep.
- Firm the soil around the cutting to hold it upright.
- Water lightly to settle the soil, ensuring it is moist but not waterlogged.
Step 6: Provide Optimal Environmental Conditions
Softwood cuttings need a warm, humid environment to encourage root growth:
- Light: Place cuttings in bright, indirect light. Avoid direct sunlight, which can stress the tender stems.
- Temperature: Maintain a temperature between 65–75°F (18–24°C).
- Humidity: Cover the pot with a clear plastic bag or a mini greenhouse to retain moisture. Ensure some air circulation to prevent mold.
Check the cuttings daily to ensure the medium remains lightly moist and that condensation does not cause rot.
Step 7: Watering and Moisture Management
Maintaining consistent moisture is key:
- Use a spray bottle to mist the soil lightly every day.
- Avoid soaking the medium, as excess water can lead to fungal infections.
- Once roots begin to form, gradually reduce humidity by removing the plastic cover for a few hours each day.
Step 8: Monitor Root Development
Softwood rosemary cuttings typically root within 2–6 weeks, depending on environmental conditions and plant vigor. You can check progress by:
➡️ How to Grow Malabar Spinach from Cuttings for Fast, Easy Greens
➡️ How to Grow Super Delicious Cabbage at Home Without a Garden
➡️ How to Grow Bean Sprouts at Home in Plastic Bottles Easily (Step‑by‑Step Guide)
➡️ Why is Your Lemon Tree Blooming in the Heart of Winter?
➡️ Why Should Your Garden Have a Dedicated Pollinator Highway?
➡️ Why Do Your Fruit Trees Need a Winter Wash to Thrive in Spring?
➡️ How Can Rice Water Transform Your Fruits into Sweeter Delights?
➡️ Jumpstart Your Winter Garden: Seed Starting Under Lights
- Gently tugging on the cutting; resistance indicates root formation.
- Observing new growth at the top, which suggests roots are developing.
Avoid disturbing cuttings prematurely, as this can damage fragile developing roots.
Step 9: Transplanting the Rooted Cuttings
Once the cuttings have established a healthy root system, it’s time to move them to a larger pot or directly into your garden:
- Gently remove the rooted cutting from its potting medium.
- Inspect the roots; healthy roots are white and fibrous.
- Plant in well-draining soil enriched with compost or organic matter.
- Water thoroughly and mulch lightly to retain moisture.
If transplanting outdoors, choose a sunny, sheltered location with well-draining soil.
Step 10: Care After Transplanting
After transplantation, young rosemary plants require extra care:
- Watering: Keep soil consistently moist for the first few weeks to help establish roots. Gradually reduce watering as the plant matures.
- Sunlight: Ensure at least 6–8 hours of full sun daily for optimal growth.
- Fertilization: Use a balanced, slow-release fertilizer sparingly. Over-fertilizing can lead to lush foliage but weak flavor.
- Pruning: Trim the tips occasionally to encourage bushier growth and prevent legginess.
Step 11: Common Problems and How to Solve Them
1. Cutting Dies Before Rooting
- Cause: Overwatering, low light, or diseased parent plant
- Solution: Ensure proper light, maintain moderate moisture, and use healthy cuttings.
2. Stem Rot
- Cause: Excess humidity or waterlogged medium
- Solution: Use well-draining soil and provide air circulation; remove affected stems promptly.
3. Slow Root Development
- Cause: Low temperatures or lack of rooting hormone
- Solution: Maintain warm conditions and consider using rooting hormone to accelerate growth.
Step 12: Tips for Beginner Gardeners
- Take multiple cuttings to increase the chance of success.
- Label each pot with the date of propagation to track progress.
- Rotate trays or pots for even light exposure.
- Use clean, sterilized tools to prevent disease transmission.
- Be patient — rosemary is slow to root, but persistence pays off.
Step 13: Expanding Your Rosemary Garden
Once your cuttings are established, you can:
- Share Plants: Give rooted plants to friends or family.
- Create a Hedge or Border: Plant multiple rosemary shrubs for a fragrant garden border.
- Container Gardening: Keep young plants in pots until ready to transplant outdoors.
- Culinary Harvest: Regularly trim leaves for cooking, which also encourages bushy growth.
Propagating from cuttings is a sustainable way to grow multiple plants without purchasing new ones.
Step 14: Seasonal Considerations
Rosemary is hardy in mild climates but requires some seasonal adjustments:
- Winter: Protect young cuttings from frost by bringing them indoors or covering them with frost cloth.
- Summer: Provide adequate water, especially during dry spells, and prevent scorching from intense sun.
- Pruning: Lightly trim annually to maintain shape and encourage vigorous growth.
Understanding seasonal needs ensures your propagated plants thrive year-round.
Step 15: The Rewards of Growing Rosemary from Cuttings
Growing rosemary from softwood cuttings is more than just a gardening task — it is a rewarding experience:
- Fresh Herbs Anytime: Enjoy a constant supply of aromatic leaves for cooking.
- Cost-Effective: Propagate new plants from a single parent plant.
- Satisfaction: Witnessing cuttings transform into thriving plants is immensely satisfying.
- Eco-Friendly: Reduces reliance on commercially grown herbs, lowering your carbon footprint.
Final Thoughts
Propagating rosemary from softwood cuttings is an ideal project for beginners. By carefully selecting healthy shoots, preparing cuttings correctly, providing optimal conditions, and patiently nurturing them, you can successfully grow robust rosemary plants that thrive indoors, on balconies, or in your garden.
Remember the key steps:
- Choose a healthy parent plant.
- Take softwood cuttings from new growth.
- Prepare cuttings by trimming leaves and optionally using rooting hormone.
- Plant in a well-draining, moist medium.
- Maintain humidity, warmth, and indirect light.
- Monitor root development and transplant once roots are strong.
- Provide consistent care and pruning to encourage bushy growth.
With patience, attention, and proper care, your softwood cuttings will flourish, producing fragrant leaves and becoming a beautiful, evergreen addition to your herb garden. Whether for cooking, aromatherapy, or garden aesthetics, rosemary propagated from cuttings is a rewarding plant that keeps giving year after year.