Cabbage is one of the most nutritious and versatile vegetables you can grow at home. Packed with vitamins, minerals, and fiber, it is a staple in many kitchens worldwide. But traditional cabbage cultivation can take up space, require significant investment in pots or raised beds, and often involve expensive fertilizers and soil amendments. What if I told you that you could grow healthy, large cabbages using nothing but discarded plastic bottles? Yes, you read that right! With this innovative method, you can turn waste into a productive garden, grow your own cabbage with zero cost, and achieve maximum yield right on your balcony, terrace, or backyard.
In this article, I’ll take you through every step of this surprisingly easy, sustainable, and highly effective method for growing cabbages in plastic bottles.
Why Grow Cabbage in Plastic Bottles?
Before we dive into the steps, let’s understand why this method is both practical and eco-friendly:
- Zero Cost Gardening: Plastic bottles are abundant and usually discarded after a single use. By repurposing them, you save money on pots or planters.
- Space Efficiency: Bottles can be hung vertically or stacked, making it perfect for small spaces like balconies or urban rooftops.
- Sustainable and Eco-Friendly: Reduce plastic waste while producing nutritious vegetables for your family.
- Controlled Growth Environment: Plastic bottles help retain moisture and heat, which can promote faster cabbage growth.
- Maximized Yield: By growing in compact vertical arrangements, you can produce more cabbages in less space.
Materials You Will Need
You don’t need fancy equipment for this method. Here’s what you need:
- Empty 2-liter or 1.5-liter plastic bottles (as many as you want to grow)
- Sharp knife or scissors
- Small gravel or pebbles for drainage
- Quality garden soil or homemade compost
- Cabbage seeds or seedlings
- Watering can or spray bottle
Optional: Rope or string for vertical hanging setups.
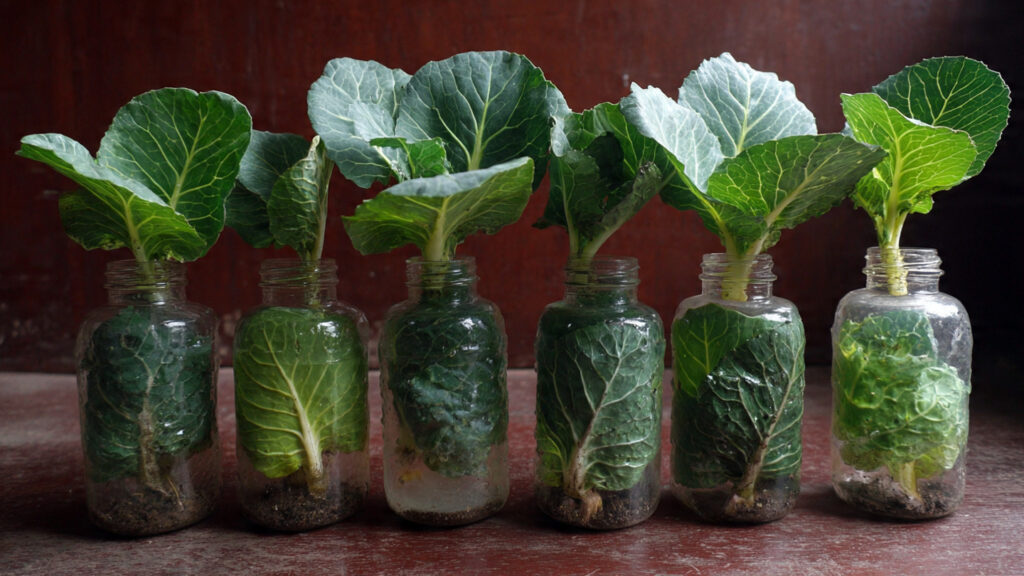
Step 1: Prepare the Plastic Bottles
- Wash the bottles thoroughly to remove any residue.
- Cut the bottle horizontally about one-third from the bottom. The bottom part will serve as the main soil container.
- Make small drainage holes at the base of the bottle to allow excess water to escape.
- Optionally, you can make side slits in the upper part of the bottle to create pockets for additional soil and seedlings—perfect for vertical planting.
Step 2: Create the Perfect Soil Mix
Healthy cabbages need nutrient-rich soil. You can either use garden soil or make a homemade compost mix:
- 50% garden soil
- 30% compost or decomposed kitchen waste
- 20% sand or perlite for aeration
Fill the bottom part of the bottle with 1–2 inches of gravel for drainage. Then add your prepared soil mix, leaving about an inch at the top for watering.
Step 3: Plant the Cabbage Seeds or Seedlings
- If using seeds, plant 2–3 seeds in each bottle about 0.5 inches deep. Cover lightly with soil.
- If using seedlings, make a small hole in the soil, place the seedling gently, and pat the soil around it.
- Water lightly to settle the soil.
💡 Tip: If planting vertically using side pockets, place one small seedling in each pocket. This allows multiple cabbages to grow in a single bottle.
Step 4: Arrange Bottles for Maximum Sunlight
Cabbages need 6–8 hours of sunlight daily to thrive. Depending on your available space:
- Vertical Hanging: Hang bottles using ropes or string. Ensure each bottle receives adequate sunlight.
- Balcony Layout: Place bottles on a railing or stacked shelves for efficient space usage.
- Ground Setup: Line bottles on the ground, ensuring drainage water flows freely.
Step 5: Watering and Care
Proper watering is crucial for healthy cabbage growth:
- Water 2–3 times per week, depending on climate. The soil should stay moist but not soggy.
- Use a spray bottle to avoid washing seeds away during germination.
- Fertilize using homemade compost tea or diluted kitchen waste liquid every 2–3 weeks. This provides essential nutrients without extra cost.
💡 Quick Tip: If your climate is hot, consider partially shading bottles during peak afternoon hours to prevent leaf burn.
Step 6: Support and Pruning
- As cabbages grow, their leaves can become heavy. Provide support by tying a soft string to the bottle neck and securing it to a stable structure.
- Remove yellowing or damaged leaves to promote healthy growth and prevent disease.
Step 7: Pest Management—Naturally
Pests can be a problem in cabbage cultivation. Instead of chemicals, use eco-friendly solutions:
- Spray a mixture of water and neem oil weekly to deter aphids and cabbage worms.
- Intercrop with herbs like basil or mint to naturally repel pests.
- Handpick any visible pests and drop them into soapy water.
Step 8: Harvesting Your Cabbage
Cabbages grown in bottles typically mature in 70–90 days, depending on the variety. Signs that your cabbage is ready:
- Firm, tight heads
- Outer leaves healthy and green
- No signs of pests or rot
To harvest: cut the cabbage at the base, leaving the roots in the soil. Often, a secondary smaller head will sprout for another quick harvest!
Tips to Maximize Yield
- Rotate crops: After harvesting, grow another quick-growing vegetable like lettuce or spinach in the bottle.
- Stack vertically: Utilize vertical space to grow multiple cabbages in a compact area.
- Use sunlight strategically: Rotate bottles weekly for even light exposure.
- Regular feeding: Even a little compost tea can dramatically increase head size.
Benefits You’ll Enjoy
- Huge Savings: Grow nutritious cabbages without spending on pots or fertilizers.
- Eco-Friendly: Reduce plastic waste by repurposing bottles for gardening.
- Fresh and Healthy: Nothing beats the taste of home-grown cabbage, free from chemicals.
- Compact Gardening: Perfect for urban homes, terraces, and balconies.
- Educational: Great project for kids and family to learn about sustainable gardening.
Final Thoughts
This plastic bottle cabbage growing method is more than just a gardening hack—it’s a lifestyle choice. It combines sustainability, cost-saving, and practical vegetable cultivation into one simple system. With just a few discarded bottles, some soil, and basic care, you can enjoy big, healthy cabbages right at home.
➡️ How to Grow Malabar Spinach from Cuttings for Fast, Easy Greens
➡️ How to Grow Super Delicious Cabbage at Home Without a Garden
➡️ How to Grow Bean Sprouts at Home in Plastic Bottles Easily (Step‑by‑Step Guide)
➡️ Why is Your Lemon Tree Blooming in the Heart of Winter?
➡️ Why Should Your Garden Have a Dedicated Pollinator Highway?
➡️ Why Do Your Fruit Trees Need a Winter Wash to Thrive in Spring?
➡️ How Can Rice Water Transform Your Fruits into Sweeter Delights?
➡️ Jumpstart Your Winter Garden: Seed Starting Under Lights
Whether you’re a beginner gardener or an experienced urban farmer, this method will surprise you with its efficiency and yield. Not only will you get to enjoy the fruits (or rather, vegetables!) of your labor, but you’ll also contribute to reducing plastic waste and creating a greener, healthier environment.
So, gather your plastic bottles, prepare your soil, and start growing cabbages the smart, sustainable, and zero-cost way. Your taste buds—and your wallet—will thank you!