Urban gardening is no longer limited to backyards or large plots of land. Even in small apartments or balcony spaces, you can cultivate a flourishing vegetable garden with a bit of creativity. One of the most innovative and eco-friendly approaches is recycling plastic bottles to grow your own food. With millions of plastic bottles discarded every day, repurposing them into planters not only reduces waste but also creates a sustainable and productive garden. This guide will walk beginners through the process of transforming plastic bottles into a thriving vegetable garden, from preparation to planting, care, and harvest.
Why Use Plastic Bottles for Gardening?
Plastic bottles are an accessible and inexpensive gardening resource. They are lightweight, durable, and easy to manipulate. Here’s why using them makes sense:
- Eco-Friendly: Recycling bottles reduces plastic waste and lowers your environmental footprint.
- Space-Saving: Perfect for balconies, windowsills, or small patios. Vertical arrangements maximize growing space.
- Affordable: Plastic bottles are often free or low-cost, making gardening accessible for everyone.
- Customizable: Bottles can be cut, stacked, or hung to suit different plants and spaces.
- Mobility: Lightweight containers are easy to move for optimal sunlight or protection from extreme weather.
By repurposing plastic bottles, you create a sustainable growing system while contributing to a greener environment.
Step 1: Collecting and Preparing Plastic Bottles
Before planting, gather suitable plastic bottles and prepare them for gardening.
Choosing the Right Bottles
- Bottles of 1–2 liters are ideal for most vegetables.
- Use clear bottles for seedlings to monitor root growth. Opaque bottles prevent algae in longer-term containers.
- Avoid bottles with labels that may contain toxic ink or chemicals.
Cleaning the Bottles
- Wash bottles thoroughly with mild soap and water.
- Rinse to remove any residues that could harm seedlings.
- Dry completely before cutting to prevent mold growth.
Cutting and Shaping
- For vertical planters: Cut a large vertical slit or half the bottle to create a planting area.
- For hanging or horizontal planters: Cut openings at the side, leaving enough structure to hold soil.
- Drill drainage holes at the bottom to prevent waterlogging.
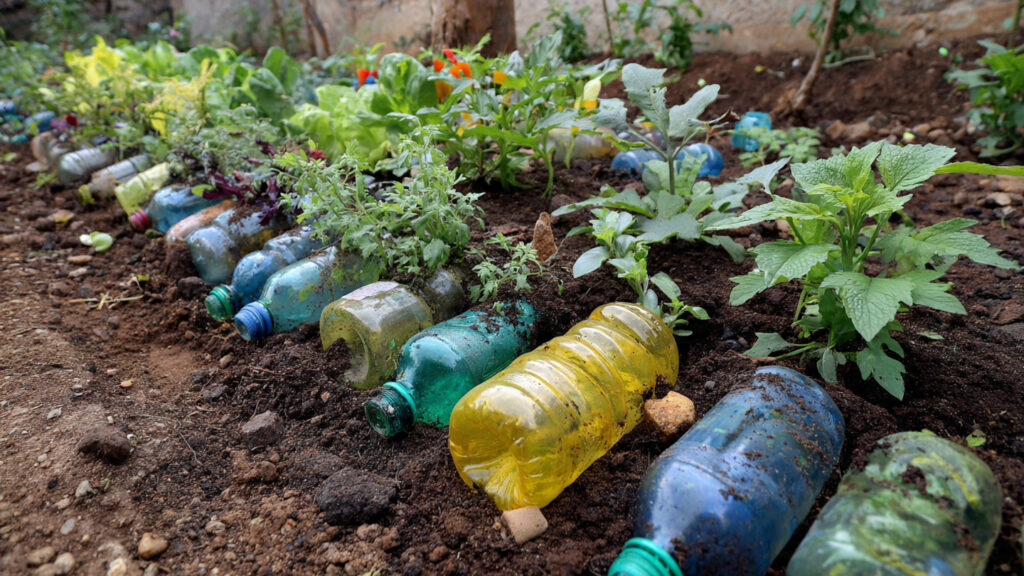
Plastic bottles can be customized into hanging, vertical, or table-top planters based on space and preference.
Step 2: Choosing Soil and Fertilizer
Healthy soil is critical for a thriving vegetable garden.
Soil Mix
- Use a lightweight, well-draining potting mix.
- Mix in compost or organic matter to provide essential nutrients.
- Avoid heavy garden soil, which can compact in small containers and restrict root growth.
Fertilization
- Organic fertilizers like vermicompost, bone meal, or compost tea nourish vegetables naturally.
- Apply lightly during the growing season, as small containers hold nutrients in limited amounts.
A rich, well-draining soil mix ensures plants grow strong and productive in confined spaces.
Step 3: Selecting Vegetables for Plastic Bottle Gardening
Some vegetables thrive better in container gardening than others. Here are beginner-friendly options:
- Leafy Greens – Lettuce, spinach, and kale grow quickly and don’t need deep soil.
- Herbs – Basil, mint, coriander, and parsley adapt well to small spaces and require minimal care.
- Small Fruits – Cherry tomatoes, chili peppers, and dwarf eggplants can flourish with proper support.
- Root Vegetables – Radishes, carrots, and baby beets grow well in deep bottles with loose soil.
- Climbing Vegetables – Beans or peas can be trained to grow vertically, maximizing space.
Choose vegetables based on your available light, space, and water access for the best results.
Step 4: Planting Techniques
Proper planting ensures your vegetables establish strong roots and grow healthily.
Seed Starting
- Fill bottles with the soil mix and gently plant seeds at the recommended depth.
- Keep the soil moist but not soggy.
- Cover bottles with a clear plastic or cling wrap to create a mini-greenhouse effect, promoting germination.
Transplanting Seedlings
- Once seedlings develop 2–3 true leaves, transplant them into larger bottles if needed.
- Ensure roots are not crowded and soil is firm around them.
- Water immediately after transplanting to reduce shock.
Plastic bottles make it easy to start seeds indoors and move them as plants grow, providing flexibility and protection.
Step 5: Watering and Maintenance
Container plants require careful watering and attention to prevent stress or nutrient deficiencies.
- Watering: Small containers dry out faster, so check soil daily. Water when the top inch is dry.
- Drainage: Ensure bottles have sufficient holes to prevent root rot. Elevate containers slightly to allow excess water to escape.
- Sunlight: Most vegetables need 4–6 hours of sunlight daily. Place bottles on a balcony ledge, window, or hang vertically for optimal exposure.
- Pruning: Remove dead leaves and trim overgrown plants to encourage airflow and prevent disease.
Regular care ensures your vegetables remain healthy and productive throughout the growing season.
Step 6: Vertical and Hanging Gardens
Plastic bottles are excellent for vertical gardening, especially in small spaces.
- Hanging Planters: Attach strings or wires to bottles to suspend them from railings or ceilings.
- Stacked Planters: Cut multiple bottles in half and stack or attach them to walls for a vertical garden.
- Trellises and Supports: Climbing vegetables like beans or tomatoes benefit from trellises attached to vertical bottles.
Vertical arrangements maximize space, improve light exposure, and create a visually appealing garden.
➡️ How to Grow Malabar Spinach from Cuttings for Fast, Easy Greens
➡️ How to Grow Super Delicious Cabbage at Home Without a Garden
➡️ How to Grow Bean Sprouts at Home in Plastic Bottles Easily (Step‑by‑Step Guide)
➡️ Why is Your Lemon Tree Blooming in the Heart of Winter?
➡️ Why Should Your Garden Have a Dedicated Pollinator Highway?
➡️ Why Do Your Fruit Trees Need a Winter Wash to Thrive in Spring?
➡️ How Can Rice Water Transform Your Fruits into Sweeter Delights?
➡️ Jumpstart Your Winter Garden: Seed Starting Under Lights
Step 7: Pest Management
Container gardening can reduce pests, but vigilance is still necessary:
- Inspect Regularly: Check leaves and stems for aphids, spider mites, or whiteflies.
- Organic Solutions: Use neem oil, insecticidal soap, or manual removal for small infestations.
- Cleanliness: Remove dead leaves and old soil to prevent fungal growth and insect breeding.
Maintaining hygiene and monitoring plants reduces stress and enhances growth.
Step 8: Harvesting Your Vegetables
The joy of a plastic bottle garden is harvesting fresh, homegrown produce:
- Leafy greens: Pick outer leaves regularly to encourage continuous growth.
- Herbs: Snip frequently for culinary use; they grow back quickly.
- Fruits and vegetables: Harvest when ripe to promote further production and avoid overripening.
Timely harvesting ensures you enjoy the maximum yield and flavor from your balcony garden.
Step 9: Seasonal Rotation and Reuse
Plastic bottles are durable and can be reused for multiple growing seasons:
- After harvesting, refresh the soil with compost and nutrients.
- Rotate vegetables to prevent soil depletion and reduce pest problems.
- Repair or replace damaged bottles to maintain structural integrity.
Reusing bottles makes your gardening cycle sustainable and cost-effective.
Step 10: Benefits Beyond Gardening
Repurposing plastic bottles for vegetables offers more than just fresh produce:
- Environmental Impact: Reduces plastic waste and encourages sustainable practices.
- Educational Value: A practical way to teach children about recycling, gardening, and nutrition.
- Cost Savings: Grow your own food, reducing grocery bills.
- Wellness: Gardening reduces stress, promotes mindfulness, and provides physical activity.
Plastic bottle gardening combines environmental stewardship with tangible personal and health benefits.
Conclusion
Transforming plastic bottles into a thriving vegetable garden is an innovative and beginner-friendly way to grow food in limited spaces. From collecting and preparing bottles to planting, watering, vertical gardening, and pest management, every step contributes to a productive and sustainable system. By repurposing trash into a functional garden, you not only enjoy fresh, homegrown vegetables but also contribute to environmental sustainability.
This beginner’s guide demonstrates that even small spaces can produce vibrant, healthy vegetables with creativity, care, and dedication. Balcony gardening with plastic bottles is more than a hobby—it’s a movement toward greener, healthier, and more sustainable urban living. Whether you’re growing herbs for your kitchen, leafy greens for salads, or small vegetables for family meals, turning plastic bottles into planters offers an accessible, rewarding, and eco-conscious way to cultivate your own fresh produce.
Start today, collect those bottles, and watch your balcony transform from “trash to table”—a flourishing vegetable garden that nourishes both body and planet.