Star fruit, also known as carambola, is a tropical fruit cherished for its crisp texture, tangy-sweet flavor, and iconic star-shaped slices. While often grown in tropical gardens, you don’t need a sprawling backyard to enjoy homegrown star fruit. With the right care, star fruit trees can thrive in pots, giving you fresh fruit right at your doorstep.
If you’ve ever wondered how to grow star fruit in a pot, from seed to harvest, and want to know what to expect over the first two years, this guide is perfect for you. We’ll cover everything from selecting seeds to full 2-year updates, so you can enjoy healthy, fruit-bearing plants in containers.
Year 0: Choosing Seeds and Preparing the Pot
Starting with quality seeds is the first step in cultivating a successful potted star fruit tree.
Selecting seeds:
- Choose fresh star fruit seeds from a ripe, healthy fruit.
- Wash off all pulp to prevent mold growth.
- Optional: Soak seeds in water for 24 hours to encourage faster germination.
Choosing a pot:
- Use a large container with a minimum diameter of 12–14 inches for young plants.
- Ensure the pot has good drainage holes to prevent waterlogging.
- Use a well-draining potting mix, combining garden soil, sand, and organic compost.
Planting the seeds about ½ inch deep in the soil and keeping the pot in a warm, bright location ensures optimal germination.
Watering and care:
- Keep the soil consistently moist but not soggy.
- Maintain a temperature of 75–85°F for optimal sprouting.
- Germination usually occurs within 2–4 weeks.
Year 1: Early Growth and Seedling Care
Once the seeds sprout, your focus shifts to nurturing strong seedlings. Healthy early growth lays the foundation for thick stems and fruit production in later years.
Sunlight and location:
- Place the pot in a location receiving 6–8 hours of indirect sunlight daily.
- Gradually acclimate seedlings to direct sunlight to strengthen them.
Watering routine:
- Water regularly to keep the soil slightly moist. Avoid overwatering as this can cause root rot.
- Mist the leaves occasionally to maintain humidity, which mimics their tropical environment.
Fertilization:
- Begin using a balanced liquid fertilizer every 4–6 weeks after the first true leaves appear.
- Organic options like compost tea or diluted fish emulsion work well for young plants.
Pruning and support:
- For seedlings, prune only dead or yellow leaves.
- Use a small stake to support the young stem and encourage upright growth.
By the end of the first year, your star fruit seedling should be 12–18 inches tall with healthy foliage and a sturdy stem.
Year 2: Strengthening the Plant and Preparing for Fruiting
During the second year, your potted star fruit tree focuses on growth and strengthening branches. This period is crucial for ensuring future fruit production.
Pot and soil management:
➡️ How to Grow Malabar Spinach from Cuttings for Fast, Easy Greens
➡️ How to Grow Super Delicious Cabbage at Home Without a Garden
➡️ How to Grow Bean Sprouts at Home in Plastic Bottles Easily (Step‑by‑Step Guide)
➡️ Why is Your Lemon Tree Blooming in the Heart of Winter?
➡️ Why Should Your Garden Have a Dedicated Pollinator Highway?
➡️ Why Do Your Fruit Trees Need a Winter Wash to Thrive in Spring?
➡️ How Can Rice Water Transform Your Fruits into Sweeter Delights?
➡️ Jumpstart Your Winter Garden: Seed Starting Under Lights
- If the seedling has outgrown its original pot, transplant it into a slightly larger container.
- Refresh the potting soil to provide new nutrients and better drainage.
Fertilizer and nutrition:
- Apply a slow-release fertilizer or continue with liquid fertilizers rich in nitrogen for leafy growth.
- Introduce a fertilizer higher in phosphorus and potassium in late year two to promote budding and flowering in the following year.
Light and environment:
- Ensure your tree receives 8 hours of sunlight daily.
- If indoors, rotate the pot periodically to ensure even growth.
Pruning:
- Begin shaping the plant by trimming weak or crossing branches.
- Maintain a central leader branch to encourage strong, upright growth.
Watering:
- Continue regular watering, ensuring the soil remains moist but well-drained.
- Reduce watering slightly in cooler months to avoid root stress.
By the end of year two, your star fruit tree should have developed thicker stems, stronger branches, and a dense, healthy canopy—ready to transition into the fruiting stage.
Tips for Growing Star Fruit Successfully in a Pot
1. Container selection:
- Large pots help accommodate root growth and prevent the plant from becoming root-bound.
- Consider using pots with a diameter of at least 20 inches once the plant reaches maturity.
2. Soil mix:
- A well-draining soil mix is essential to prevent root rot. Combine equal parts garden soil, sand, and compost for optimal results.
- Mulch the surface with organic material to retain moisture and regulate soil temperature.
3. Sunlight exposure:
- Star fruit requires bright, indirect sunlight.
- If growing indoors, supplement with artificial grow lights for 6–8 hours daily.
4. Fertilization schedule:
- Use a nitrogen-rich fertilizer during the first year to promote leaf and stem growth.
- Switch to a phosphorus and potassium-rich fertilizer before flowering and fruiting to support blooms and fruit development.
5. Pest and disease management:
- Common pests include mealybugs and aphids. Spray with mild insecticidal soap or neem oil if detected.
- Watch for fungal diseases; ensure proper spacing and airflow around the plant.
6. Temperature and humidity:
- Star fruit prefers tropical conditions (70–90°F) with moderate humidity.
- Avoid exposing the plant to frost or prolonged cold.
What to Expect After Two Years
By the end of year two, a potted star fruit tree should be well-established, with thicker stems and a strong root system. Some trees may start flowering in the second year, but fruiting usually begins in the third or fourth year. Patience is key, but regular care during the first two years ensures a healthy plant that can bear abundant fruit in the future.
Signs of readiness for fruiting:
- The plant reaches 3–4 feet in height.
- The canopy is dense, and stems are robust.
- Flower buds begin to appear at branch tips.
With proper care, star fruit trees in pots can produce fruit for many years, giving you sweet, tangy slices right from your own home.
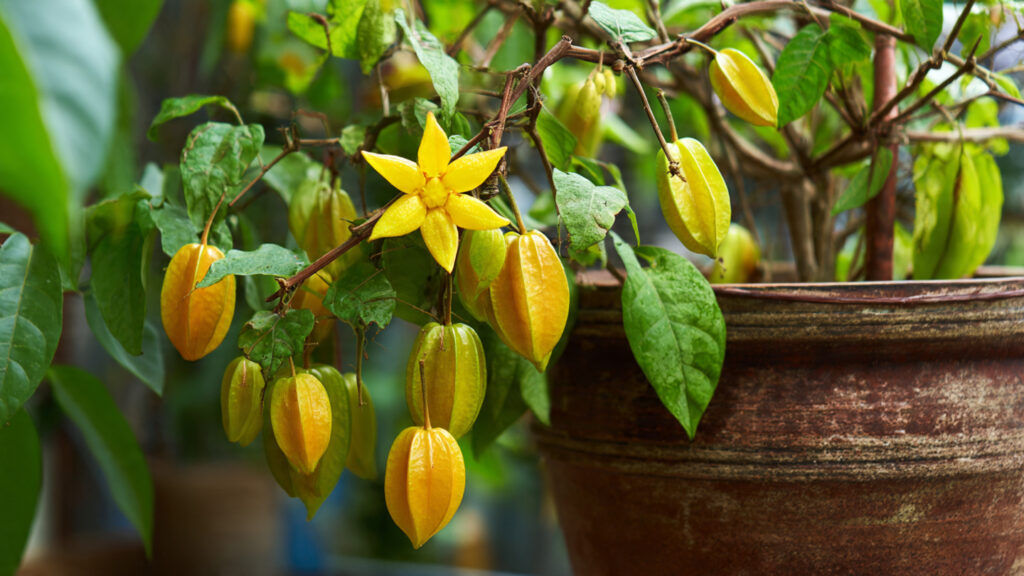
Harvesting Star Fruit
Once your potted star fruit tree begins producing, harvesting is simple:
- Look for fruits that have turned golden-yellow and feel firm but slightly tender.
- Use scissors or pruning shears to cut the fruit without damaging the branches.
- Harvest regularly to encourage continuous fruit production.
Freshly harvested star fruit can be eaten raw, added to salads, made into juices, or used as garnishes for dishes.
Full 2-Year Update Summary
Here’s a quick snapshot of what you can expect over the first two years of growing star fruit in a pot:
| Year | Growth Stage | Key Activities | Expected Outcome |
|---|---|---|---|
| 0 | Seed Germination | Plant seeds, maintain warm & moist conditions | Seeds sprout within 2–4 weeks |
| 1 | Seedling Care | Sunlight, watering, fertilizer, early pruning | Plant grows 12–18 inches tall, develops first true leaves |
| 2 | Strengthening | Repotting if needed, fertilization, shaping, pruning | Thick stems, strong branches, dense foliage, early flower buds |
Following these steps ensures that by year three, your star fruit tree is ready to enter its fruiting phase.
Conclusion
Growing star fruit in a pot is a rewarding experience that allows you to enjoy tropical flavors right at home. With proper attention from seed planting to the second year of growth, your plant can develop thick stems, robust roots, and healthy branches, preparing it for years of fruitful harvests.
Patience, proper care, and understanding the plant’s needs are key. From sunlight and watering to fertilization and pruning, each step contributes to creating a thriving potted star fruit tree.
Start your star fruit journey today, and in just a few years, you’ll be enjoying homegrown, delicious, star-shaped fruits that are as rewarding to grow as they are to eat.