There’s something magical about tasting the sweet, tangy flavor of a fresh passion fruit you grew yourself. Not only is it delicious, but growing your own passion fruit also transforms your garden—or even a balcony—into a tropical paradise filled with vibrant vines and fragrant flowers.
The good news? You don’t need a nursery-bought plant. Passion fruit can be grown successfully from seed, and with the right guidance, it’s easier than you might think. This step-by-step guide will walk you through everything from selecting seeds to harvesting luscious fruit.
By the end, you’ll be ready to nurture your own passion fruit vine and enjoy the rewards of homegrown tropical goodness.
Why Grow Passion Fruit from Seed?
Growing passion fruit from seed has several advantages:
- Cost-effective: One fruit can give dozens of seeds.
- Fun and educational: It’s a rewarding experience to see a tiny seed grow into a sprawling vine.
- Control over plant health: You choose the best seeds from ripe, healthy fruits.
- Variety: You can experiment with different passion fruit varieties for flavor, size, or color.
Though it requires patience—seeds take longer to bear fruit than grafted plants—the satisfaction of growing from scratch is unparalleled.
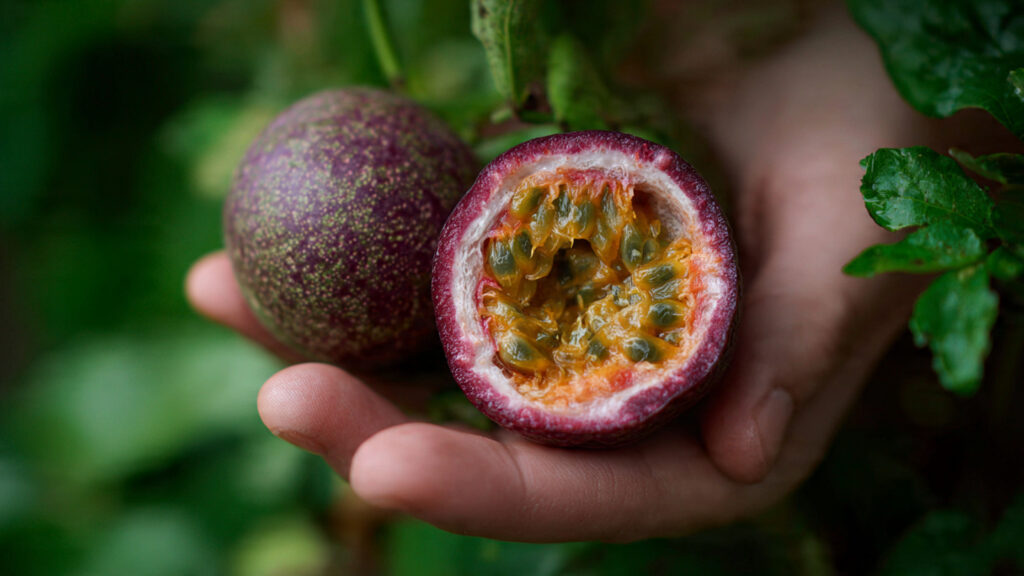
Step 1: Select the Right Passion Fruit
The journey begins with picking the right fruit.
Choosing the Seed Source
- Look for ripe, healthy fruits, ideally with slightly wrinkled skin (this signals ripeness).
- Avoid overripe, rotten, or damaged fruits—they may produce weak seeds.
- If possible, select local varieties that adapt well to your climate.
Seed Extraction
- Cut the fruit open carefully.
- Scoop out the seeds along with the pulp.
- Place them in a bowl of water. Healthy seeds will sink, while damaged seeds float—discard those.
- Rinse seeds gently to remove pulp residue.
Step 2: Prepare Seeds for Germination
Passion fruit seeds have a tough outer coat, and proper preparation improves germination rates.
Pre-Germination Tips
- Soak seeds in warm water for 24–48 hours to soften the coat.
- Optional: Lightly rub seeds with sandpaper or a nail file to scarify them, helping water absorption.
Why This Matters
Scarification and soaking speed up germination and help produce strong seedlings.
Step 3: Choose the Right Germination Medium
Seeds need a well-draining, nutrient-rich medium to sprout successfully.
Recommended Medium
- Use a mix of potting soil and sand (2:1)
- Add a small amount of compost to boost nutrients
- Avoid garden soil—it can contain pathogens and pests
Fill a small tray or seedling pot with this mix and moisten lightly.
Step 4: Plant the Seeds
Now it’s time to plant your seeds carefully.
Planting Steps
- Make a shallow hole (~½ inch deep) in the soil.
- Place one seed in each hole.
- Cover lightly with soil.
- Water gently to settle the soil.
Tip
Do not bury seeds too deep—light is not essential for germination, but shallow planting ensures quicker sprouting.
Step 5: Provide Ideal Conditions for Germination
Germination is delicate, and the right conditions ensure success.
Optimal Conditions
- Temperature: 70–85°F (21–29°C)
- Moisture: Keep soil damp but not soggy
- Light: Bright, indirect sunlight
Germination Timeline
- Seeds usually sprout within 2–4 weeks, though some may take longer.
- Be patient and keep soil consistently moist.
Step 6: Transplant Seedlings to Larger Containers
Once seedlings have 2–3 sets of true leaves, they’re ready to grow in larger pots.
Choosing Containers
- Start with 6–8 inch pots, eventually moving to 12–16 inch pots
- Ensure good drainage holes
Soil Mix
- Use a mix of garden soil, compost, and sand
- Fertilize lightly with balanced NPK fertilizer to encourage healthy growth
Tip
Handle seedlings gently to avoid damaging the delicate roots.
➡️ How to Grow Malabar Spinach from Cuttings for Fast, Easy Greens
➡️ How to Grow Super Delicious Cabbage at Home Without a Garden
➡️ How to Grow Bean Sprouts at Home in Plastic Bottles Easily (Step‑by‑Step Guide)
➡️ Why is Your Lemon Tree Blooming in the Heart of Winter?
➡️ Why Should Your Garden Have a Dedicated Pollinator Highway?
➡️ Why Do Your Fruit Trees Need a Winter Wash to Thrive in Spring?
➡️ How Can Rice Water Transform Your Fruits into Sweeter Delights?
➡️ Jumpstart Your Winter Garden: Seed Starting Under Lights
Step 7: Provide Support for Climbing Vines
Passion fruit is a climber and needs a trellis, fence, or stakes for support.
Support Ideas
- Wooden or metal trellis
- String or rope tied to a balcony railing
- Bamboo stakes
Why Support Matters
Vines without support can sprawl on the ground, producing fewer flowers and fruit. Proper training ensures better airflow, sunlight exposure, and fruit production.
Step 8: Sunlight and Water Requirements
Passion fruit thrives in full sun and well-watered soil.
Sunlight
- 6–8 hours of sunlight daily
- If grown indoors, use grow lights to supplement
Watering
- Keep soil consistently moist but not waterlogged
- Reduce watering slightly during cooler months
- Mulching helps retain soil moisture and regulate temperature
Step 9: Fertilization and Plant Nutrition
Healthy vines need nutrients to grow vigorously and bear fruit.
Fertilization Tips
- Use a balanced fertilizer (10-10-10) every 4–6 weeks
- Supplement with organic compost or liquid seaweed
- Stop heavy fertilization during flowering to encourage fruit development
Expert Advice
Passion fruit benefits from extra potassium and phosphorus for better flowering and fruiting.
Step 10: Flowering and Pollination
Passion fruit produces fragrant purple or yellow flowers, attracting pollinators.
Pollination Tips
- Outdoor plants are usually pollinated naturally by bees
- Indoor plants may require hand pollination using a soft brush
Pollination directly affects fruit set, so ensure flowers are fertilized for a successful harvest.
Step 11: Harvesting Your Passion Fruit
Seed-grown passion fruit vines may take 12–18 months before bearing fruit, but patience pays off.
Signs of Ripeness
- Fruit turns purple or yellow (depending on the variety)
- Slightly wrinkled skin indicates peak sweetness
- Fruit detaches easily when gently pulled
Storage
- Keep ripe fruit at room temperature for a few days
- Refrigerate for up to 2–3 weeks
Step 12: Common Problems and Solutions
Even container-grown passion fruit is hardy, but watch for:
- Yellow leaves: Often caused by nutrient deficiency or overwatering
- Pests: Aphids, mites, and caterpillars; use organic sprays or manual removal
- Poor flowering or fruiting: Usually due to lack of sunlight, improper pollination, or nutrient imbalance
Experts recommend early observation and routine care to prevent problems.
Step 13: Tips for Container Passion Fruit Gardening
- Rotate pots occasionally to ensure even sunlight exposure
- Prune older vines to stimulate new growth
- Mulch soil surface to retain moisture and reduce weeds
- Train new shoots along your trellis for better space utilization
Even in limited space, container-grown passion fruit can be productive and decorative.
Final Thoughts: Grow Tropical Goodness from a Simple Seed
Growing passion fruit from seed is a rewarding journey that combines patience, care, and a touch of tropical magic. From extracting seeds to harvesting luscious, fragrant fruit, each stage is an exciting step in nurturing life.
Whether you have a small balcony, terrace, or backyard, passion fruit vines can flourish in containers, giving you fresh, homegrown tropical fruit that tastes far superior to store-bought varieties.
Start today, nurture your seed, provide sunlight, water, and support, and in time, your home will be adorned with beautiful vines, fragrant flowers, and sweet, juicy passion fruit—all grown from a single seed.