Have you ever looked at the seeds leftover from your kitchen spices and wondered if you could turn them into a thriving, aromatic garden? What if those tiny seeds that usually end up in your compost or trash could transform your home into a lush haven of flavor and fragrance? The good news is, with a little knowledge, patience, and creativity, you can grow a spice garden right from your kitchen seeds. Not only will this give you fresh, homegrown spices, but it’s also an enjoyable, sustainable, and rewarding hobby.
Step 1: Understand the Basics of Kitchen Seeds
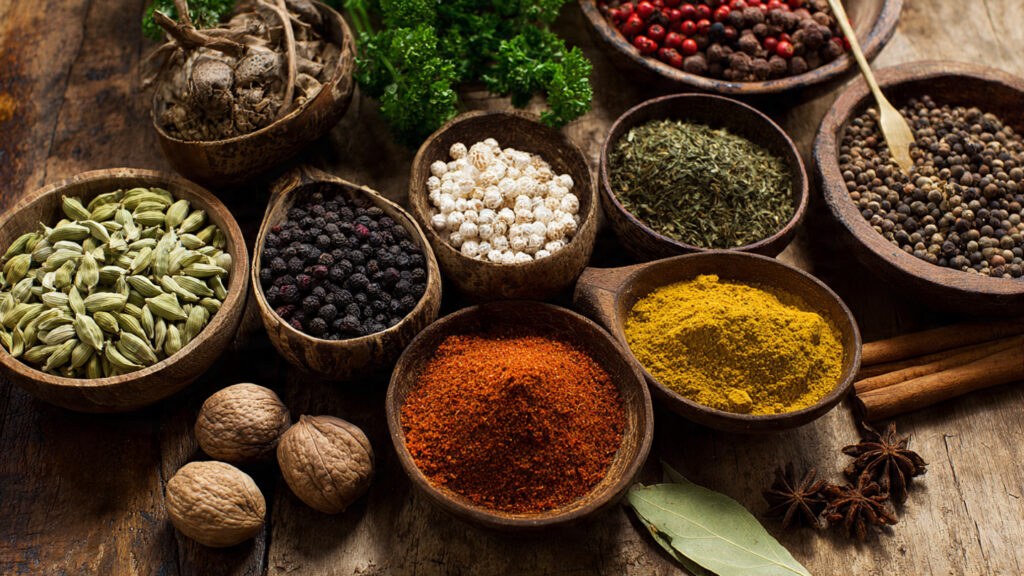
The first step in creating a spice garden from kitchen seeds is understanding which seeds are viable and what each one requires. Not all kitchen seeds will germinate successfully, especially if they’ve been roasted, dried, or treated. However, many common kitchen spices have seeds that sprout beautifully under the right conditions. Here’s a quick guide to some popular seeds you can grow:
- Coriander (Cilantro) – Coriander seeds are easy to sprout and can grow both indoors and outdoors. They prefer cool, sunny locations.
- Cumin – Cumin seeds need a warm environment and plenty of sunlight. They’re perfect for pots or small garden plots.
- Fennel – Fennel seeds grow best in fertile, well-draining soil with full sun.
- Mustard – Mustard seeds germinate quickly and can grow in pots, raised beds, or traditional garden soil.
- Basil, Dill, and Fenugreek – Many herbs can be grown from kitchen seeds with the right care and patience.
A quick tip: Always select seeds that are untreated for chemicals and pesticides. Organic seeds are more likely to grow successfully and will provide healthier plants.
Step 2: Prepare Your Growing Space
Your spice garden doesn’t need acres of land. Even a small balcony, windowsill, or kitchen counter can serve as the perfect location. Here’s how to set it up:
- Choose Your Containers – Small pots, recycled containers, or seed trays work well. Make sure they have drainage holes to prevent waterlogging.
- Pick the Right Soil – A rich, well-draining potting mix is ideal. Avoid garden soil that may contain pests or diseases.
- Provide Sunlight – Most spice seeds need at least 4–6 hours of sunlight daily. South-facing windows are perfect, or you can use grow lights indoors if natural light is limited.
- Label Your Seeds – Keep track of your different seeds with small labels. This avoids confusion and helps you monitor growth.
Even if you live in an apartment, a simple spice garden setup can transform your kitchen into a fragrant paradise.
Step 3: Germination – Bringing Seeds to Life
Germination is where the magic begins. Here’s a step-by-step guide to germinating kitchen seeds:
- Soak Your Seeds – Some seeds, like coriander and fennel, benefit from a few hours of soaking. This softens the seed coat and accelerates germination.
- Planting Depth – Most small seeds should be planted shallowly, about 1/4 inch deep. Large seeds may need to be buried slightly deeper.
- Watering – Keep the soil moist but not soggy. Overwatering can cause seeds to rot, while underwatering can halt growth.
- Temperature – Maintain a warm temperature, ideally between 70–75°F (21–24°C) for most spices. A sunny windowsill or a warm corner of your home works perfectly.
Seeds usually sprout within 1–3 weeks. Patience is key! During this time, avoid disturbing the soil or moving the pots too much.
Step 4: Caring for Young Plants
Once your seeds have sprouted, they require nurturing to grow into healthy spice plants:
- Thinning – When seedlings have a few true leaves, thin them out by snipping weaker ones. This ensures each plant has enough space to thrive.
- Watering Routine – Young plants need regular watering but make sure the soil drains well to prevent root rot.
- Fertilizing – A light, organic fertilizer every 2–3 weeks can give your spice plants a boost. Avoid heavy synthetic fertilizers as they can alter flavor and damage delicate herbs.
- Sunlight Adjustment – Rotate your pots every few days to ensure even sunlight exposure and prevent plants from leaning toward the light.
Healthy young plants are the foundation of a thriving spice garden. Paying attention to their needs early on will result in stronger, more flavorful herbs.
Step 5: Transplanting (Optional)
Some kitchen seeds grow best when transplanted into larger containers or an outdoor garden. Herbs like basil and fennel benefit from extra space for roots. Carefully move seedlings with minimal disturbance to the roots. Using a richer potting mix and larger pots encourages healthy growth and increased yield.
Step 6: Harvesting Your Spices
The most satisfying part of growing your own spices is harvesting. Timing is key for maximum flavor:
- Coriander – Harvest leaves (cilantro) when the plant is 4–6 inches tall. Seeds can be collected once they turn brown and dry.
- Cumin & Fennel – Harvest seeds when the plant matures and the seeds turn golden brown.
- Basil & Dill – Snip leaves as needed, always leaving enough foliage to allow continued growth.
- Mustard – Harvest young leaves early for mild flavor, or wait for seeds to dry for traditional use.
Regular harvesting encourages new growth and keeps your spice garden productive all season long.
Step 7: Maximizing Your Kitchen Seeds’ Potential
To truly transform your kitchen seeds into a vibrant spice garden, consider these additional tips:
- Companion Planting – Many herbs grow well together. For example, basil and coriander enhance each other’s growth.
- Vertical Gardening – Use shelves, hanging pots, or wall-mounted containers to maximize space in small homes.
- Succession Planting – Plant new seeds every few weeks to ensure a continuous supply of fresh spices.
- DIY Seed Saving – Collect seeds from your plants to start the next generation, making your spice garden self-sustaining.
Step 8: Beyond the Garden – Culinary and Lifestyle Benefits
A spice garden is more than just aesthetics. The benefits extend to your kitchen and lifestyle:
- Fresh Flavors – Homegrown spices are more aromatic and flavorful than store-bought varieties.
- Health Benefits – Many herbs, like coriander, fennel, and basil, are packed with antioxidants and nutrients.
- Sustainable Living – Growing your own spices reduces waste, packaging, and reliance on store-bought herbs.
- Stress Relief – Gardening, even on a small scale, is a calming and meditative activity that promotes well-being.
Imagine adding freshly picked basil to your pasta, sprinkling coriander seeds on your curry, or brewing fennel tea—all straight from your kitchen spice garden. It’s convenience, freshness, and satisfaction rolled into one.
➡️ How to Grow Malabar Spinach from Cuttings for Fast, Easy Greens
➡️ How to Grow Super Delicious Cabbage at Home Without a Garden
➡️ How to Grow Bean Sprouts at Home in Plastic Bottles Easily (Step‑by‑Step Guide)
➡️ Why is Your Lemon Tree Blooming in the Heart of Winter?
➡️ Why Should Your Garden Have a Dedicated Pollinator Highway?
➡️ Why Do Your Fruit Trees Need a Winter Wash to Thrive in Spring?
➡️ How Can Rice Water Transform Your Fruits into Sweeter Delights?
➡️ Jumpstart Your Winter Garden: Seed Starting Under Lights
Step 9: Troubleshooting Common Problems
Even the best gardeners face challenges. Here are solutions for common spice garden issues:
- Poor Germination – Ensure seeds are fresh and not treated. Adjust soil moisture and temperature.
- Leggy Seedlings – Provide more light or move plants closer to a sunny window.
- Pests – Introduce natural remedies like neem oil, or plant companion herbs that repel pests, such as basil or mint.
- Slow Growth – Check soil nutrients, sunlight, and water routine. Sometimes, small adjustments can make a huge difference.
Step 10: Enjoy Your Homegrown Spice Garden
Once your spice garden is established, you’ll notice the aroma filling your home, the greenery brightening your kitchen, and the joy of harvesting your own spices. What started as leftover kitchen seeds can become a lifelong hobby, a source of sustainable flavors, and a reminder that magic often begins in the smallest seeds.
Growing a spice garden from your kitchen seeds is more than just planting—it’s an art, a science, and a journey of patience, care, and reward. With the right setup, consistent care, and a love for flavors, your kitchen seeds can transform into a lush, fragrant spice garden, ready to enhance every meal you prepare.