If you’ve ever planted seeds with excitement, watered them carefully, and still ended up with weak plants or disappointing harvests… you’re not alone.
The secret to a thriving garden isn’t just sunlight or watering schedules — it starts underground.
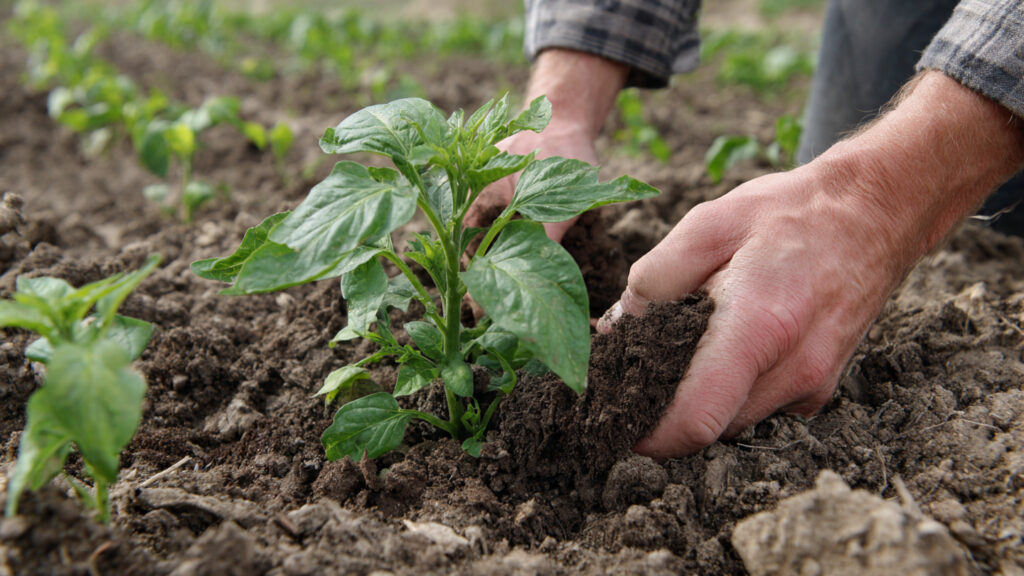
Perfect soil is the foundation of every successful harvest. When your soil is healthy, loose, and rich in nutrients, plants grow faster, produce more, and resist pests and diseases naturally.
In this guide, you’ll learn exactly how to prepare soil the right way and how to add fertilizer correctly so you can enjoy maximum yields season after season.
Why Soil Preparation Matters More Than You Think
Soil isn’t just “dirt.” It’s a living ecosystem full of microbes, minerals, air pockets, and organic matter.
When soil is properly prepared, it provides:
- Strong root support
- Better water retention
- Improved drainage
- Easy nutrient absorption
- Higher crop production
Poor soil, on the other hand, can cause:
- Yellow leaves
- Slow growth
- Weak root systems
- Fewer flowers and fruits
Healthy soil equals healthy plants — it’s that simple.
Step 1: Understand Your Soil Type
Before adding anything, you need to know what kind of soil you’re working with.
Common soil types include:
1. Sandy Soil
- Drains quickly
- Warms up fast
- Needs more compost and moisture retention
2. Clay Soil
- Holds water too long
- Becomes compacted
- Needs loosening with organic matter
3. Loamy Soil (Ideal!)
- Balanced texture
- Holds nutrients well
- Best for most crops
4. Silty Soil
- Smooth and fertile
- Can become compacted over time
Quick Tip:
Grab a handful of moist soil and squeeze it:
- Falls apart easily → sandy
- Stays in a sticky lump → clay
- Crumbles softly → loamy
Step 2: Test Your Soil for Best Results
If you want maximum harvests, don’t guess — test.
➡️ How to Grow Malabar Spinach from Cuttings for Fast, Easy Greens
➡️ How to Grow Super Delicious Cabbage at Home Without a Garden
➡️ How to Grow Bean Sprouts at Home in Plastic Bottles Easily (Step‑by‑Step Guide)
➡️ Why is Your Lemon Tree Blooming in the Heart of Winter?
➡️ Why Should Your Garden Have a Dedicated Pollinator Highway?
➡️ Why Do Your Fruit Trees Need a Winter Wash to Thrive in Spring?
➡️ How Can Rice Water Transform Your Fruits into Sweeter Delights?
➡️ Jumpstart Your Winter Garden: Seed Starting Under Lights
A basic soil test helps you understand:
- pH level (acidic or alkaline)
- Nutrient levels (N-P-K)
- Organic matter content
Most vegetables grow best in soil with a pH between 6.0 and 7.0.
Signs your soil needs help:
- Plants stay small
- Leaves turn pale
- Poor fruiting
- Hard, cracked ground
Soil testing gives you the exact starting point.
Step 3: Clear the Garden Bed Properly
Before planting, remove:
- Weeds and roots
- Old plant debris
- Rocks and hard clumps
Leaving weeds behind means they will compete with your crops for nutrients and water.
Clean soil = better growing space.
Step 4: Loosen the Soil for Strong Root Growth
One of the most important steps is aeration.
How deep should you loosen soil?
- For leafy greens → 6–8 inches
- For tomatoes, carrots, potatoes → 12 inches
Use tools like:
- Garden fork
- Hoe
- Rotavator (for large areas)
Loose soil allows:
- Roots to spread freely
- Better water penetration
- Improved oxygen flow
Compact soil suffocates plants underground.
Step 5: Add Organic Matter — The Soil Superfood
Organic matter is the magic ingredient for perfect soil.
Best organic materials include:
- Compost (most recommended)
- Well-rotted cow dung manure
- Leaf mold
- Vermicompost
- Kitchen waste compost
Benefits:
- Feeds soil microbes
- Improves soil texture
- Increases nutrient availability
- Helps soil hold moisture
How much to add?
Mix 2–3 inches of compost into the topsoil before planting.
Organic matter is the long-term key to high yields.
Step 6: Level and Shape Your Beds Correctly
After mixing compost, level the soil and form planting beds.
Raised beds are excellent because they:
- Drain well
- Warm faster
- Prevent waterlogging
Keep pathways separate to avoid compacting planting areas.
Step 7: Fertilizer Basics — Feed Plants the Right Way
Fertilizer provides nutrients plants need for fast growth and fruit production.
The three main nutrients are:
- N (Nitrogen) → leafy growth
- P (Phosphorus) → strong roots and flowers
- K (Potassium) → fruits, immunity, overall health
Different crops require different nutrient balance.
Step 8: Organic vs Chemical Fertilizers
Both can work — but they must be used correctly.
Organic Fertilizers (Slow, Safe, Long-Term)
Examples:
- Compost
- Manure
- Bone meal
- Neem cake
Pros:
- Improves soil health
- Releases nutrients slowly
- Safe for long-term gardening
Chemical Fertilizers (Fast, Powerful, Risky if Overused)
Examples:
- Urea
- DAP
- NPK blends
Pros:
- Quick nutrient boost
Cons: - Can burn roots
- Doesn’t improve soil structure
- Overuse damages soil microbes
Best approach?
Use organic as the base, chemical only if needed.
Step 9: When and How to Apply Fertilizer Correctly
Applying fertilizer at the wrong time wastes nutrients and harms plants.
Best fertilizer timing:
1. Before planting (Base feeding)
Mix compost and slow-release fertilizer into the soil.
2. During growth (Side dressing)
Apply fertilizer near the plant after 3–4 weeks.
3. Flowering and fruiting stage
Use potassium-rich fertilizer for better yield.
Correct method:
- Never dump fertilizer directly on roots
- Apply 2–3 inches away from stem
- Water after application
- Follow recommended dosage
Over-fertilizing leads to leafy plants with fewer fruits.
Step 10: Mulching for Maximum Soil Power
Mulch is like a protective blanket for soil.
Use:
- Dry leaves
- Straw
- Grass clippings
- Coconut husk
Mulching helps:
- Retain moisture
- Reduce weeds
- Keep soil cool
- Add organic matter over time
Healthy soil stays protected, not exposed.
Step 11: Rotate Crops to Prevent Nutrient Loss
Planting the same crop in the same spot every season drains nutrients.
Example:
- Tomatoes use lots of nitrogen
- Root crops need phosphorus
- Legumes add nitrogen back into soil
Rotate plant families each season for long-term fertility.
Common Soil and Fertilizer Mistakes to Avoid
Many gardeners lose yield because of simple mistakes:
- Using fresh manure (burns plants)
- Adding too much fertilizer at once
- Ignoring soil pH
- Planting in compacted soil
- Skipping compost and relying only on chemicals
Avoid these, and your harvest will improve dramatically.
Final Thoughts: Perfect Soil = Bigger, Healthier Harvests
Preparing soil properly is the most valuable gardening investment you can make.
When you combine:
✅ Loose, aerated soil
✅ Rich compost
✅ Correct fertilizer timing
✅ Mulching and crop rotation
…you create a powerful growing environment where plants thrive naturally.
Remember:
Feed the soil, and the soil will feed your plants.
With the right preparation, you won’t just grow vegetables — you’ll grow abundance.