Chickpeas may seem like a crop reserved for wide farm fields and dry countryside gardens, but the truth is surprisingly encouraging: you can successfully grow chickpeas right in a simple garden pot.
These protein-rich legumes are not only delicious and nutritious, but they’re also easy to grow, drought-tolerant, and perfect for container gardening. Whether you have a balcony, patio, small backyard, or even a sunny doorstep, chickpeas can thrive with just a little care and the right setup.
In this guide, you’ll learn exactly how to grow chickpeas in pots—from choosing the right container to harvesting your own homegrown crop.
Why Grow Chickpeas in a Pot?
Chickpeas (also called garbanzo beans) are one of the world’s most popular legumes, used in hummus, curries, salads, and soups. Growing them at home offers many benefits:
- Perfect for small spaces
- Low-maintenance and drought-tolerant
- Improves soil by fixing nitrogen
- Produces a rewarding edible harvest
- Great for beginner gardeners
Container-grown chickpeas are also less prone to weeds and easier to manage than garden-grown plants.
Understanding Chickpea Growth Basics
Before planting, it helps to know how chickpeas grow.
Chickpeas are cool-season legumes that:
- Prefer mild temperatures
- Grow best in full sun
- Need well-draining soil
- Take about 90–120 days to mature
They form small bushy plants, usually 1–2 feet tall, with delicate leaves and tiny white or purple flowers that develop into pods.
Each pod contains 1–2 chickpeas, making every harvest feel like a treasure hunt!
Step 1: Choose the Right Pot
The first key to success is selecting a suitable container.
Best Pot Size for Chickpeas
Chickpeas need space for deep root growth, so choose:
- At least 10–12 inches deep
- 12–14 inches wide
- Minimum 5-gallon container for one plant
For multiple plants, use a large rectangular planter or grow bag.
Drainage Is Essential
Chickpeas hate soggy soil. Your pot must have:
- Several drainage holes
- A saucer underneath (optional, but don’t let water sit)
Good drainage prevents root rot and keeps plants healthy.
Step 2: Use the Right Soil Mix
Chickpeas grow best in loose, airy soil.
➡️ How to Grow Malabar Spinach from Cuttings for Fast, Easy Greens
➡️ How to Grow Super Delicious Cabbage at Home Without a Garden
➡️ How to Grow Bean Sprouts at Home in Plastic Bottles Easily (Step‑by‑Step Guide)
➡️ Why is Your Lemon Tree Blooming in the Heart of Winter?
➡️ Why Should Your Garden Have a Dedicated Pollinator Highway?
➡️ Why Do Your Fruit Trees Need a Winter Wash to Thrive in Spring?
➡️ How Can Rice Water Transform Your Fruits into Sweeter Delights?
➡️ Jumpstart Your Winter Garden: Seed Starting Under Lights
Ideal Soil Requirements
Use a mix that is:
- Well-draining
- Light and crumbly
- Rich in organic matter
Best Potting Mix Combination
A great homemade mix includes:
- 60% quality potting soil
- 30% compost
- 10% sand or perlite for drainage
Avoid heavy garden soil, which compacts easily in containers.
Step 3: Select the Best Chickpea Variety
There are two main types of chickpeas:
Desi Chickpeas
- Smaller, darker seeds
- Hardy and drought-tolerant
- Common in Indian cooking
Kabuli Chickpeas
- Larger, cream-colored seeds
- Used for hummus and salads
Both types can grow well in pots, but Desi varieties are often more adaptable to container conditions.
Choose seeds labeled for planting—not grocery store beans, which may not sprout reliably.
Step 4: Planting Chickpeas in a Pot
Chickpeas are easy to plant directly from seed.
When to Plant
Plant chickpeas in early spring when temperatures are cool:
- Ideal range: 60–75°F (15–24°C)
They do not like extreme heat during early growth.
How to Plant
- Fill your pot with soil mix
- Plant seeds 1–2 inches deep
- Space seeds about 3–4 inches apart
- Water gently after planting
Seeds usually germinate in 7–14 days.
Step 5: Provide Plenty of Sunlight
Chickpeas love sunlight.
Light Requirements
Place your pot in a spot that receives:
- 6–8 hours of full sun daily
A sunny balcony, terrace, or patio is perfect.
If plants get too little light, they may become leggy and produce fewer pods.
Step 6: Water Correctly (The Most Important Part)
Watering is often where container gardeners struggle, but chickpeas are forgiving.
How Much Water Do Chickpeas Need?
Chickpeas prefer moderate watering:
- Water when the top inch of soil feels dry
- Avoid keeping soil constantly wet
Watering Tips
- Water deeply, then let soil dry slightly
- Reduce watering once pods begin forming
- Never let the pot sit in standing water
Chickpeas are drought-tolerant once established, so less is often better.
Step 7: Fertilizing Chickpeas in Containers
Because chickpeas are legumes, they naturally fix nitrogen in the soil, meaning they don’t need heavy feeding.
Best Fertilizer Approach
At planting time, mix in:
- Compost or aged manure
During growth, apply:
- A light organic fertilizer once every 4–6 weeks
Avoid high-nitrogen fertilizers, which cause leafy growth instead of pods.
Step 8: Supporting and Pruning (Optional)
Chickpea plants are small bushes, but in pots they may lean.
Support Options
- Small bamboo stakes
- Tomato cage (for larger varieties)
Pruning is not required, but removing damaged leaves improves airflow.
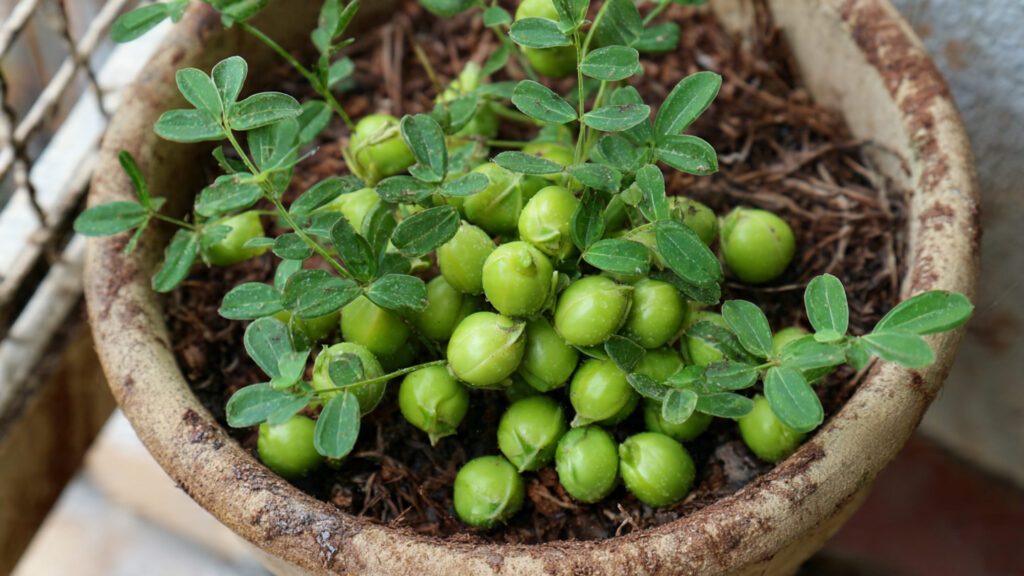
Step 9: Watch for Flowers and Pods
After 4–6 weeks, your chickpea plant will begin flowering.
What Happens Next?
- Flowers appear (white, pink, or purple)
- Pollination occurs naturally
- Small green pods form
- Pods slowly fill with chickpeas
Each plant can produce dozens of pods if healthy.
Step 10: Common Problems and Solutions
Even though chickpeas are hardy, container growing can bring challenges.
Yellow Leaves
Possible causes:
- Overwatering
- Poor drainage
- Nutrient imbalance
Solution: Let soil dry and improve drainage.
No Pods Forming
Causes:
- Too much nitrogen fertilizer
- Too little sun
- High heat stress
Solution: Reduce feeding and ensure full sun exposure.
Aphids or Pests
Chickpeas may attract aphids.
Solution:
- Spray neem oil or soapy water
- Encourage ladybugs
Powdery Mildew
Occurs in humid conditions.
Solution:
- Improve airflow
- Avoid wetting leaves when watering
Step 11: Harvesting Chickpeas
Harvest depends on whether you want fresh green chickpeas or dried beans.
Harvesting Fresh Chickpeas
Pick pods when they are:
- Green and plump
Fresh chickpeas taste sweet and nutty.
Harvesting Dried Chickpeas
For storage, let pods dry on the plant until:
- Brown and crispy
Then:
- Pull up the whole plant
- Hang it in a dry place for 1–2 weeks
- Shell the pods and store beans
Homegrown dried chickpeas can last for months.
Bonus Tip: Saving Seeds for Next Year
Chickpeas are excellent for seed saving.
Simply choose the healthiest dried pods, store seeds in a cool dry jar, and plant next season.
This makes chickpeas one of the most sustainable container crops you can grow.
Conclusion: Yes, Chickpeas Thrive in Simple Pots!
Growing chickpeas in a simple garden pot is not only possible—it’s surprisingly easy and rewarding.
With the right container, well-draining soil, consistent sunlight, and careful watering, you can enjoy:
- Beautiful leafy plants
- Delicate flowers
- Nutritious pods full of chickpeas
Even in small spaces, chickpeas offer a productive and satisfying harvest.
So if you’ve ever wanted to grow your own hummus ingredient or add a unique edible plant to your container garden, chickpeas are the perfect choice.