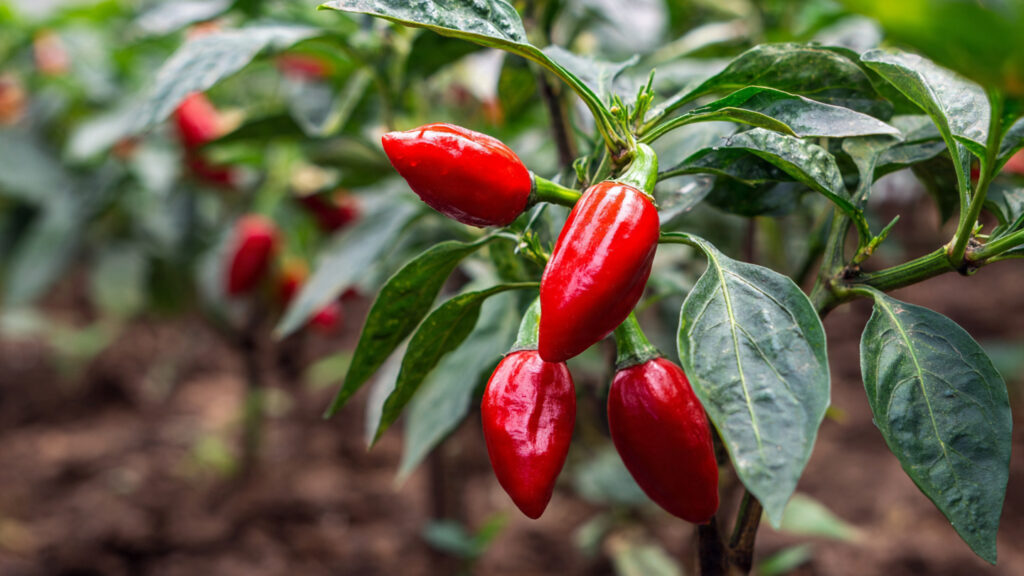
Chili peppers are a staple in kitchens worldwide, adding spice, flavor, and heat to countless dishes. But many gardeners struggle with low yields, weak plants, or inconsistent fruiting. What if there were a revolutionary method that could boost your chili pepper harvest by up to five times? With the right techniques, soil preparation, watering, and pruning, it’s not only possible—it’s replicable for home gardeners and small-scale growers alike.
In this article, we’ll explore a step-by-step guide to growing chili peppers like a pro, increasing both quantity and quality of your harvest.
Understanding Chili Pepper Growth
Before diving into revolutionary methods, it’s important to understand how chili peppers grow. Most varieties thrive in warm temperatures, bright sunlight, and well-draining soil. Proper growth depends on:
- Healthy root systems: Strong roots absorb nutrients efficiently, supporting vigorous plants.
- Flower production: More flowers mean more potential peppers.
- Consistent care: Watering, fertilization, and pest control directly impact yield.
Maximizing yield requires a combination of traditional best practices and innovative growing strategies.
Step 1: Start with Quality Seeds and Pre-Sprouting
The foundation of high-yield chili peppers begins with high-quality seeds. Varieties differ in fruit size, heat, and yield potential. For maximum harvest:
- Select high-yielding varieties: Jalapeño, Cayenne, Thai Bird, or Habanero are known for prolific fruiting.
- Pre-sprout seeds: Soak seeds in warm water for 12–24 hours, then start them on a moist paper towel. This accelerates germination and ensures stronger seedlings.
- Use seedling trays: Plant pre-sprouted seeds in nutrient-rich potting mix under bright, indirect light.
Strong seedlings are the first step toward multiplying your harvest.
Step 2: Optimize Soil for Maximum Growth
Soil quality directly affects chili pepper yield. Healthy soil provides nutrients, aeration, and proper drainage.
- Use well-draining soil: Mix garden soil with compost and perlite to prevent waterlogging.
- Add organic fertilizer: Chili peppers need nitrogen for foliage growth and phosphorus/potassium for flowers and fruit.
- Maintain slightly acidic pH: A pH of 6.0–6.8 ensures optimal nutrient absorption.
Tip: Mulching around the base of the plant retains moisture, reduces weeds, and keeps roots cool—boosting fruit production.
Step 3: Provide Ideal Light Conditions
Chili peppers are sun-loving plants. For maximum yield, they need 6–8 hours of bright sunlight daily. If growing indoors or in limited sunlight:
- Use full-spectrum LED grow lights to supplement natural light.
- Rotate plants to ensure even light distribution.
- Avoid shading from taller plants.
Bright, consistent light encourages flowering, which directly increases the number of peppers.
Step 4: Master Watering and Humidity
Proper watering is critical for a 5× yield. Both overwatering and underwatering reduce fruit production.
- Water consistently: Keep soil moist but not soggy. Deep watering promotes strong roots.
- Monitor humidity: Chili peppers thrive in moderate humidity (50–70%).
- Avoid water stress: Irregular watering can cause flowers to drop and reduce yield.
Pro tip: Use drip irrigation or self-watering containers to maintain steady moisture, especially during hot months.
Step 5: Pruning for Productivity
Pruning may seem counterintuitive, but it’s a key factor in increasing chili pepper yield. Removing certain leaves and stems encourages energy to be redirected toward fruit production.
- Pinch the growing tips: Early in the plant’s life, pinch the tips to encourage bushier growth and more branches.
- Remove lower leaves: Leaves touching the soil are prone to disease and pests.
- Trim excess flowers: If a plant is overwhelmed, selectively remove some flowers early to allow remaining fruit to grow larger and stronger.
Strategic pruning ensures the plant focuses energy where it counts—on peppers.
Step 6: Pollination Boost
Many chili pepper varieties require pollination for fruit to set. While bees and insects help outdoors, indoor plants need manual assistance.
➡️ How to Grow Malabar Spinach from Cuttings for Fast, Easy Greens
➡️ How to Grow Super Delicious Cabbage at Home Without a Garden
➡️ How to Grow Bean Sprouts at Home in Plastic Bottles Easily (Step‑by‑Step Guide)
➡️ Why is Your Lemon Tree Blooming in the Heart of Winter?
➡️ Why Should Your Garden Have a Dedicated Pollinator Highway?
➡️ Why Do Your Fruit Trees Need a Winter Wash to Thrive in Spring?
➡️ How Can Rice Water Transform Your Fruits into Sweeter Delights?
➡️ Jumpstart Your Winter Garden: Seed Starting Under Lights
- Shake the plants: Lightly shaking branches helps distribute pollen.
- Use a brush or cotton swab: Gently brush the flowers to transfer pollen between blooms.
- Encourage airflow: Good ventilation reduces humidity buildup and promotes natural pollination.
Improving pollination increases fruit set, directly contributing to higher yields.
Step 7: Fertilization Schedule
High-yield chili peppers need a balanced feeding regimen. Proper fertilization encourages flowers, healthy leaves, and strong fruits:
- Early growth: Use a nitrogen-rich fertilizer to promote foliage.
- Flowering stage: Switch to a phosphorus and potassium-rich fertilizer to boost flowering and fruiting.
- Fruit development: Continue feeding with a balanced fertilizer every 2–3 weeks.
Organic options like compost tea or worm castings are also excellent for long-term soil health and yield enhancement.
Step 8: Pest and Disease Management
Even the healthiest chili plants can be undermined by pests and diseases. Proactive management ensures maximum fruit production:
- Inspect regularly: Check leaves for aphids, spider mites, or caterpillars.
- Use natural remedies: Neem oil, insecticidal soap, or garlic sprays help control pests.
- Rotate crops and maintain cleanliness: Prevent soil-borne diseases by avoiding planting peppers in the same soil year after year.
Healthy plants are productive plants—prevention is key to achieving multiple harvests.
Step 9: Harvesting for Maximum Yield
Proper harvesting encourages continued fruiting:
- Pick peppers when mature: Leaving ripe peppers on the plant too long can reduce overall production.
- Frequent harvesting: Harvest every few days to stimulate the plant to produce more peppers.
- Handle gently: Avoid damaging stems or branches during harvest.
By maintaining a consistent harvest schedule, you can dramatically increase total yield.
Step 10: Using Containers for Controlled Growth
Growing chili peppers in containers can also boost yields by giving you control over soil, watering, and placement:
- Use pots at least 12–14 inches deep with drainage holes.
- Combine potting soil with compost for nutrients.
- Place containers where they get maximum bright, indirect sunlight.
Containers make it easier to move plants to ideal conditions and optimize growth, resulting in more peppers per plant.
The Results: A 5× Yield
By combining these strategies—pre-sprouting seeds, optimized soil, consistent lighting, careful watering, pruning, pollination, fertilization, pest management, and proper harvesting—you can see up to five times the normal yield of chili peppers.
Gardeners using these methods report:
- Bushier plants with more flowers.
- Larger, more robust fruit.
- Continuous harvests throughout the growing season.
- Stronger resistance to stress, pests, and disease.
It’s a comprehensive approach that turns average chili plants into prolific producers.
Conclusion: The Revolutionary Approach to Chili Pepper Success
Growing chili peppers with 5× yield isn’t magic—it’s science combined with smart gardening techniques. By starting with quality seeds, optimizing soil and light, managing water and pruning strategically, and harvesting correctly, you can achieve unprecedented results in your garden.
This revolutionary approach makes chili gardening more rewarding, whether you’re growing a small balcony garden or a backyard chili farm. With attention to detail and consistent care, every plant can reach its full potential, producing abundant, flavorful peppers season after season.
✅ Action Step: Start by pre-sprouting high-quality chili seeds today, and prepare your soil with compost and nutrients. Follow these techniques to revolutionize your chili pepper harvest—and enjoy more heat, flavor, and satisfaction from your garden than ever before.