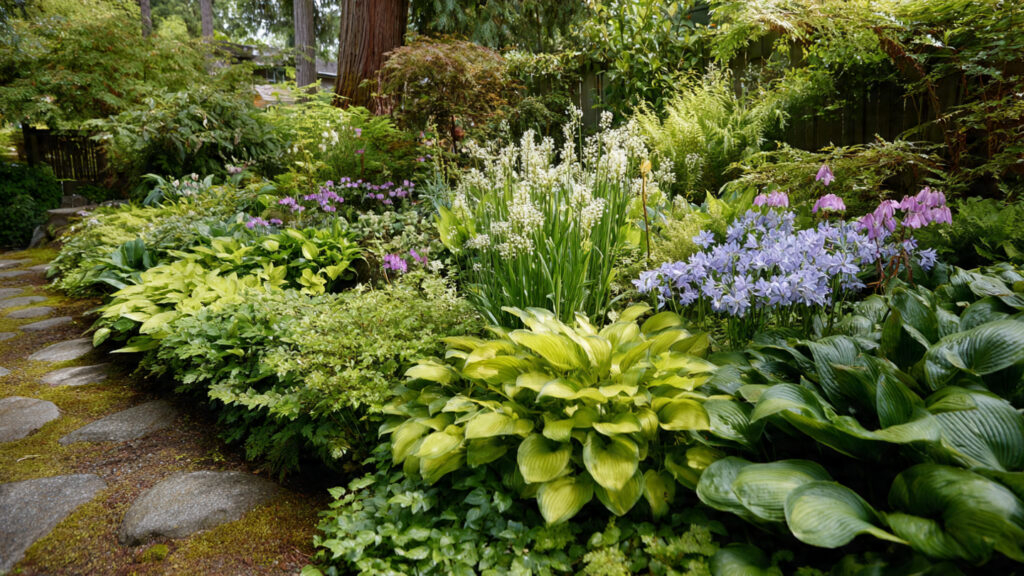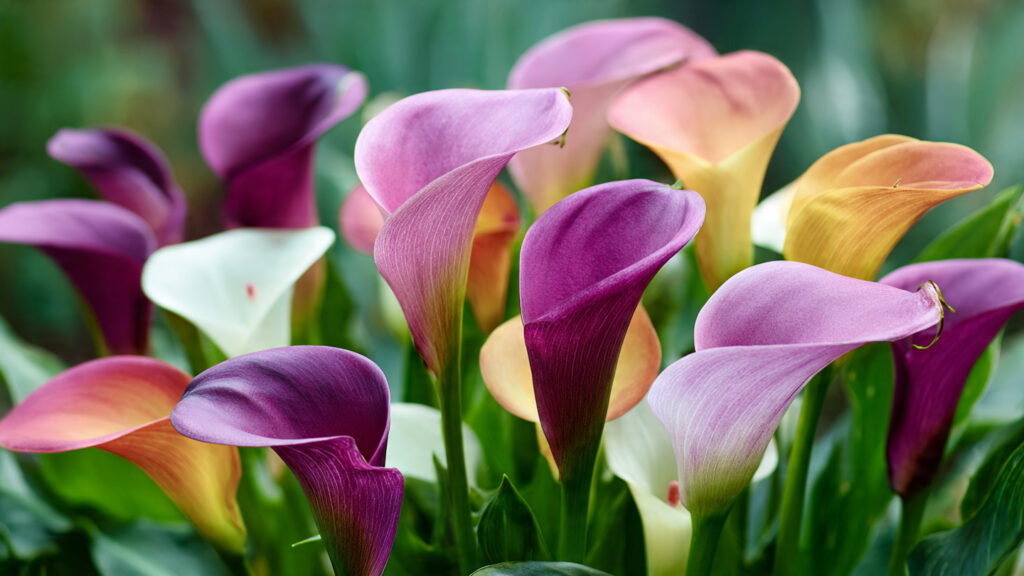
Calla lilies (Zantedeschia spp.) are among the most elegant and striking flowers you can grow, renowned for their trumpet-shaped blooms and glossy, dark green foliage. Their beauty makes them a favorite for gardens, containers, and floral arrangements. While planting calla lilies is straightforward, achieving abundant, vibrant blooms requires understanding both their cultivation needs and pollination process. In this guide, we’ll walk you through planting, caring for, and mastering pollination to enjoy gorgeous, long-lasting flowers.
Why Calla Lilies Are So Special
Calla lilies are appreciated for:
- Elegant blooms: Their distinctive trumpet-shaped flowers add sophistication to any garden or indoor setting.
- Long-lasting flowers: Properly cared-for plants can bloom repeatedly throughout the season.
- Versatility: Suitable for garden beds, containers, or indoor displays.
- Variety: Available in a range of colors, including white, yellow, pink, orange, and deep purple.
To maximize their beauty, gardeners need to pay attention to planting conditions, feeding, and pollination.
Step 1: Selecting the Right Location
Calla lilies thrive in areas that provide:
- Bright, indirect sunlight: They do best with morning sun and afternoon shade, especially in hot climates.
- Well-drained soil: Waterlogged soil can rot bulbs, so choose raised beds, containers, or amended garden soil.
- Air circulation: Good airflow helps prevent fungal diseases and keeps foliage healthy.
While calla lilies tolerate partial shade, blooms will be more prolific when the plant receives adequate filtered sunlight.
Step 2: Choosing Quality Bulbs
Calla lilies are grown from rhizomes (bulb-like structures). When selecting bulbs:
- Choose firm, plump rhizomes with no soft spots or signs of mold.
- Select bulbs 1.5–2 inches in diameter for faster flowering.
- Consider different varieties based on color, bloom size, and plant height.
Healthy bulbs are essential for vigorous growth and vibrant flowers.
Step 3: Preparing the Soil
Calla lilies prefer soil that is:
- Rich in organic matter: Mix compost or well-rotted manure to provide nutrients.
- Slightly acidic to neutral: Aim for a pH between 6.0 and 7.0.
- Well-draining: Sandy loam or raised beds with drainage holes in containers are ideal.
A soil test can help you adjust pH or nutrient levels before planting.
Step 4: Planting Calla Lilies
Follow these steps for proper planting:
- Plant rhizomes in spring after the last frost when soil has warmed to around 60°F (16°C).
- Position the rhizome horizontally with the growing points (small bumps) facing upward.
- Plant 4 inches deep in garden soil or containers.
- Space bulbs 12–18 inches apart to allow room for growth.
- Water lightly after planting to settle the soil; keep it moist but not soggy.
Proper planting ensures strong roots and vigorous shoots for abundant flowers.
Step 5: Watering and Fertilization
- Watering: Keep the soil consistently moist, especially during the growing season. Avoid letting soil dry out completely.
- Fertilizer: Apply a balanced, slow-release fertilizer (10:10:10) every 4–6 weeks during active growth. Liquid fertilizers with phosphorus can encourage bigger, brighter blooms.
- Mulching: Mulch with organic materials to retain moisture, regulate temperature, and suppress weeds.
Well-fed and adequately watered calla lilies reward gardeners with stronger stems and more prolific flowering.
Step 6: Supporting Healthy Growth
- Remove yellow leaves promptly to prevent disease spread.
- Stake taller varieties if needed to prevent stems from bending under heavy blooms.
- Monitor for pests such as aphids or slugs; treat early with natural remedies like neem oil.
Strong, healthy foliage is crucial for sustaining flowers and supporting the plant’s reproductive processes.
Step 7: Understanding Calla Lily Pollination
Calla lilies are monoecious plants, meaning male and female flowers appear on the same spadix (the central spike inside the trumpet-shaped spathe). Pollination is essential for seed production and can also influence future bloom quality if you plan to save seeds or propagate.
- Male flowers: Located at the top of the spadix; produce pollen.
- Female flowers: Located at the base; receive pollen to form seeds.
Pollination can occur naturally via insects (bees, flies) or manually through hand pollination.
➡️ How to Grow Malabar Spinach from Cuttings for Fast, Easy Greens
➡️ How to Grow Super Delicious Cabbage at Home Without a Garden
➡️ How to Grow Bean Sprouts at Home in Plastic Bottles Easily (Step‑by‑Step Guide)
➡️ Why is Your Lemon Tree Blooming in the Heart of Winter?
➡️ Why Should Your Garden Have a Dedicated Pollinator Highway?
➡️ Why Do Your Fruit Trees Need a Winter Wash to Thrive in Spring?
➡️ How Can Rice Water Transform Your Fruits into Sweeter Delights?
➡️ Jumpstart Your Winter Garden: Seed Starting Under Lights
Step 8: Hand Pollination for Gorgeous Blooms
Manual pollination ensures seeds and helps maintain the health of your calla lilies, particularly for hybrid varieties:
- Identify male and female flowers: Open the spathe carefully to locate the spadix.
- Use a small brush or cotton swab to collect pollen from the male flowers.
- Transfer pollen gently onto the female flowers at the base of the spadix.
- Repeat with other blooms if you want seed production.
Hand pollination increases your control over fertilization, ensures seed viability, and can lead to more vigorous blooms in the next generation.
Step 9: Deadheading and Flower Care
Removing spent flowers, or deadheading, keeps plants looking tidy and encourages continuous blooming:
- Cut back the flower stem once it starts fading.
- Avoid damaging the spadix or leaves while removing old blooms.
- Clean up fallen leaves to prevent fungal growth.
Consistent deadheading directs the plant’s energy toward producing new flowers instead of seed development.
Step 10: Seasonal Maintenance
Calla lilies require specific care depending on the season:
- Dormancy: In cooler climates, lift bulbs after foliage dies back in fall. Store in a cool, dry place over winter.
- Replanting: Reintroduce rhizomes in spring for fresh blooms.
- Container lilies: Move pots to protected areas during frost and maintain proper watering.
Seasonal care ensures longevity and reliable flowering year after year.
Step 11: Propagation Tips
For gardeners who want to expand their collection:
- Seed propagation: Harvest seeds from hand-pollinated flowers; sow in seed trays with well-draining soil.
- Division: Separate clumps of mature rhizomes after dormancy for new plants.
- Tissue culture: Advanced gardeners or commercial growers can use lab methods for virus-free, uniform plants.
Proper propagation techniques allow you to enjoy more calla lilies while maintaining quality and color.
Step 12: Troubleshooting Common Problems
- Yellowing leaves: Often caused by overwatering or nutrient deficiency. Adjust watering and fertilize accordingly.
- Fungal infections: Ensure good air circulation and avoid overhead watering. Remove affected leaves promptly.
- Poor flowering: May result from low light, crowded bulbs, or insufficient fertilization. Ensure adequate sunlight and space.
Monitoring your plants regularly helps maintain their beauty and productivity.
Conclusion
Calla lilies are truly a gardener’s delight, offering elegant, show-stopping blooms and lush, tropical foliage. By following these steps—selecting quality bulbs, preparing soil, planting correctly, providing proper care, and mastering pollination—you can ensure stunning, abundant flowers. Hand pollination and attentive care enhance not only your current blooms but also future generations of lilies.
Whether planted in garden beds, containers, or as part of a mixed floral display, calla lilies reward patience and care with dramatic, long-lasting beauty. With consistent attention and proper techniques, your garden or balcony can become a blooming sanctuary of vibrant calla lilies, impressing guests and creating a serene, elegant environment.