Geraniums are one of the most beloved flowering plants around the world. Their vibrant blooms, pleasant fragrance, and ability to thrive in containers, hanging baskets, or garden beds make them a favorite among gardeners, both beginners and experts. But there’s a challenge many gardeners face: rooting geranium cuttings without encountering fungal rot. This common issue can quickly ruin your plants before they even have a chance to flourish. Luckily, with the right approach, you can successfully propagate geraniums and keep fungal problems at bay. In this article, we’ll explore simple techniques to root geraniums effectively and ensure healthy, thriving plants.
Understanding Geranium Propagation
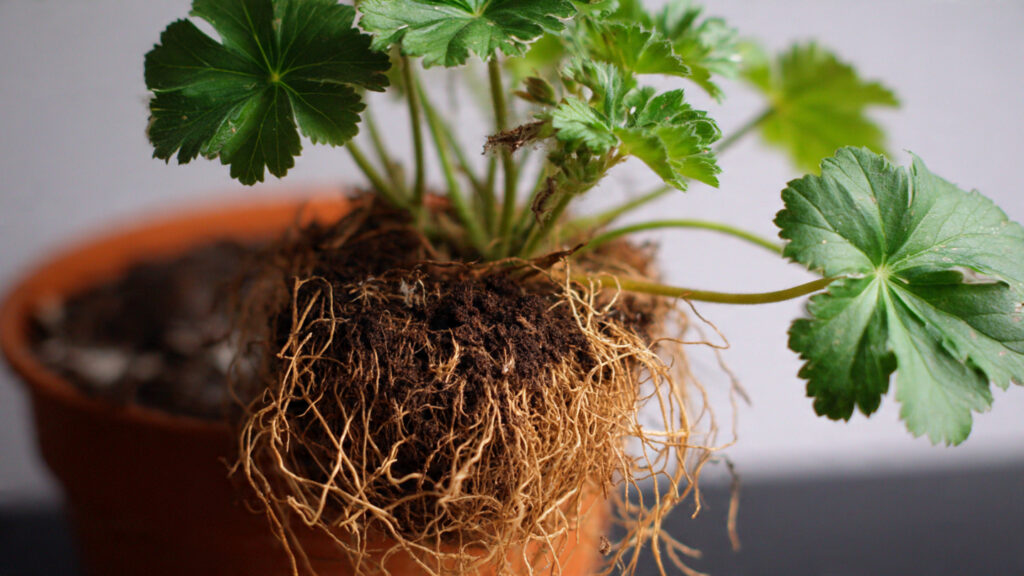
Before diving into the solution, it’s essential to understand the basics of geranium propagation. Geraniums are typically propagated through stem cuttings, rather than seeds, because cuttings root faster and maintain the parent plant’s characteristics. However, their stems are susceptible to fungal infections, especially in damp environments, which can cause stem rot or fungal rot.
Fungal rot occurs when the cut end of the stem is exposed to excessive moisture or pathogens in the soil. This often leads to soft, blackened stems, and eventually, the cutting fails to grow. Preventing this rot is the key to successfully rooting geraniums.
Choosing the Right Cutting
Success starts with selecting the right part of the plant. Here’s what to look for:
- Healthy, Non-Flowering Stems: Choose stems that are free from flowers and buds. Flowering stems focus energy on bloom production, reducing root development.
- New Growth: Young, firm stems from the current season are ideal. Avoid woody or old stems, which root poorly.
- Cut at the Right Angle: Using a clean, sharp knife or pruning shears, cut the stem about 4–6 inches long just below a leaf node. Leaf nodes are where new roots are most likely to develop.
Preparing Cuttings to Prevent Fungal Rot
The secret to avoiding fungal rot is in the preparation. Follow these simple steps:
- Remove Lower Leaves: Strip off the leaves from the lower half of the cutting. Leaves in contact with the soil can encourage fungal growth.
- Allow the Cutting to Callus: Let the cuttings sit for 2–3 hours in a shaded, dry area to form a callus over the cut end. This protective layer prevents moisture from entering and reduces the chance of rot.
- Optional Fungicide Treatment: If you’ve had rot problems before, dip the cut end in a mild fungicide or cinnamon powder, which acts as a natural antifungal agent.
Choosing the Right Medium
The rooting medium is critical for healthy geranium propagation. Using soil that retains too much water can lead to rot. Instead, opt for:
- Well-Draining Mix: A combination of perlite, vermiculite, and peat moss works excellently. These materials retain some moisture but allow excess water to drain away.
- Sterilized Soil: Using sterilized soil reduces the chance of fungal spores attacking your cuttings. You can sterilize soil by baking it in the oven at 180°F for 30 minutes.
- Avoid Garden Soil: Regular garden soil can harbor fungi, bacteria, and pests, making your cuttings more vulnerable.
Planting the Cuttings
Now that your cuttings are ready and the soil is prepared, it’s time to plant them:
- Create a Hole: Make a small hole in the soil using a pencil or your finger.
- Insert the Cutting: Place the cut end gently into the hole, ensuring the stem is stable but not compressed. Firm the soil lightly around it.
- Spacing: If planting multiple cuttings, leave 2–3 inches of space between them to ensure good airflow, which helps prevent fungal growth.
Watering and Moisture Control
Watering is where many gardeners accidentally promote fungal rot. Here’s how to manage it:
- Minimal Watering Initially: After planting, water lightly to settle the soil. Overwatering is a primary cause of rot.
- Keep Humidity High Without Wet Soil: You can cover the cuttings with a plastic dome or transparent bag to maintain humidity around the leaves, but ensure the soil stays just damp, not soggy.
- Avoid Water on Leaves: Wet leaves are more prone to fungal infections, so water directly at the soil level.
Providing Proper Light and Temperature
Geranium cuttings need light and warmth to root successfully, but too much stress can invite disease:
- Indirect Sunlight: Place cuttings in bright, indirect sunlight. Direct sunlight can dry them out too quickly.
- Warm Environment: Maintain a temperature between 65–75°F (18–24°C) for optimal root growth.
- Air Circulation: Ensure the area is well-ventilated. Stale, humid air increases the risk of fungal rot.
Encouraging Faster Rooting
To accelerate rooting and further prevent rot:
- Rooting Hormones: Dip cuttings in a commercial rooting hormone or natural alternatives like honey. These stimulate root formation.
- Regular Checks: Gently tug on the cutting after 2–3 weeks. Resistance indicates roots are forming.
- Patience: Depending on the variety, rooting can take 2–4 weeks.
Transplanting Successfully
Once roots are established, it’s time to transplant:
- Check Roots: Ensure the roots are 1–2 inches long and healthy. Avoid transplanting if the soil around roots is soggy or the cutting shows signs of rot.
- Gradual Acclimatization: Introduce the plant to outdoor conditions gradually to prevent shock.
- Use Well-Draining Soil Again: Even after rooting, continue planting in soil that drains well to keep your geranium healthy.
Common Mistakes to Avoid
Even with careful preparation, mistakes can happen. Here’s what to watch out for:
- Overwatering: Even slight excess water can cause rot. Always err on the side of dryness.
- Crowded Cuttings: Without proper spacing, air circulation is reduced, increasing fungal risk.
- Poor Hygiene: Dirty tools, containers, or soil can introduce pathogens. Always sterilize tools and pots.
- Cutting Too Long or Woody: Longer or older stems are prone to rot and slow root growth.
Benefits of Successful Geranium Propagation
Rooting geraniums successfully offers many rewards:
- Cost-Effective: Propagating from cuttings is cheaper than buying new plants.
- Continuous Supply: You can create multiple plants for your home or garden.
- Vibrant Gardens: Healthy geraniums bloom profusely, adding color and fragrance.
- Learning Experience: Propagation enhances your gardening skills and confidence.
Final Thoughts
Rooting geraniums doesn’t have to be complicated or risky. By carefully selecting cuttings, allowing them to callus, using a well-draining medium, and controlling moisture, you can prevent fungal rot and propagate healthy plants effortlessly. Remember, patience is key, as is maintaining cleanliness and proper care throughout the process.
Whether you’re a beginner or seasoned gardener, these simple techniques will allow you to enjoy a flourishing garden full of vibrant geraniums without the frustration of fungal issues. Start today, and in just a few weeks, you’ll witness the magic of your cuttings developing into beautiful, thriving plants.
➡️ How to Grow Malabar Spinach from Cuttings for Fast, Easy Greens
➡️ How to Grow Super Delicious Cabbage at Home Without a Garden
➡️ How to Grow Bean Sprouts at Home in Plastic Bottles Easily (Step‑by‑Step Guide)
➡️ Why is Your Lemon Tree Blooming in the Heart of Winter?
➡️ Why Should Your Garden Have a Dedicated Pollinator Highway?
➡️ Why Do Your Fruit Trees Need a Winter Wash to Thrive in Spring?
➡️ How Can Rice Water Transform Your Fruits into Sweeter Delights?
➡️ Jumpstart Your Winter Garden: Seed Starting Under Lights