Coriander, also known as cilantro, is a versatile herb prized for its fresh leaves and seeds. Its aromatic flavor enhances everything from soups and curries to salads and chutneys. While coriander is commonly grown in gardens, it is equally rewarding—and surprisingly easy—to cultivate in a tray at home. Whether you have a balcony, kitchen window, or a small indoor space, growing coriander at home can provide a continuous supply of fresh, vibrant leaves. This article will guide you through effective strategies to grow coriander in a tray successfully, ensuring a healthy and productive harvest.
1. Choosing the Right Tray and Soil
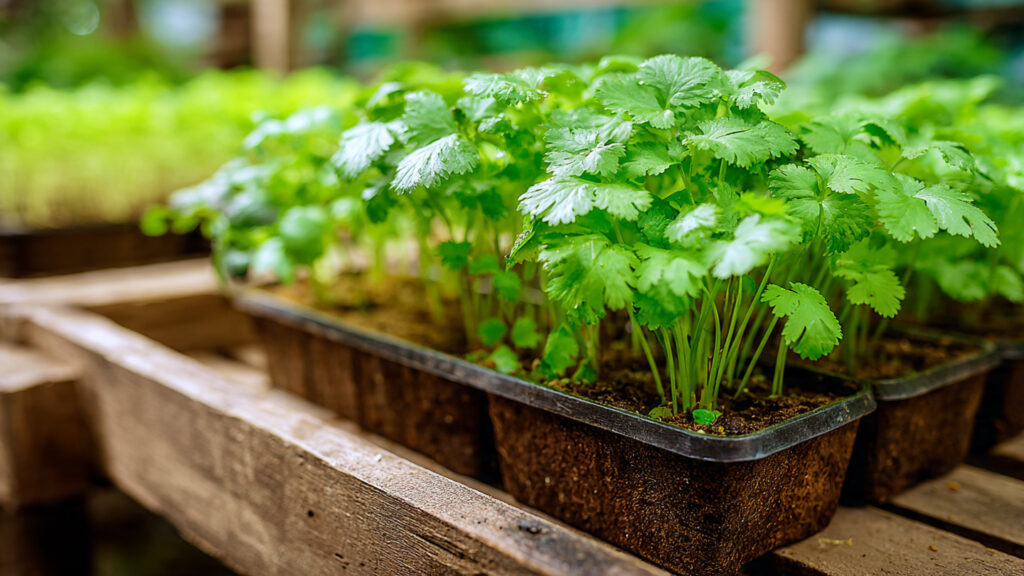
The first step in growing coriander is selecting the right tray. Choose a tray that is at least 6–8 inches deep with good drainage holes. Coriander has delicate roots that can easily rot if water collects at the bottom, so proper drainage is essential.
For soil, use a light, fertile potting mix that is rich in organic matter. A combination of garden soil, compost, and sand in equal parts works perfectly. The soil should be loose to allow roots to expand freely and retain enough moisture without becoming waterlogged. Adding a small amount of vermicompost can provide essential nutrients that will encourage vigorous growth.
2. Selecting Quality Seeds
The quality of seeds plays a crucial role in successful coriander cultivation. Opt for fresh, organic coriander seeds from a trusted source. Before sowing, soak the seeds in water for 12–24 hours. Soaking helps soften the hard seed coat, improving germination rates and promoting quicker sprouting.
It’s also important to note that coriander seeds contain two halves that may germinate at slightly different rates. Be patient, as it may take anywhere from 7 to 14 days for the seeds to sprout.
3. Sowing Seeds in the Tray
Once your tray and seeds are ready, it’s time to sow. Spread the seeds evenly over the tray’s surface. For even growth, sprinkle the seeds lightly over the soil, then cover them with a thin layer (about 0.5 cm) of soil. Lightly press the soil to ensure good seed-to-soil contact.
Water the tray gently using a fine mist spray to avoid dislodging the seeds. Maintaining consistent moisture is crucial during the germination period, but avoid overwatering, which can cause seeds to rot or mold to form.
4. Providing Optimal Light
Coriander thrives in bright, indirect sunlight. Place your tray near a south-facing window or in an area that receives 4–5 hours of sunlight daily. If natural sunlight is limited, you can supplement with a grow light to provide 12–14 hours of light per day.
Proper lighting ensures strong, healthy growth. Insufficient light leads to leggy, weak plants with pale leaves. Rotating the tray every few days helps prevent plants from bending toward the light source and encourages even growth.
5. Watering and Moisture Management
Coriander prefers consistently moist soil but not waterlogged conditions. Use a spray bottle or a watering can with a fine spout to keep the soil damp. Watering early in the morning is ideal, as it allows excess moisture to evaporate during the day and reduces the risk of fungal diseases.
Check the soil daily. If the top 1 cm feels dry, it’s time to water. Overwatering or letting the tray sit in stagnant water can lead to root rot, yellowing leaves, or fungal growth.
6. Fertilizing for Robust Growth
Coriander is a light feeder, but providing nutrients ensures robust and flavorful leaves. Use a balanced organic liquid fertilizer every 2–3 weeks. A mixture of water and compost tea, or a mild diluted solution of cow dung or fish emulsion, works wonderfully.
Avoid over-fertilization, as excessive nitrogen may lead to rapid leaf growth but a reduced flavor. The goal is healthy, aromatic leaves rather than just volume.
7. Thinning Seedlings
Once seedlings reach 2–3 inches in height, they need thinning to avoid overcrowding. Crowded plants compete for nutrients, sunlight, and water, leading to weak growth.
Using small scissors, snip off weaker seedlings at soil level, leaving 2–3 inches between plants. Thinning promotes stronger, healthier coriander that develops fuller leaves.
➡️ How to Grow Malabar Spinach from Cuttings for Fast, Easy Greens
➡️ How to Grow Super Delicious Cabbage at Home Without a Garden
➡️ How to Grow Bean Sprouts at Home in Plastic Bottles Easily (Step‑by‑Step Guide)
➡️ Why is Your Lemon Tree Blooming in the Heart of Winter?
➡️ Why Should Your Garden Have a Dedicated Pollinator Highway?
➡️ Why Do Your Fruit Trees Need a Winter Wash to Thrive in Spring?
➡️ How Can Rice Water Transform Your Fruits into Sweeter Delights?
➡️ Jumpstart Your Winter Garden: Seed Starting Under Lights
8. Controlling Temperature and Humidity
Coriander prefers cool weather. Ideal temperatures range between 15–25°C (59–77°F). Extreme heat can trigger bolting, where plants flower and go to seed prematurely, reducing leaf yield.
If growing indoors during summer, keep the tray in a cooler spot or use a light shade cloth to protect plants from direct afternoon sunlight. Maintaining moderate humidity prevents leaves from drying and keeps the tray environment stable.
9. Preventing Pests and Diseases
Growing coriander in a tray minimizes exposure to many garden pests, but indoor plants can still face issues like aphids or fungal infections. Prevent problems by:
- Ensuring proper air circulation around the tray.
- Avoiding overwatering and removing any decayed leaves.
- Spraying a mild solution of neem oil or soapy water if pests appear.
Early intervention ensures healthy plants and a steady harvest.
10. Harvesting for Maximum Flavor
Coriander leaves are ready to harvest about 3–4 weeks after sowing, once plants reach 6–8 inches in height. For continuous growth, follow the “cut-and-come-again” method:
- Snip the outer leaves close to the base, leaving the inner leaves intact.
- Avoid removing more than one-third of the plant at a time to prevent stress.
Regular harvesting encourages new growth and ensures a fresh supply for your kitchen. You can also allow some plants to flower and set seeds for a future crop.
11. Extending Coriander Growth
Even in small trays, you can extend coriander production by:
- Succession planting: Sow new seeds every 2–3 weeks to maintain a continuous harvest.
- Pruning: Regularly trim the tips to encourage bushy growth.
- Using larger trays: If space allows, transplant seedlings into a slightly bigger tray to avoid root crowding.
By applying these strategies, coriander can thrive in a small indoor space for months.
12. Tips for Maximum Success
Here are a few practical tips to make your coriander tray garden flourish:
- Use fresh seeds: Avoid old seeds with reduced germination rates.
- Maintain soil health: Mix in compost or vermicompost periodically.
- Monitor plant health: Remove yellow or wilting leaves promptly.
- Rotate trays: Ensure even sunlight exposure for uniform growth.
- Keep it clean: Regularly sanitize your tray between plantings to prevent diseases.
Conclusion
Growing coriander in a tray at home is not only convenient but also highly rewarding. By choosing the right tray and soil, providing optimal light, maintaining consistent watering, and following proper fertilization and harvesting techniques, you can enjoy fresh, aromatic coriander leaves year-round. Even beginners can achieve success by implementing these strategies, making indoor coriander cultivation a satisfying and flavorful addition to any home.
With patience and care, your tray of coriander will thrive, filling your kitchen with fresh greens and your dishes with a burst of natural flavor. Start today, and within a few weeks, you’ll have your very own homegrown coriander ready to elevate every meal.