Balsam (Impatiens balsamina), often referred to as garden balsam or rose balsam, is a vibrant and easy-to-grow flowering plant that brings color, charm, and fragrance to home gardens. Its bright blooms, which come in shades of red, pink, white, purple, and even multicolor combinations, make it a favorite among gardeners of all levels. The great news is that balsam can be easily grown from seeds indoors or directly in the garden, even if you have minimal gardening experience. With the right techniques, you can enjoy a continuous display of lush flowers while developing your gardening skills. In this comprehensive guide, we will walk you through every step for successfully growing balsam from seed at home.
Why Grow Balsam From Seed?
Growing balsam from seed offers several benefits:
- Cost-Effective: Starting from seeds is much cheaper than purchasing mature plants.
- Variety Options: Seeds allow access to a wider range of colors and patterns than available as seedlings.
- Extended Blooming Season: When grown indoors and transplanted strategically, balsam can bloom for longer periods.
- Educational: Growing plants from seed is a rewarding learning experience for beginners and seasoned gardeners alike.
Balsam is naturally fast-growing and forgiving, making it ideal for indoor propagation, balcony gardening, or traditional flower beds.
Step 1: Selecting Quality Seeds
The foundation of success begins with good-quality seeds. When choosing balsam seeds:
- Source: Purchase from reputable nurseries or seed suppliers to ensure high germination rates.
- Freshness: Seeds should be fresh and stored properly in a cool, dry place. Older seeds may germinate poorly.
- Variety: Consider the height, color, and growth habit. Compact varieties are ideal for containers, while taller varieties suit garden beds.
Some popular varieties include “Touch-Me-Not” (classic balsam), “Rose Balsam,” and dwarf hybrids suitable for pots and window boxes.
Step 2: Preparing Containers and Seed Trays
Balsam seeds do not require deep soil, so small trays or shallow pots are perfect for indoor propagation. Essential tips for container preparation include:
- Drainage: Ensure containers have drainage holes to prevent waterlogging.
- Size: Use seed trays, small pots, or any container about 2–3 inches deep.
- Cleaning: Wash containers with mild soap and water to remove any residual pathogens.
Good container preparation prevents root rot and provides an optimal environment for seed germination.
Step 3: Preparing the Soil
Balsam prefers light, well-draining soil. A suitable seed-starting mix ensures strong germination and early growth:
- Soil Mix: Use a combination of potting soil and perlite or sand (about 2:1 ratio) for drainage.
- Moisture Retention: The soil should retain some moisture but never remain soggy.
- pH Level: Slightly acidic to neutral soil (pH 6.0–7.0) works best.
Avoid heavy garden soil, which may compact in shallow trays and hinder root development.
Step 4: Sowing Balsam Seeds
Balsam seeds are small and require careful sowing to ensure even growth:
- Fill your containers with the prepared soil and lightly firm the surface.
- Sprinkle the seeds evenly on top of the soil. Balsam seeds are very small, so thin sprinkling works best.
- Cover the seeds lightly with a fine layer of soil, about 1/8 inch deep, or press gently into the soil surface.
- Water gently using a spray bottle to avoid displacing seeds.
Seeds typically germinate in 7–14 days under ideal conditions. Keep the soil consistently moist but not waterlogged during this period.
Step 5: Providing the Right Light
Light is essential for strong seedling growth. Indoors, balsam seeds need bright, indirect light:
- Windowsill: Place seed trays near a south- or east-facing window to provide adequate sunlight.
- Artificial Light: If natural light is insufficient, use LED or fluorescent grow lights for 12–14 hours per day.
- Rotation: Rotate trays every few days to prevent seedlings from leaning toward the light source.
Adequate light prevents leggy growth, resulting in sturdy, healthy seedlings ready for transplantation.
Step 6: Maintaining Temperature and Moisture
Balsam seeds germinate best in warm conditions:
- Temperature: Maintain soil temperatures between 70°F–75°F (21°C–24°C).
- Humidity: Cover seed trays loosely with plastic wrap or a clear dome to retain moisture and humidity.
- Watering: Keep the soil evenly moist during germination. Spray lightly rather than pouring water to avoid displacing seeds.
Once seedlings emerge, remove the cover to improve air circulation and prevent fungal issues.
➡️ How to Grow Malabar Spinach from Cuttings for Fast, Easy Greens
➡️ How to Grow Super Delicious Cabbage at Home Without a Garden
➡️ How to Grow Bean Sprouts at Home in Plastic Bottles Easily (Step‑by‑Step Guide)
➡️ Why is Your Lemon Tree Blooming in the Heart of Winter?
➡️ Why Should Your Garden Have a Dedicated Pollinator Highway?
➡️ Why Do Your Fruit Trees Need a Winter Wash to Thrive in Spring?
➡️ How Can Rice Water Transform Your Fruits into Sweeter Delights?
➡️ Jumpstart Your Winter Garden: Seed Starting Under Lights
Step 7: Thinning Seedlings
After seedlings develop their first true leaves (2–3 leaves), thinning is essential:
- Spacing: Thin seedlings to maintain 2–3 inches between each plant.
- Method: Use scissors to snip weaker seedlings at the soil level rather than pulling them out, which can disturb neighboring plants.
- Purpose: Thinning ensures strong, healthy seedlings with enough nutrients and space to grow.
Proper thinning prevents overcrowding and increases overall plant vigor.
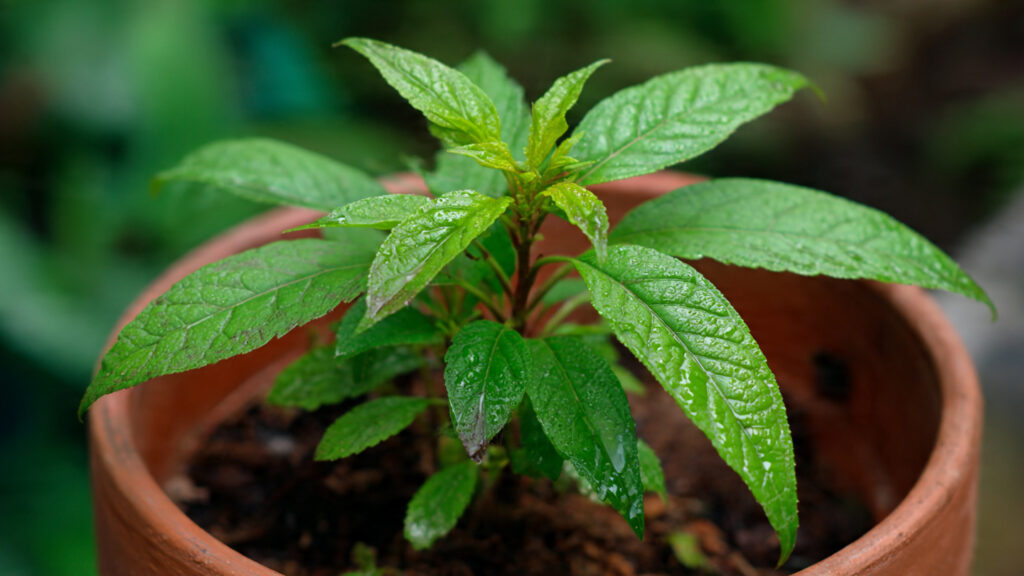
Step 8: Transplanting Seedlings
Once seedlings are 4–6 inches tall and have developed a strong root system, they can be transplanted:
- Prepare larger pots (6–8 inches) or garden beds with well-draining soil.
- Carefully remove seedlings from the tray, keeping the soil around the roots intact.
- Plant at the same depth they were growing in the seed tray.
- Water gently to help seedlings adjust to their new environment.
Transplanting strengthens plants and allows them to grow vigorously, producing lush foliage and vibrant blooms.
Step 9: Ongoing Care for Healthy Growth
After transplantation, proper care ensures continuous growth and flowering:
- Sunlight: Provide full sun for at least 4–6 hours per day. Partial shade is acceptable in extremely hot climates.
- Watering: Water regularly to maintain consistently moist soil, avoiding waterlogging.
- Fertilizing: Use a balanced, water-soluble fertilizer every 2–3 weeks to support flowering and strong growth.
- Mulching: Apply a thin layer of organic mulch around the base to retain moisture and reduce weeds.
Healthy care practices maximize flower production and enhance plant appearance.
Step 10: Encouraging Continuous Bloom
Balsam can bloom repeatedly when cared for properly:
- Deadheading: Regularly remove faded flowers to encourage new blooms.
- Pinching: Pinch off growing tips periodically to promote bushier growth and more flowering stems.
- Pest Management: Watch for aphids, whiteflies, and fungal infections. Use mild insecticidal soap or neem oil as needed.
These steps ensure a long-lasting, colorful display throughout the growing season.
Step 11: Harvesting Seeds for Future Planting
Balsam produces seed pods after flowering, which can be collected for future plantings:
- Seed Collection: Wait until pods mature and turn brown before harvesting.
- Storage: Dry seeds in a shaded area for a few days, then store in a cool, dry place in paper envelopes.
- Replanting: Fresh seeds can be used in the next season, allowing a continuous cycle of growth and propagation.
Collecting seeds makes balsam a sustainable plant that can be enjoyed year after year.
Step 12: Common Challenges and Solutions
Even though balsam is easy to grow, gardeners may encounter some challenges:
- Damping-Off Disease: Prevent fungal issues by ensuring good air circulation, using sterile soil, and avoiding overwatering.
- Leggy Seedlings: Ensure sufficient light and pinch growing tips if necessary.
- Pests: Monitor regularly and apply organic treatments promptly.
- Overcrowding: Thin seedlings early to prevent competition and weak growth.
Addressing issues promptly ensures healthy plants and successful home cultivation.
Conclusion
Growing balsam from seed at home is an easy, rewarding, and colorful gardening project. With fresh seeds, proper containers, light, water, and careful care, even beginners can enjoy a continuous display of vibrant flowers. From seed sowing to transplanting and ongoing maintenance, each step contributes to strong, healthy plants that bloom beautifully throughout the season.
Balsam’s forgiving nature, combined with simple techniques like proper soil preparation, thinning, and deadheading, makes it ideal for home gardeners seeking a low-maintenance yet rewarding flowering plant. By following this guide, you can enjoy the satisfaction of growing your own garden balsam, bringing vibrant colors, fragrant blooms, and natural beauty into your home or outdoor space.
Start your balsam seeds today, and in just a few weeks, you can witness the transformation from tiny seeds to a lush, blooming garden centerpiece—proving that successful home gardening is easier than you think.