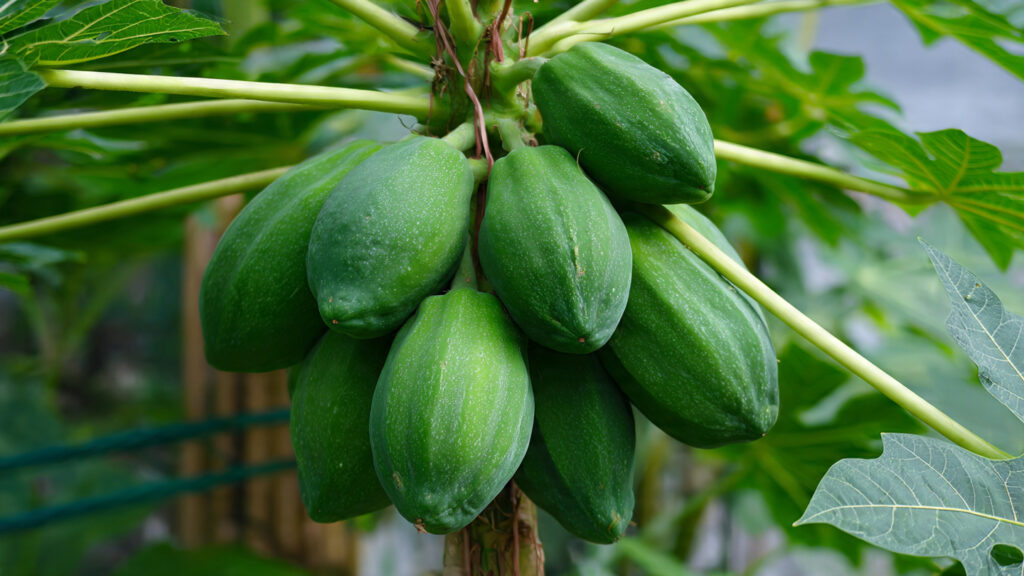
Papaya (Papaya) is a tropical fruit loved for its sweet, juicy flavor and high nutritional value. Rich in vitamins A, C, and digestive enzymes, it’s a favorite in many households. While papaya trees are often grown in the ground, beginners can successfully cultivate them in pots, even with limited space, provided they follow simple steps. Container gardening allows you to enjoy fresh papaya fruits on your balcony, terrace, or small backyard, without complicated techniques.
This guide provides a beginner-friendly, step-by-step approach to growing papaya in a pot, ensuring healthy plants and fruitful harvests with minimal effort.
Why Grow Papaya in a Pot?
Container gardening offers unique advantages for papaya cultivation:
- Space Efficiency – Ideal for small spaces, apartments, or terraces.
- Mobility – Easily move the pot to protect the plant from harsh sunlight, heavy rain, or strong winds.
- Pest and Disease Management – Isolated pots reduce exposure to soil-borne pests.
- Controlled Soil Quality – You can provide nutrient-rich, well-draining soil.
- Early Harvesting – Potted papayas often grow faster and start flowering earlier compared to ground-grown plants.
With these benefits, even first-time gardeners can enjoy fresh papaya without complications.
Step 1: Choosing the Right Variety
Selecting the right papaya variety is crucial for container growth.
- Dwarf Varieties – Ideal for pots as they remain compact. Examples include ‘Red Lady’ and ‘Solo’.
- Fast-Growing Varieties – Promote early fruiting.
- Disease-Resistant Varieties – Reduce the need for chemical interventions.
Buying seeds from a trusted nursery ensures healthy and viable plants.
Step 2: Selecting a Suitable Pot
Papaya develops a long taproot, so the container must accommodate root growth.
Recommended Pot Features:
- Size: Minimum 15–20 gallons (approx. 18–20 inches deep and wide).
- Material: Plastic, ceramic, or fiberglass — lightweight options are easier to move.
- Drainage: Ensure multiple drainage holes to prevent waterlogging.
A deep, wide pot ensures that roots spread properly and the plant remains stable as it grows.
Step 3: Preparing the Soil
Papayas thrive in nutrient-rich, well-draining soil.
Ideal Soil Mix for Beginners:
- 40% garden soil
- 30% compost or well-rotted manure
- 20% coco peat or peat moss
- 10% sand or perlite
Tips:
- Avoid heavy clay soil as it retains water and may cause root rot.
- Add organic matter for better fertility and aeration.
This combination ensures the papaya receives essential nutrients while preventing water stagnation.
Step 4: Sowing Seeds
Papaya seeds are easy to germinate with minimal effort.
Seed Sowing Steps:
- Remove seeds from a ripe papaya fruit.
- Rinse thoroughly to remove pulp.
- Optional: Soak seeds in water for 24 hours to improve germination.
- Plant seeds ½–1 inch deep in the prepared soil.
- Water gently and keep soil moist.
Germination usually occurs in 2–3 weeks, depending on temperature. Warm, humid conditions accelerate growth.
Step 5: Providing Ideal Sunlight
Papayas are sun-loving plants.
- Ensure 6–8 hours of direct sunlight daily.
- If grown indoors or on shaded balconies, rotate the pot regularly to maintain uniform growth.
- Avoid excessive midday heat by providing light shade in extremely hot climates.
Proper sunlight supports strong stem growth and earlier flowering.
➡️ How to Grow Malabar Spinach from Cuttings for Fast, Easy Greens
➡️ How to Grow Super Delicious Cabbage at Home Without a Garden
➡️ How to Grow Bean Sprouts at Home in Plastic Bottles Easily (Step‑by‑Step Guide)
➡️ Why is Your Lemon Tree Blooming in the Heart of Winter?
➡️ Why Should Your Garden Have a Dedicated Pollinator Highway?
➡️ Why Do Your Fruit Trees Need a Winter Wash to Thrive in Spring?
➡️ How Can Rice Water Transform Your Fruits into Sweeter Delights?
➡️ Jumpstart Your Winter Garden: Seed Starting Under Lights
Step 6: Watering Practices
Watering is essential, but overwatering can damage papaya roots.
Guidelines:
- Keep soil consistently moist but not soggy.
- Water deeply 2–3 times per week, depending on weather.
- Reduce watering during rainy periods.
Tip: Mulching with dry leaves or straw helps retain moisture, regulates soil temperature, and suppresses weeds.
Step 7: Fertilizing the Papaya Plant
Papaya plants are heavy feeders and require regular nutrition for healthy growth and fruiting.
Beginner-Friendly Fertilizer Tips:
- Apply compost or well-rotted manure every 4–6 weeks.
- Use balanced NPK fertilizer (10-10-10) once a month.
- Add micronutrients like magnesium and zinc if leaves yellow.
Avoid excessive nitrogen, as it promotes leafy growth but delays flowering.
Step 8: Pruning and Supporting the Plant
Pruning is minimal but important for container-grown papaya.
- Remove damaged or yellowing leaves to improve airflow.
- If the plant grows tall and thin, provide stake support to prevent tipping.
- Trim lateral shoots if necessary to maintain a strong central stem.
This simple care reduces disease risk and strengthens the plant for better fruiting.
Step 9: Flowering and Fruiting
Papayas are either male, female, or hermaphrodite.
- Hermaphrodite plants produce fruit without pollination and are ideal for containers.
- Female plants need a male nearby for pollination.
Encouraging Flowering:
- Maintain consistent watering and nutrition.
- Provide at least 6–8 hours of sunlight daily.
- Keep the plant stress-free — avoid sudden temperature changes.
Flowering may start as early as 6–8 months in potted papaya, especially dwarf varieties.
Step 10: Pollination Tips
- Hermaphrodite varieties generally self-pollinate.
- For female plants, hand-pollination improves fruit set.
- Use a small brush to transfer pollen from male to female flowers if needed.
Pollination ensures good fruit size and uniform ripening.
Step 11: Pest and Disease Management
Container-grown papayas are less prone to pests, but vigilance is necessary.
Common Issues:
- Aphids and mealybugs: Treat with neem oil or insecticidal soap.
- Powdery mildew: Improve air circulation and avoid wetting leaves.
- Root rot: Prevent by ensuring proper drainage and avoiding overwatering.
Regular monitoring and organic solutions keep plants healthy without complicated procedures.
Step 12: Harvesting Papaya Fruits
- Harvest fruits when skin turns from green to yellow.
- Slightly firm fruits ripen off the plant within a few days.
- Frequent harvesting encourages more flowering and fruiting.
Proper harvest timing ensures sweet, juicy, and flavorful papayas.
Step 13: Repotting as the Tree Grows
Papayas grow rapidly, so repotting may be necessary:
- Repot into a slightly larger container every 1–2 years.
- Refresh soil with a mix of compost, garden soil, and sand.
- Trim any damaged roots during repotting.
Container papayas remain manageable with proper repotting and care.
Step 14: Common Mistakes to Avoid
- Using shallow or small pots that restrict root growth.
- Overwatering or waterlogging soil.
- Neglecting sunlight requirements.
- Over-fertilizing with nitrogen-rich fertilizers.
- Ignoring pest issues.
Avoiding these pitfalls ensures a healthy, productive plant.
Step 15: Advantages of Growing Papaya in Pots
- Accessible Fresh Fruits: Enjoy homegrown papaya year-round.
- Compact Growth: Suitable for balconies and small gardens.
- Controlled Soil and Water: Reduces disease risk.
- Faster Fruiting: Container-grown plants often fruit earlier than seed-grown ground plants.
- Educational and Fun: Ideal for beginner gardeners learning plant care.
Even a single pot can provide fresh fruits and a beautiful tropical touch to your space.
Final Thoughts
Growing papaya in a pot is a simple and beginner-friendly way to enjoy fresh tropical fruits without complications. By following these steps — selecting the right variety, preparing a deep pot, using nutrient-rich soil, maintaining proper sunlight and watering, and monitoring growth — anyone can cultivate healthy, fruit-bearing papaya trees at home.
The process is not only rewarding but also educational, allowing you to witness a tiny seed transform into a thriving tree producing delicious fruits. With patience, consistency, and minimal care, container-grown papayas can provide abundant harvests, making your home garden vibrant, productive, and truly tropical.