Petroselinum crispum, commonly known as parsley, is one of the most popular herbs in home gardens. Its fresh, bright flavor enhances a wide range of dishes, from salads and soups to sauces and garnishes. Parsley is not only valued for its culinary uses but also for its high nutritional content, including vitamins A, C, and K, as well as antioxidants and minerals.
Despite its popularity, parsley is notorious among gardeners for being slow and sometimes unpredictable to germinate. However, with a little planning, proper technique, and attention to environmental conditions, germinating parsley seeds at home can be a simple and rewarding process. This guide provides step-by-step instructions to ensure effortless germination and healthy seedlings, setting the stage for a thriving parsley garden.
Understanding Parsley Seeds
Parsley seeds are slow to germinate due to their tough outer seed coat. In nature, this hard coating allows seeds to survive adverse conditions, but it also means gardeners need to take extra steps to encourage rapid sprouting.
Key characteristics of parsley seeds:
- Dormant seed coat that delays water absorption.
- Germination typically takes 14–28 days under ideal conditions.
- Prefers moderate temperatures (65–75°F or 18–24°C).
- Requires consistent moisture but not waterlogging.
Knowing these characteristics helps gardeners employ techniques that maximize germination success.
Step 1: Selecting Quality Seeds
The first step toward effortless germination is choosing high-quality seeds.
- Purchase seeds from reputable suppliers to ensure viability.
- Check the packaging for freshness; older seeds may have lower germination rates.
- Choose the variety based on your needs—curly leaf parsley for garnish or flat-leaf (Italian) parsley for cooking.
Selecting fresh, viable seeds increases the likelihood of rapid, uniform germination.
Step 2: Pre-Soaking or Scarification
One of the most effective methods to speed up parsley germination is pre-soaking or scarification.
Pre-Soaking Method:
- Soak seeds in lukewarm water for 12–24 hours before planting.
- This softens the hard seed coat, allowing water absorption and stimulating germination.
Scarification Method:
- Gently rub seeds with fine sandpaper or nick the seed coat with a knife.
- This creates a small opening, helping moisture penetrate the seed.
Both techniques help overcome dormancy, reducing germination time and improving uniformity.
Step 3: Preparing the Planting Medium
Parsley seeds require a light, well-draining seed-starting mix to prevent damping-off disease and encourage root growth.
Recommended Medium:
- Use a commercial seed-starting mix or make your own by combining equal parts peat moss, perlite, and vermiculite.
- Avoid heavy garden soil, which can compact and impede root development.
- Moisten the soil lightly before sowing seeds.
A well-prepared medium ensures seedlings develop strong roots and healthy foliage.
Step 4: Sowing the Seeds
Proper sowing depth and spacing are critical for parsley seed germination.
➡️ How to Grow Malabar Spinach from Cuttings for Fast, Easy Greens
➡️ How to Grow Super Delicious Cabbage at Home Without a Garden
➡️ How to Grow Bean Sprouts at Home in Plastic Bottles Easily (Step‑by‑Step Guide)
➡️ Why is Your Lemon Tree Blooming in the Heart of Winter?
➡️ Why Should Your Garden Have a Dedicated Pollinator Highway?
➡️ Why Do Your Fruit Trees Need a Winter Wash to Thrive in Spring?
➡️ How Can Rice Water Transform Your Fruits into Sweeter Delights?
➡️ Jumpstart Your Winter Garden: Seed Starting Under Lights
Sowing Steps:
- Sow seeds on the surface or cover lightly with ¼ inch of soil. Parsley seeds need light for optimal sprouting.
- Space seeds about 1–2 inches apart to prevent overcrowding.
- Mist the soil gently to avoid displacing seeds.
Following these steps ensures seeds receive the right environment for consistent germination.
Step 5: Providing Optimal Temperature and Light
Parsley germinates best under moderate temperatures and adequate light.
Temperature:
- Maintain soil temperature between 65–75°F (18–24°C).
- Use a heat mat if necessary to maintain warmth, especially in cooler climates.
Light:
- Place trays or containers in a bright location with indirect sunlight.
- If indoor light is insufficient, use fluorescent or LED grow lights for 12–16 hours daily.
Consistent warmth and light prevent slow, leggy growth and encourage uniform sprouting.
Step 6: Maintaining Consistent Moisture
Moisture is crucial during germination but overwatering can cause seed rot.
Watering Tips:
- Keep the soil consistently moist but not soggy.
- Mist lightly with a spray bottle to maintain humidity without displacing seeds.
- Cover seed trays with clear plastic or a humidity dome to reduce evaporation and maintain moisture levels.
Proper moisture management ensures seeds absorb water effectively and sprout without rotting.
Step 7: Patience and Monitoring
Parsley seeds are slow to germinate, so patience is key.
- Germination can take 14–28 days. Some seeds may sprout slightly later than others.
- Check soil daily to ensure it remains moist.
- Remove any seeds that fail to germinate or show signs of mold to prevent contamination.
Monitoring and patience are essential to achieving a healthy seedling population.
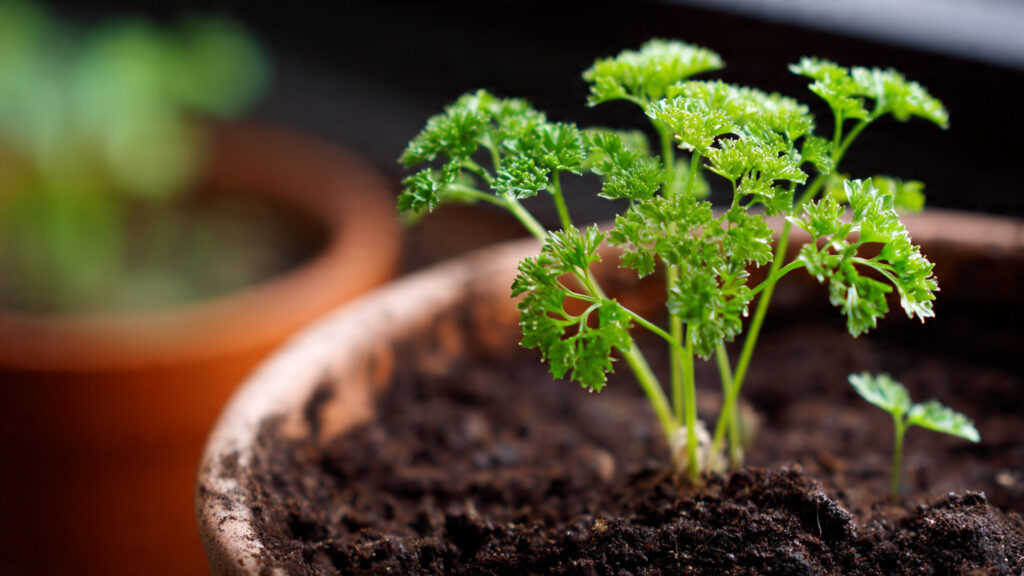
Step 8: Thinning Seedlings
Once parsley seedlings develop 2–3 true leaves, thinning is necessary to prevent overcrowding and ensure strong growth.
Thinning Guidelines:
- Space seedlings 2–3 inches apart in trays or pots.
- Remove weaker seedlings, leaving the strongest plants.
- Transplant thinned seedlings carefully to prepared garden beds or containers.
Thinning promotes airflow, reduces disease risk, and allows remaining plants to grow vigorously.
Step 9: Hardening Off
Before transplanting parsley seedlings outdoors, it’s important to acclimate them to garden conditions.
Hardening Off Steps:
- Begin by placing seedlings outdoors in partial shade for 1–2 hours daily.
- Gradually increase exposure to sunlight and outdoor conditions over 7–10 days.
- Protect seedlings from wind, frost, or heavy rain during this period.
Hardening off reduces transplant shock and ensures seedlings thrive in their permanent location.
Step 10: Transplanting to Garden or Containers
Parsley grows well both in garden beds and containers, making it versatile for small spaces.
Transplanting Guidelines:
- Choose well-draining, fertile soil enriched with compost.
- Space plants 6–8 inches apart to allow for bushy growth.
- Water immediately after transplanting to settle soil around roots.
Whether grown in containers or garden beds, parsley will establish quickly when transplanted carefully.
Ongoing Care for Parsley
Once germinated and transplanted, parsley requires minimal but consistent care to maintain lush growth:
- Watering: Keep soil evenly moist, avoiding prolonged drought.
- Light: Provide 6–8 hours of sunlight daily or supplemental indoor light.
- Fertilization: Apply balanced, water-soluble fertilizer every 3–4 weeks.
- Pruning: Harvest leaves regularly to encourage new growth and maintain a bushy shape.
Consistent care ensures a continuous supply of flavorful parsley leaves.
Troubleshooting Common Germination Issues
Parsley seeds may occasionally face challenges during germination:
- Slow or Uneven Sprouting: Often due to cold soil or old seeds; pre-soak and maintain warmth.
- Damping-Off Disease: Caused by overwatering or poor airflow; ensure well-draining soil and adequate ventilation.
- Mold or Fungal Growth: Cover trays lightly or reduce humidity slightly; remove affected seeds.
- Leggy Seedlings: Insufficient light; provide bright, indirect light or grow lights.
Addressing these issues early ensures a higher germination success rate.
Benefits of Growing Parsley at Home
Growing parsley from seeds at home offers multiple advantages:
- Fresh Flavor: Enjoy flavorful leaves anytime for cooking or garnishing.
- Nutritional Value: Parsley is rich in vitamins, antioxidants, and minerals.
- Cost-Effective: Growing from seeds is inexpensive and sustainable.
- Decorative Appeal: Lush parsley adds greenery and texture to garden beds or indoor containers.
- Continuous Supply: Regular harvesting encourages new growth, providing fresh leaves throughout the season.
Homegrown parsley combines culinary, nutritional, and aesthetic benefits for any gardener.
Final Thoughts
Effortless germination of parsley seeds at home is achievable with proper planning, patience, and attention to detail. By selecting high-quality seeds, pre-soaking or scarifying them, providing well-draining soil, maintaining consistent moisture, and ensuring optimal light and temperature, gardeners can enjoy successful, uniform germination.
Once seedlings are established, thinning, hardening off, and careful transplanting create strong, healthy plants ready to provide a continuous supply of flavorful leaves. With minimal ongoing care—consistent watering, light, and harvesting—parsley can flourish indoors or outdoors, adding vibrant flavor and greenery to your home garden.
By following these simple steps, even novice gardeners can transform parsley from a tricky-to-germinate seed into a lush, productive herb garden, ensuring fresh, aromatic leaves are always at hand for culinary use.