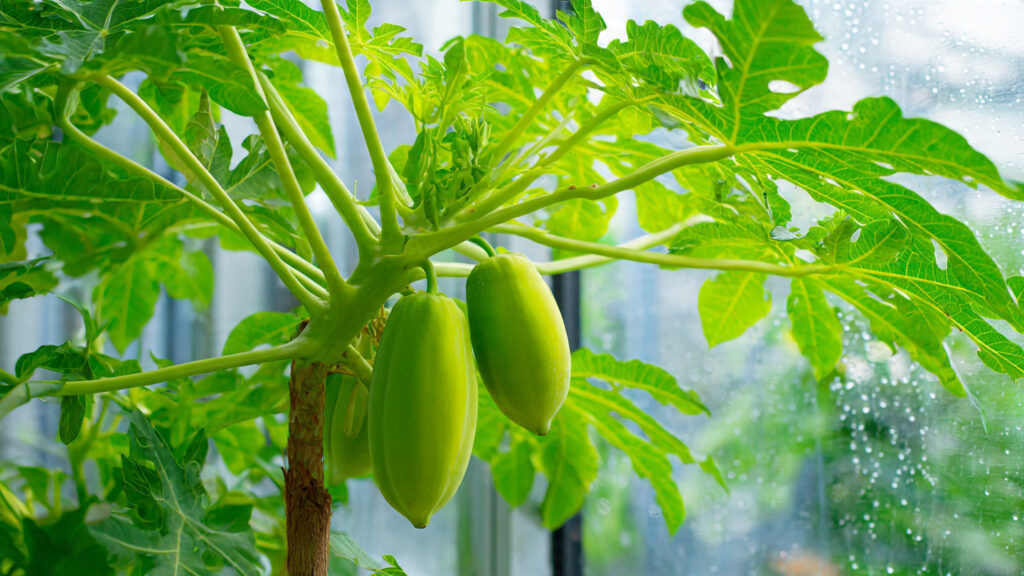
Papaya (Carica papaya) is not only delicious and nutritious but also one of the fastest-growing tropical fruit trees. If you’ve ever tried growing papaya from seeds, you know it can take some time before the tree matures enough to produce fruit.
But there’s a clever technique called air layering that allows you to propagate papaya faster, giving you strong, healthy plants ready for transplanting and fruiting sooner. Unlike traditional propagation from seeds, air layering encourages a new root system while the stem is still attached to the parent plant, ensuring quick growth and better survival rates.
In this guide, we’ll explore exactly how to air layer papaya, step by step, so you can enjoy vigorous, fruit-bearing plants in record time.
What Is Air Layering and Why Use It for Papaya?
Air layering is a propagation technique where a stem develops roots while still attached to the parent plant. Once roots are established, you can cut the new plant and transplant it.
Why air layering works wonders for papaya:
- Papaya has a high growth rate but fragile roots. Air layering avoids transplant shock.
- Produces plants faster than growing from seeds.
- Ensures genetic consistency—you’ll get a clone of the parent tree, preserving desirable traits like fruit size and sweetness.
- Increases survival rates for young plants.
Materials You’ll Need for Air Layering Papaya
Before you start, gather the following items:
- A healthy papaya plant (1–2 years old is ideal)
- Sharp knife or pruning tool
- Sphagnum moss or coco peat
- Polyethylene sheet or plastic wrap
- String, rubber bands, or tape
- Small container or bag for moss (optional)
- Water
Step 1: Choose the Right Stem
Selecting the correct stem is critical for success.
✅ Look for a healthy, young branch that is about 1–2 cm thick.
✅ Avoid stems that are too woody or too soft.
✅ Choose a location with plenty of sunlight, as this encourages root development.
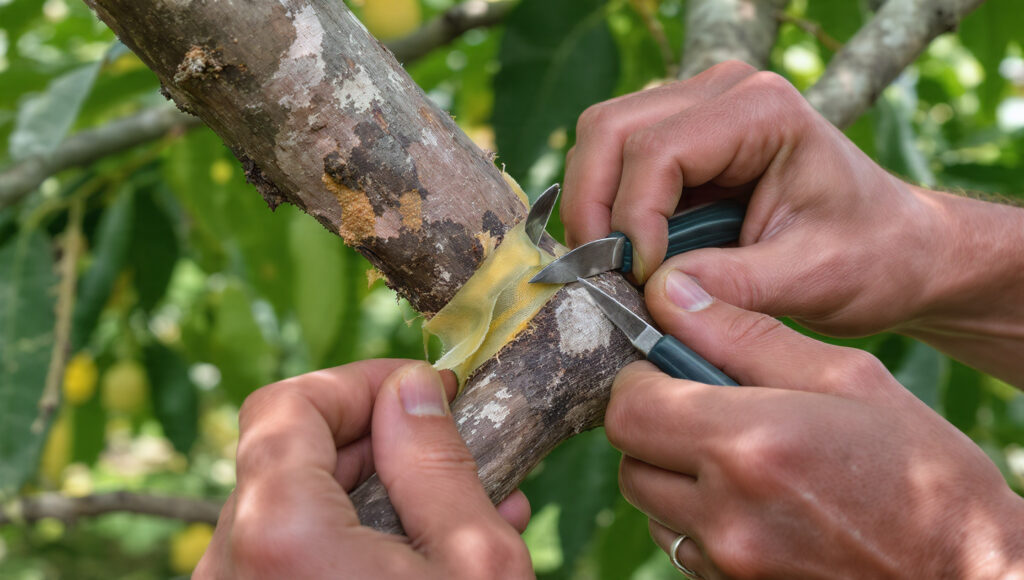
Step 2: Prepare the Stem
Air layering requires wounding the stem to stimulate root growth.
- About 12–18 inches from the tip of the branch, make a clean diagonal cut about one-third of the way through the stem.
- Remove a thin ring of bark (about 1–2 inches wide) to expose the inner tissue (cambium).
- Ensure the exposed area is clean—remove any damaged or decaying tissue.
This wound signals the plant to produce roots at the cut site.
Step 3: Apply Rooting Medium
Now it’s time to wrap the wounded area with a medium that retains moisture:
- Soak sphagnum moss or coco peat in water until damp but not soggy.
- Wrap the moss around the exposed area, covering it completely.
- Ensure there’s enough thickness to hold moisture for root development.
Step 4: Cover with Plastic
To keep the moss moist and protect it from drying out:
- Wrap the moss-covered area with a polyethylene sheet or plastic wrap.
- Seal both ends tightly using string, tape, or rubber bands.
- Make sure it’s snug but not crushing the branch.
💡 Tip: You can also insert a small transparent container around the moss to monitor root growth easily.
Step 5: Maintain Moisture and Wait for Roots
Patience is key. Roots will form over the next 4–8 weeks depending on temperature and humidity.
- Check moisture every week. If the moss feels dry, carefully open the plastic and sprinkle water.
- Avoid overwatering, as soggy moss can cause rot.
- Ensure the plant continues to receive sunlight and healthy care during this period.
Step 6: Cut and Transplant the New Papaya Plant
Once you see healthy white roots emerging through the moss:
- Carefully cut the stem just below the root ball.
- Remove the plastic and gently separate the new plant.
- Plant it in a pot or directly in the garden with well-draining soil.
- Water immediately to help the plant adjust.
💡 Tip: Keep the new plant in a partially shaded area for the first week or two to reduce transplant shock.
➡️ How to Grow Malabar Spinach from Cuttings for Fast, Easy Greens
➡️ How to Grow Super Delicious Cabbage at Home Without a Garden
➡️ How to Grow Bean Sprouts at Home in Plastic Bottles Easily (Step‑by‑Step Guide)
➡️ Why is Your Lemon Tree Blooming in the Heart of Winter?
➡️ Why Should Your Garden Have a Dedicated Pollinator Highway?
➡️ Why Do Your Fruit Trees Need a Winter Wash to Thrive in Spring?
➡️ How Can Rice Water Transform Your Fruits into Sweeter Delights?
➡️ Jumpstart Your Winter Garden: Seed Starting Under Lights
Tips for Quick and Healthy Growth
Air layering is effective, but certain steps ensure the papaya grows faster and healthier:
- Use a healthy parent plant: Weak or diseased plants will produce weak layers.
- Choose the right season: Spring or early summer is ideal for air layering as growth is naturally faster.
- Keep moss moist: Roots can dry out quickly if the moss isn’t damp.
- Protect from pests: Monitor for aphids or ants near the air-layered stem.
- Fertilize lightly after transplanting: Use organic compost or a mild balanced fertilizer to encourage strong root and leaf development.
Advantages of Air Layering Papaya Over Seeds
| Feature | Air Layering | Seeds |
|---|---|---|
| Growth speed | Faster | Slower |
| Fruit quality | Same as parent (clone) | Variable |
| Root survival | High | Risk of transplant shock |
| Time to fruiting | 6–8 months for mature tree | 12–18 months |
| Ease of propagation | Moderate | Easy, but slower |
As you can see, air layering is ideal if you want a quick-growing papaya plant that will produce fruit sooner.
Common Mistakes to Avoid
Even experienced gardeners can make mistakes. Here’s what to watch out for:
- Wrapping too tightly: Can damage the branch.
- Leaving moss dry: Roots will fail to develop.
- Cutting too early: Ensure roots are well-formed before cutting.
- Using weak branches: Only healthy branches produce strong roots.
- Ignoring pests: Aphids or ants can damage the air-layered stem.
Extra Care After Transplanting
Once your new papaya plant is in the soil:
- Water regularly, keeping the soil moist but not waterlogged.
- Mulch around the base to retain moisture.
- Fertilize every 4–6 weeks with compost or organic fertilizer.
- Provide support if the stem is tall and fragile.
With proper care, your papaya plant will continue growing vigorously and start producing fruit faster than plants grown from seeds.
Final Thoughts: Air Layering Papaya Made Easy
Air layering is a fantastic way to propagate papaya quickly and reliably. It allows you to produce healthy, robust plants without waiting for seeds to germinate, reducing the risk of transplant shock, and ensuring your new plants are strong from the start.
Quick Recap:
- Choose a healthy branch
- Make a clean wound and remove a ring of bark
- Wrap with damp moss or coco peat
- Cover with plastic to retain moisture
- Wait 4–8 weeks for roots
- Cut and transplant the new plant
By following these steps, you can enjoy fast-growing papaya plants that thrive in your garden and reward you with delicious fruit sooner than ever. 🌿🍈
Air layering is simple, effective, and perfect for any gardener who loves papayas and wants quick results. Start your air-layering project today and watch your tropical garden flourish!