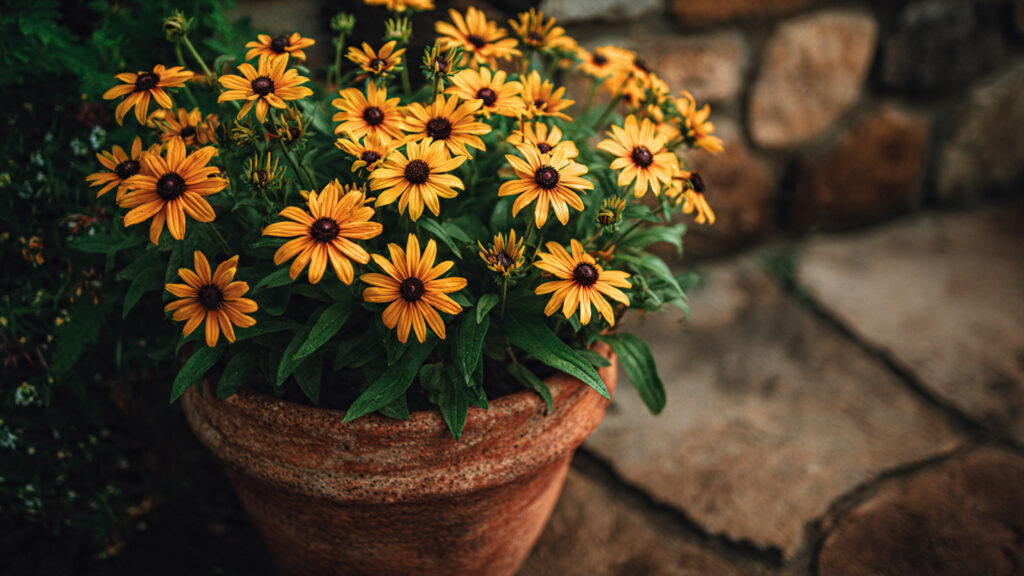
Black-Eyed Susans (Rudbeckia hirta) are a favorite among gardeners for their cheerful yellow petals and dark centers, adding vibrant color to any space. Traditionally grown in garden beds, these resilient perennials can also thrive in pots, making them ideal for patios, balconies, and small outdoor areas. If you’ve ever wondered whether container gardening is suitable for Black-Eyed Susans, this guide will explore the best methods to grow them successfully in pots, the benefits, and tips to ensure they flourish all season long.
Why Grow Black-Eyed Susans in Pots?
Container gardening offers several advantages, particularly for Black-Eyed Susans:
- Space-Saving: Perfect for urban gardens, balconies, or patios where ground space is limited.
- Mobility: Pots can be moved to catch sunlight, avoid harsh weather, or create dynamic floral displays.
- Soil Control: You can optimize the soil mix for drainage and fertility, reducing the risk of disease.
- Pest Management: Containers allow you to monitor and manage pests more effectively.
- Seasonal Flexibility: Potted Black-Eyed Susans can be brought indoors or to sheltered areas during extreme weather.
Container cultivation allows gardeners of all levels to enjoy these iconic flowers without the need for a traditional garden plot.
Choosing the Right Container
The first step to successful pot cultivation is selecting an appropriate container.
Key considerations include:
- Size: Black-Eyed Susans have moderate root systems. A pot at least 10–12 inches deep and wide enough to accommodate growth is ideal. Larger containers allow multiple plants to thrive together.
- Material: Terracotta, ceramic, and plastic pots all work, but each has pros and cons. Terracotta is porous and promotes airflow but dries quickly; plastic retains moisture longer.
- Drainage: Ensure the pot has adequate drainage holes to prevent waterlogging, which can cause root rot.
Proper container selection is essential, as it affects both root development and overall plant health.
The Best Soil for Black-Eyed Susans
Healthy soil is key to vibrant blooms. Black-Eyed Susans prefer well-draining, slightly acidic to neutral soil (pH 6.0–7.0).
Tips for the perfect soil mix:
- Use a high-quality potting mix rather than garden soil, which may compact and hinder drainage.
- Add perlite or coarse sand to enhance drainage.
- Incorporate a slow-release fertilizer or organic compost to provide nutrients.
- Avoid overly rich soils; Black-Eyed Susans thrive in moderately fertile soil and may produce fewer flowers if over-fertilized.
By preparing soil specifically for container growth, you can ensure a strong foundation for your plants.
Planting Black-Eyed Susans in Pots
Once you have the container and soil ready, planting is straightforward.
Step-by-step process:
- Fill the pot with the prepared soil mix, leaving a few inches at the top for watering.
- If planting seeds, scatter them evenly and lightly cover with a thin layer of soil.
- For transplants or seedlings, dig a small hole slightly larger than the root ball and gently place the plant inside.
- Firm the soil around the plant to eliminate air pockets.
- Water thoroughly to settle the soil and encourage root establishment.
Planting at the correct depth ensures roots establish quickly and helps the plant produce strong, upright stems.
Sunlight Requirements
Black-Eyed Susans are sun-loving flowers, requiring at least 6–8 hours of direct sunlight per day.
- Place pots in south- or west-facing areas for maximum sunlight exposure.
- If sunlight is limited, consider using reflective surfaces or rotating pots to ensure all plants receive adequate light.
- Insufficient sunlight can lead to leggy growth, fewer blooms, and weaker plants.
Sunlight is one of the most important factors for achieving the iconic, vibrant look of Black-Eyed Susans.
Watering and Care Tips
Proper watering and maintenance are crucial for container-grown Black-Eyed Susans:
➡️ How to Grow Malabar Spinach from Cuttings for Fast, Easy Greens
➡️ How to Grow Super Delicious Cabbage at Home Without a Garden
➡️ How to Grow Bean Sprouts at Home in Plastic Bottles Easily (Step‑by‑Step Guide)
➡️ Why is Your Lemon Tree Blooming in the Heart of Winter?
➡️ Why Should Your Garden Have a Dedicated Pollinator Highway?
➡️ Why Do Your Fruit Trees Need a Winter Wash to Thrive in Spring?
➡️ How Can Rice Water Transform Your Fruits into Sweeter Delights?
➡️ Jumpstart Your Winter Garden: Seed Starting Under Lights
- Watering: Keep soil consistently moist but not waterlogged. Water deeply when the top inch of soil feels dry.
- Fertilization: Apply a balanced liquid fertilizer every 4–6 weeks during the growing season. Avoid excessive nitrogen, which promotes foliage growth over flowers.
- Pruning: Deadhead spent flowers to encourage continuous blooming. Trim back any leggy stems to maintain a compact shape.
- Pest Control: Watch for aphids, spider mites, and snails. Use organic or chemical treatments as needed, but always follow instructions carefully.
- Winter Care: In colder climates, consider moving pots to a sheltered location or indoors, as Black-Eyed Susans are hardy mostly in zones 3–9.
Consistent care ensures that potted plants remain healthy, vibrant, and productive throughout the season.
Benefits of Container Cultivation
Growing Black-Eyed Susans in pots offers advantages that traditional garden planting may not:
- Aesthetic Flexibility: Containers can enhance patios, balconies, or front entrances. Their mobility allows you to create visually appealing arrangements.
- Controlled Environment: Soil, sunlight, and watering are easier to manage in pots, reducing the risk of stress or disease.
- Experimentation: Grow different varieties together, experiment with soil types, and test fertilization schedules without affecting other plants.
- Accessibility: Container gardening is perfect for gardeners with limited mobility or those who prefer gardening at eye level.
These benefits make pots an excellent choice for maximizing both the beauty and practicality of Black-Eyed Susan cultivation.
Common Mistakes to Avoid
Even though Black-Eyed Susans are hardy, common mistakes in container gardening can hinder success:
- Too Small a Pot: Restricts root growth, leading to stunted plants and fewer flowers.
- Poor Drainage: Causes root rot and fungal issues.
- Overwatering: Consistently wet soil can damage roots, even with good drainage.
- Insufficient Sunlight: Leads to weak stems and sparse blooms.
- Ignoring Fertilization: Container soil loses nutrients faster than garden soil, so regular feeding is necessary.
Avoiding these pitfalls will ensure that your potted Black-Eyed Susans thrive and bloom profusely.
Enhancing Bloom and Longevity
To get the best results from your potted Black-Eyed Susans:
- Deadheading: Regularly remove spent flowers to prolong blooming.
- Pinching Back: In early growth stages, pinch the tips of stems to encourage bushier plants.
- Companion Planting: Planting other sun-loving flowers alongside Black-Eyed Susans in the same pot can create vibrant, layered displays.
- Seasonal Rotation: Move pots to follow sunlight or shield them from extreme heat to maintain consistent growth.
These techniques help maximize bloom quality and the overall lifespan of your container plants.
Conclusion
So, should you try the best method to grow Black-Eyed Susans in pots? Absolutely. With careful container selection, well-draining soil, proper sunlight, and attentive care, Black-Eyed Susans can thrive in pots just as beautifully as in garden beds. Container cultivation not only provides flexibility and mobility but also allows for experimentation and easier management, making it perfect for urban gardeners or those with limited outdoor space.
By following these methods, you can enjoy a cheerful splash of golden-yellow blooms on patios, balconies, and terraces throughout the growing season. Container-grown Black-Eyed Susans combine beauty, convenience, and practicality—bringing the charm of a vibrant garden right into small, manageable spaces.
Whether you are a beginner or an experienced gardener, potted Black-Eyed Susans offer a rewarding way to cultivate resilience, color, and joy in your home. With the right approach, patience, and care, your pots can flourish with these sunny, iconic flowers, creating a delightful and uplifting atmosphere wherever they are placed.