Starting your own seedlings at home is one of the most satisfying parts of gardening. Whether you’re planning to grow vegetables, herbs, or flowers, a strong beginning makes all the difference. The good news? You don’t need expensive trays, grow lights, or professional equipment to raise healthy young plants. With a simple DIY improvised seedbed and minimal tools, you can successfully germinate and nurture seedlings right at home.
This complete guide will show you how to create a practical seedbed using everyday materials, ensure strong germination, and grow vigorous seedlings ready for transplanting.
Why Start Seeds at Home?
Growing from seed offers several benefits:
- Saves money compared to buying nursery plants
- Provides wider variety choices
- Ensures chemical-free growing
- Allows better control over plant health
- Extends your growing season
By building a simple improvised seedbed, you create an ideal environment for seeds to sprout and develop strong roots before moving outdoors.
What Is an Improvised Seedbed?
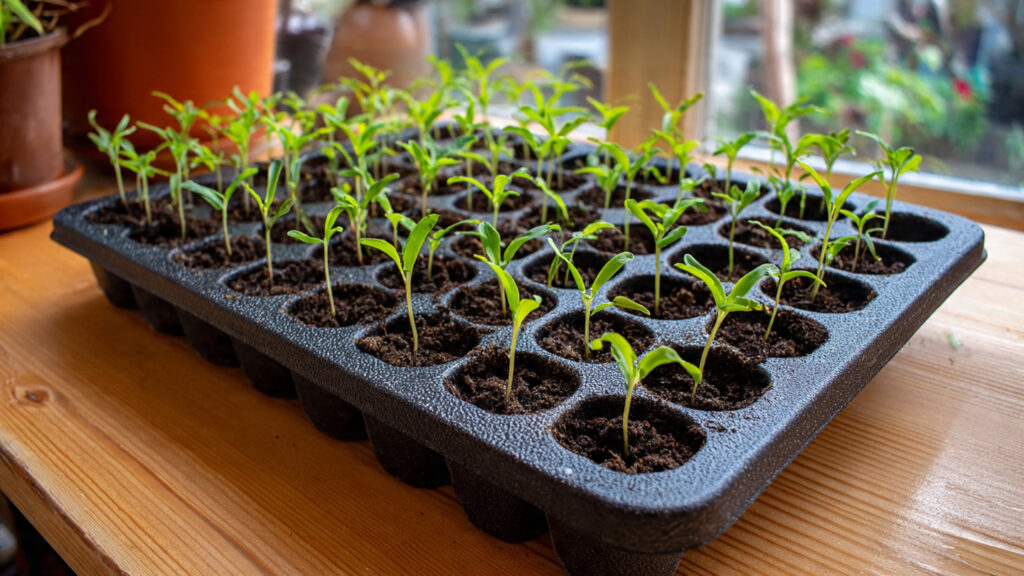
An improvised seedbed is a homemade growing setup that replaces commercial seed trays or greenhouse systems. It can be created using recycled or low-cost materials such as:
- Plastic food containers
- Old trays or shallow boxes
- Wooden crates
- Egg cartons
- Plastic bottles cut in half
The goal is to provide seeds with three essentials:
- Moisture
- Warmth
- Proper drainage
As long as those conditions are met, seedlings will thrive.
Step 1: Choose the Right Container
Your container doesn’t need to be fancy. It simply needs:
- Shallow depth (2–4 inches for most seeds)
- Drainage holes at the bottom
- Enough surface area for spacing seeds
If using food containers or plastic boxes, punch small holes underneath to allow excess water to drain.
For extra drainage, place the container on a tray to catch runoff.
Step 2: Prepare a Lightweight Seed Starting Mix
Healthy seedlings depend heavily on the right soil. Avoid heavy garden soil, which can compact and suffocate tiny roots.
Simple DIY Seed Mix:
- 1 part cocopeat or peat moss
- 1 part fine compost
- 1 part sand or perlite
This mixture should be:
- Light and airy
- Moisture-retentive but well-draining
- Free of large debris
Moisten the mix slightly before filling your container. It should feel like a squeezed sponge — damp but not dripping.
Step 3: Fill and Level the Seedbed
Fill your improvised container with the prepared mix. Leave about half an inch at the top.
Gently press down to remove air pockets, but do not compact heavily. Seedlings need loose soil for root expansion.
➡️ How to Grow Malabar Spinach from Cuttings for Fast, Easy Greens
➡️ How to Grow Super Delicious Cabbage at Home Without a Garden
➡️ How to Grow Bean Sprouts at Home in Plastic Bottles Easily (Step‑by‑Step Guide)
➡️ Why is Your Lemon Tree Blooming in the Heart of Winter?
➡️ Why Should Your Garden Have a Dedicated Pollinator Highway?
➡️ Why Do Your Fruit Trees Need a Winter Wash to Thrive in Spring?
➡️ How Can Rice Water Transform Your Fruits into Sweeter Delights?
➡️ Jumpstart Your Winter Garden: Seed Starting Under Lights
Level the surface with your hand or a flat object.
Step 4: Sow Seeds Properly
Different seeds require different planting depths, but a general rule is:
Plant seeds at a depth equal to twice their size.
For Tiny Seeds:
- Scatter lightly on the surface
- Press gently without burying deeply
For Medium Seeds:
- Make shallow furrows
- Cover lightly with soil
Space seeds adequately to prevent overcrowding.
Overcrowded seedlings compete for light and nutrients, leading to weak growth.
Step 5: Water Gently
After sowing, water carefully.
Best methods include:
- Using a spray bottle
- Light misting
- Bottom watering (placing the container in a tray of water briefly)
Avoid pouring water directly, as strong flow can displace seeds.
Keep the soil consistently moist but never waterlogged.
Step 6: Create a Mini Greenhouse Effect
Seeds germinate faster in warm, humid conditions.
To create a simple greenhouse effect:
- Cover the container with transparent plastic wrap
- Use a clear plastic lid
- Place inside a transparent bag
This traps moisture and warmth, speeding up sprouting.
Remove the cover once seedlings appear to prevent fungal growth.
Step 7: Provide Proper Light
Once seeds sprout, light becomes critical.
Place your improvised seedbed:
- Near a bright window
- On a balcony with indirect sunlight
- In a well-lit indoor area
Seedlings need at least 4–6 hours of light daily.
If natural light is weak, rotate the container daily to prevent leaning.
Insufficient light leads to leggy, weak stems.
Step 8: Maintain Ideal Temperature
Most seeds germinate well between:
18°C to 25°C (65°F to 77°F)
Keep the seedbed in a warm location away from cold drafts.
In cooler climates, placing the container on top of a refrigerator or near a warm appliance can help maintain warmth.
Step 9: Thin Seedlings Early
Once seedlings develop two true leaves, thinning becomes necessary.
Remove weaker seedlings to allow stronger ones to grow properly.
Use scissors to snip extras at soil level instead of pulling them out, which can disturb roots.
This ensures better airflow and healthier growth.
Step 10: Begin Gentle Feeding
Seed starting mix contains limited nutrients.
After seedlings develop 2–3 sets of leaves:
- Apply diluted liquid fertilizer (¼ strength)
- Feed every 10–14 days
Avoid strong fertilizers at early stages, as delicate roots can burn easily.
Step 11: Strengthen Seedlings Before Transplanting
Before moving seedlings outdoors, they need gradual adaptation — a process called hardening off.
Hardening Process:
- Place seedlings outdoors for 1–2 hours daily.
- Gradually increase exposure over one week.
- Protect from strong wind or harsh sun initially.
This prepares them for real garden conditions.
Common Mistakes to Avoid
Even with minimal tools, success depends on avoiding these common errors:
Overwatering
Leads to fungal diseases and root rot.
Poor Drainage
Always ensure holes in containers.
Too Much Fertilizer
Causes leaf burn and weak growth.
Crowding Seeds
Results in thin, unhealthy seedlings.
Insufficient Light
Creates leggy plants prone to falling over.
Careful attention during early stages makes a huge difference.
Best Plants for DIY Seedbeds
Many plants grow beautifully in improvised seedbeds:
- Tomatoes
- Peppers
- Marigolds
- Basil
- Spinach
- Lettuce
- Eggplant
These crops germinate quickly and adapt well to home setups.
Advantages of an Improvised Seedbed
Creating your own seedbed offers multiple benefits:
- Extremely low cost
- Environmentally friendly (recycling materials)
- Flexible size and design
- Easy to customize
- Ideal for small spaces
You can expand or reduce your setup depending on seasonal needs.
Long-Term Maintenance Tips
To reuse your improvised seedbed:
- Clean containers thoroughly
- Disinfect with mild soap solution
- Replace old soil mix
- Store in a dry place
This prevents disease buildup and ensures future success.
Final Thoughts
Starting healthy seedlings at home doesn’t require expensive tools or professional equipment. With a simple DIY improvised seedbed, proper soil mix, gentle watering, and adequate light, you can grow strong, vibrant seedlings ready for transplanting.
By focusing on moisture balance, warmth, and airflow, your seedlings will develop sturdy stems and healthy roots. Gardening success begins at the seed stage — and with this easy, low-cost method, anyone can grow plants confidently at home.