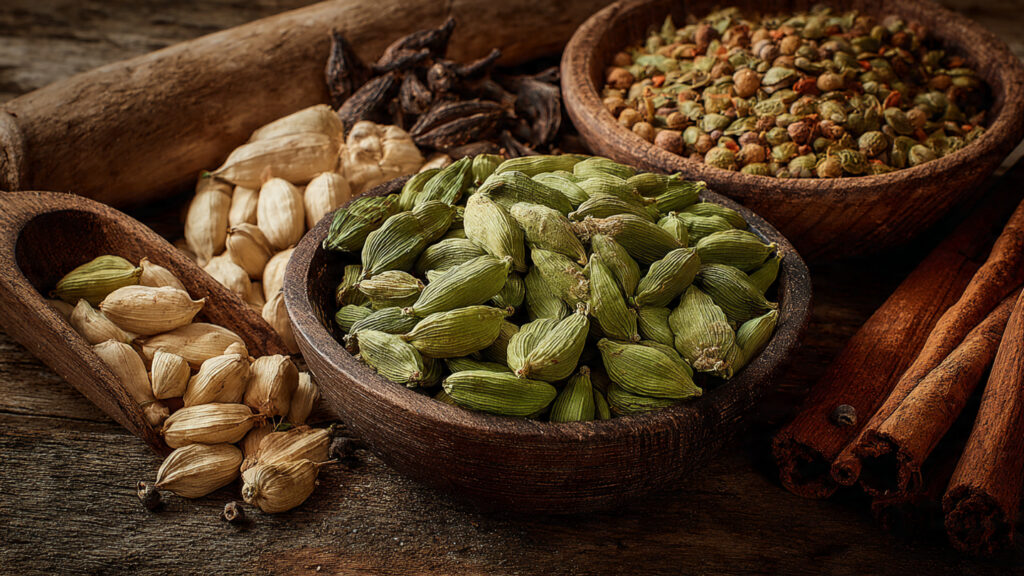
Cardamom, often called the “queen of spices,” is celebrated for its aromatic flavor and culinary versatility. From chai to desserts and savory dishes, this spice adds a unique warmth and sweetness that elevates any recipe. While cardamom is native to tropical forests and often cultivated in large plantations, it’s possible to grow it at home with some patience and care. For beginners, cultivating cardamom might seem challenging, but with the right guidance, you can enjoy fresh pods right from your garden or indoor space. This guide takes you step by step, from seed to spice, ensuring you can grow healthy cardamom plants at home.
1. Understanding Cardamom: A Tropical Treasure
Before planting, it’s important to understand what makes cardamom thrive. Cardamom belongs to the ginger family (Zingiberaceae) and is a perennial herb that prefers warm, humid conditions.
- Climate: Cardamom grows best in tropical or subtropical climates with temperatures between 65–95°F (18–35°C). It thrives in partial shade and requires consistent humidity.
- Soil: The plant prefers rich, well-draining, loamy soil with plenty of organic matter. Slightly acidic soils (pH 5.5–6.5) are ideal.
- Growth habit: Cardamom grows as a clump-forming plant, producing long green stalks and eventually flowering spikes that yield the prized seed pods.
Understanding these requirements helps set realistic expectations and prepares you for the cultivation process.
2. Sourcing High-Quality Cardamom Seeds
Starting with quality seeds is crucial for a successful cardamom harvest.
- Seed selection: Use fresh seeds from a reputable source. Cardamom seeds lose viability quickly, so older seeds may fail to germinate.
- Seed preparation: Soak the seeds in warm water for 24 hours to soften the seed coat and improve germination.
- Timing: Plant seeds during the warm season, preferably when temperatures are consistently above 70°F (21°C).
Fresh, well-prepared seeds dramatically increase the chances of successful germination.
3. Germination: The First Step
Cardamom seeds are slow to germinate, often taking 2–3 weeks or even longer.
- Containers: Use shallow trays or small pots with drainage holes. Fill with a seed-starting mix rich in organic matter and slightly acidic.
- Planting depth: Sow seeds just below the surface, about ¼ inch deep. Cover lightly with soil.
- Humidity and warmth: Keep the soil consistently moist but not waterlogged. Cover the tray with plastic wrap or a clear lid to retain humidity. Maintain temperatures between 70–85°F (21–29°C).
- Light: Provide indirect sunlight or filtered light. Avoid harsh direct sunlight, which can dry out seeds and reduce germination rates.
Patience is key—cardamom seeds germinate slowly, but consistent care will yield strong seedlings.
4. Transplanting Seedlings
Once seedlings develop 2–3 true leaves and are strong enough, they can be transplanted to larger containers or garden beds.
- Hardening off: Gradually expose seedlings to outdoor conditions over 7–10 days to prevent shock.
- Spacing: Cardamom plants require space to grow, ideally 3–5 feet apart in a garden or 2–3 feet apart in large containers.
- Planting depth: Plant seedlings at the same depth they were growing in the seed tray. Firm the soil gently around roots and water thoroughly.
Proper transplanting ensures the plants establish strong roots and grow vigorously.
5. Providing the Right Environment
Cardamom plants thrive under specific environmental conditions.
- Shade: Cardamom prefers filtered sunlight, making it ideal to grow under trees or shade nets. Full sun can scorch leaves.
- Humidity: Regular misting or a humid environment helps prevent leaf drying. Indoor growers can use humidity trays or place plants in naturally humid rooms.
- Temperature: Avoid exposure to temperatures below 60°F (16°C). Frost or cold drafts can damage young plants.
Creating the right microclimate mimics the natural tropical environment, supporting healthy growth and future flowering.
6. Soil Fertility and Mulching
Cardamom requires nutrient-rich soil for optimal growth and high-quality pods.
- Fertilization: Apply organic compost, well-rotted manure, or a balanced slow-release fertilizer every 6–8 weeks. Focus on nitrogen during early growth and increase potassium as plants mature.
- Mulching: Apply a 2–3 inch layer of mulch around the base to retain moisture, suppress weeds, and regulate soil temperature.
- Drainage: Ensure soil drains well to prevent root rot, as cardamom roots are sensitive to waterlogging.
Healthy, fertile soil is essential for lush leaves, strong stems, and abundant pods.
7. Watering Techniques
Consistent moisture is critical for cardamom, but overwatering can be harmful.
- Deep watering: Water deeply to encourage a robust root system. Avoid shallow, frequent watering.
- Avoid waterlogging: Ensure containers or garden beds drain well. Excess water can lead to fungal diseases or root decay.
- Humidity management: Maintain consistent humidity around the plant to prevent leaf drying and support flowering.
Balanced watering promotes steady growth and helps the plant focus energy on producing flavorful pods.
➡️ How to Grow Malabar Spinach from Cuttings for Fast, Easy Greens
➡️ How to Grow Super Delicious Cabbage at Home Without a Garden
➡️ How to Grow Bean Sprouts at Home in Plastic Bottles Easily (Step‑by‑Step Guide)
➡️ Why is Your Lemon Tree Blooming in the Heart of Winter?
➡️ Why Should Your Garden Have a Dedicated Pollinator Highway?
➡️ Why Do Your Fruit Trees Need a Winter Wash to Thrive in Spring?
➡️ How Can Rice Water Transform Your Fruits into Sweeter Delights?
➡️ Jumpstart Your Winter Garden: Seed Starting Under Lights
8. Flowering and Pollination
Cardamom begins to flower after 2–3 years of growth, producing long spikes that eventually form the green pods.
- Flower care: Remove old or damaged flowers to encourage new growth and healthier pods.
- Pollination: While cardamom flowers are often self-pollinating, insects like bees can improve pod set. Indoor growers can hand-pollinate by gently shaking flowers or using a small brush to transfer pollen.
- Energy management: Avoid excessive pruning during flowering, as leaves supply energy to developing pods.
Proper care during flowering ensures maximum pod production and optimal quality.
9. Pest and Disease Management
Cardamom plants are susceptible to pests like aphids, mealybugs, and spider mites, as well as fungal diseases such as leaf spot and root rot.
- Inspection: Regularly check leaves and stems for signs of pests or disease.
- Natural remedies: Neem oil, insecticidal soaps, or organic fungicides help control infestations without harming plants or soil.
- Cultural practices: Maintain good airflow, avoid overhead watering, and remove debris to reduce fungal outbreaks.
Healthy plants free from pests and disease produce better-quality pods.
10. Harvesting Cardamom Pods
The final goal is to harvest the aromatic pods that will become the spice.
- Maturity: Cardamom pods are ready to harvest when they turn green and plump, but before they begin to dry or split.
- Method: Carefully cut the spike with a sharp knife, leaving a small portion of the stem attached to the pods. Handle gently to avoid bruising.
- Post-harvest drying: Dry pods in a shaded, well-ventilated area. Avoid direct sunlight, which can degrade flavor. Proper drying preserves aroma and quality.
With patience, your homegrown cardamom will be fragrant, flavorful, and ready for culinary use.
11. Storing and Using Homegrown Cardamom
Proper storage maintains the flavor and potency of your cardamom.
- Storage: Store dried pods in airtight containers away from heat, light, and moisture. Whole pods retain flavor longer than ground cardamom.
- Culinary uses: Use homegrown cardamom in teas, desserts, curries, and even infused oils. Freshly harvested pods offer a stronger aroma than store-bought options.
- Seeds: You can also harvest seeds from dried pods for future planting, continuing your homegrown spice cycle.
Growing cardamom at home not only supplies fresh spice but also adds a touch of tropical elegance to your garden.
Conclusion
Growing cardamom at home may require patience, but the reward is worth the effort. From selecting high-quality seeds and creating the right environment to proper watering, fertilization, and pest management, each step contributes to a healthy plant and abundant harvest. With consistent care, your cardamom plants will flourish, producing fragrant pods that elevate your culinary creations. By following this complete beginner’s guide, you can enjoy the satisfaction of growing your own “queen of spices” right at home—truly taking the journey from seed to spice.