Few garden crops are as rewarding as peppers. Whether you love mild, sweet varieties for salads or fiery hot types for sauces, growing peppers at home offers unmatched freshness, flavor, and satisfaction. From tiny balcony pots to backyard gardens, peppers adapt beautifully when given the right care.
This complete guide walks you through every step — from seed selection to harvesting — so you can grow healthy, productive pepper plants and enjoy homegrown spice all season long.
Why Grow Peppers at Home?
Peppers are part of the species Capsicum annuum, which includes many popular varieties such as bell peppers, jalapeños, cayenne, and paprika types. Other species like Capsicum chinense include some of the hottest peppers in the world.
Growing peppers at home has several advantages:
- Superior flavor compared to store-bought produce
- Higher nutritional value, especially vitamin C and antioxidants
- Cost savings over time
- Control over pesticide use
- Access to unique varieties not found in markets
Plus, few things compare to picking a sun-warmed pepper straight from the plant.
Step 1: Choosing the Right Pepper Variety
Before planting, decide what type of pepper suits your taste and climate.
Sweet Peppers
- Bell peppers
- Banana peppers
- Sweet Italian varieties
These are mild, versatile, and great for beginners.
Medium-Heat Peppers
- Jalapeño
- Serrano
- Anaheim
Perfect for fresh salsas and grilling.
Hot Peppers
- Habanero
- Scotch bonnet
- Ghost pepper
These require a longer growing season and more warmth.
When selecting seeds, consider:
- Growing season length
- Available sunlight
- Container or ground planting
- Desired spice level
Step 2: Starting Peppers from Seed
Peppers require warmth and patience. They germinate slower than many vegetables.
When to Start Seeds
Start seeds indoors 8–10 weeks before your last expected frost date.
Peppers need a long growing season, so early starting gives them a head start.
How to Germinate Seeds
- Use seed-starting mix (light, well-draining).
- Plant seeds about ¼ inch deep.
- Water gently.
- Maintain soil temperature between 24–30°C (75–86°F).
Warmth is critical. A heat mat significantly improves germination speed.
Seeds typically sprout within 7–14 days, though some hot varieties take longer.
➡️ How to Grow Malabar Spinach from Cuttings for Fast, Easy Greens
➡️ How to Grow Super Delicious Cabbage at Home Without a Garden
➡️ How to Grow Bean Sprouts at Home in Plastic Bottles Easily (Step‑by‑Step Guide)
➡️ Why is Your Lemon Tree Blooming in the Heart of Winter?
➡️ Why Should Your Garden Have a Dedicated Pollinator Highway?
➡️ Why Do Your Fruit Trees Need a Winter Wash to Thrive in Spring?
➡️ How Can Rice Water Transform Your Fruits into Sweeter Delights?
➡️ Jumpstart Your Winter Garden: Seed Starting Under Lights
Step 3: Providing Strong Seedling Growth
Once seedlings emerge:
- Provide 12–16 hours of bright light daily.
- Keep soil moist but not soggy.
- Maintain temperatures around 20–25°C (68–77°F).
Weak, leggy seedlings result from insufficient light.
When seedlings develop 2–3 true leaves, transplant them into larger pots to encourage root development.
Step 4: Hardening Off Before Transplanting
Before moving plants outdoors:
- Gradually expose them to outdoor conditions.
- Start with 1–2 hours of shade daily.
- Increase exposure over 7–10 days.
This prevents transplant shock.
Never plant peppers outside until soil temperatures consistently stay above 18°C (65°F).
Step 5: Planting in the Garden or Containers
Peppers thrive in:
- Full sun (6–8 hours daily)
- Well-draining soil
- Rich organic matter
Spacing
- 12–18 inches apart for most varieties
- Larger varieties may need more space
Container Growing
Use pots at least 12–14 inches wide and deep. Ensure drainage holes are present.
Add compost to improve fertility and soil structure.
Step 6: Watering for Maximum Growth
Peppers prefer consistent moisture.
- Water deeply but allow topsoil to dry slightly between watering.
- Avoid overwatering — it causes root rot.
- Mulch around plants to retain moisture.
Inconsistent watering can cause blossom end rot and fruit drop.
Step 7: Feeding for Bigger Yields
Nutrition plays a major role in fruit production.
Early Growth
Use balanced fertilizer (e.g., 10-10-10) to promote strong stems and leaves.
Flowering Stage
Reduce nitrogen and increase phosphorus and potassium to support fruit formation.
Too much nitrogen results in lush leaves but fewer peppers.
Organic options include:
- Compost
- Fish emulsion
- Bone meal
- Wood ash (for potassium)
Feed lightly every 3–4 weeks.
Step 8: Encouraging More Flowers and Fruits
Peppers are self-pollinating, but airflow helps.
To boost fruit production:
- Gently shake plants during flowering.
- Ensure adequate sunlight.
- Maintain moderate humidity.
Some gardeners pinch early flowers to encourage stronger plant growth before heavy fruiting.
Step 9: Pruning for Better Airflow and Yield
Light pruning improves productivity.
Remove:
- Yellowing leaves
- Lower leaves touching soil
- Crowded inner growth
This improves airflow and reduces fungal diseases.
For larger varieties, staking prevents branches from breaking under fruit weight.
Step 10: Managing Pests and Diseases
Common pepper pests include:
- Aphids
- Spider mites
- Whiteflies
Control methods:
- Neem oil spray
- Insecticidal soap
- Manual removal
Common diseases:
- Powdery mildew
- Bacterial leaf spot
- Blossom end rot (calcium deficiency)
Healthy soil, good spacing, and consistent watering prevent most problems.
Step 11: Harvesting Peppers
Peppers can be harvested at various stages.
Green Stage
Firm and fully grown but not yet mature color.
Mature Stage
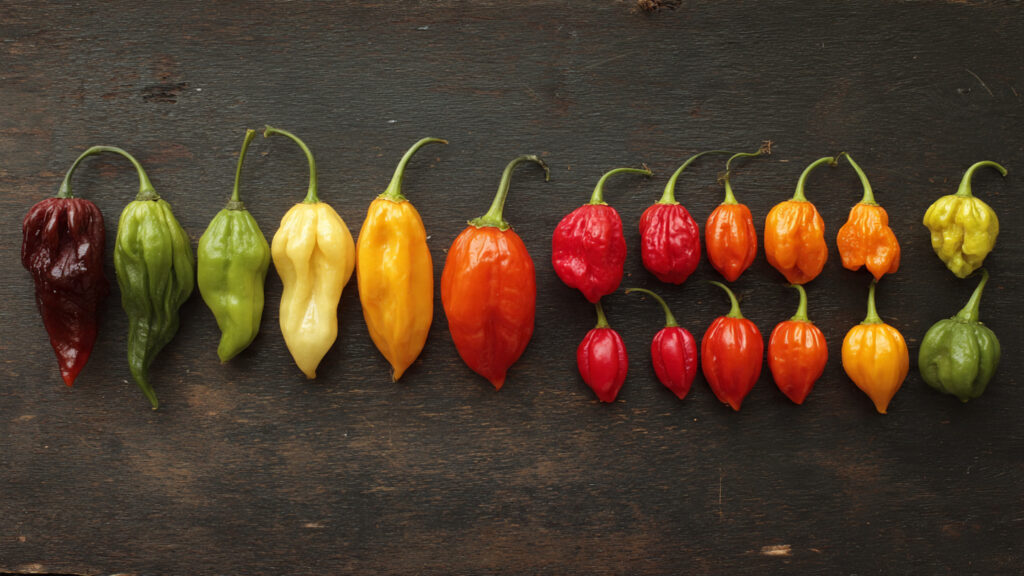
Red, yellow, orange, or purple depending on variety.
Fully ripened peppers:
- Are sweeter (in sweet types)
- Are hotter (in hot varieties)
- Contain more nutrients
Use sharp scissors to cut peppers to avoid damaging branches.
Frequent harvesting encourages more fruit production.
Step 12: Saving Seeds for Next Season
To save seeds:
- Choose fully mature peppers.
- Remove seeds and dry thoroughly.
- Store in a cool, dry place.
Note: Hybrid varieties may not grow true to type.
Extending the Growing Season
In cooler climates:
- Use row covers
- Grow in containers to move indoors
- Use greenhouse or cold frames
Peppers are technically perennial in warm climates, meaning they can live for multiple years.
In mild regions, you can overwinter plants indoors by:
- Pruning back growth
- Reducing watering
- Providing bright light
Tips for Bigger, Spicier Peppers
If you want maximum heat or flavor:
- Provide full sun exposure.
- Avoid overwatering during fruit ripening.
- Slight stress (not extreme) can intensify heat in hot varieties.
- Ensure adequate potassium during fruiting.
Sunlight and nutrition strongly influence flavor intensity.
Common Mistakes to Avoid
- Planting too early in cold soil
- Overwatering
- Overfeeding nitrogen
- Crowding plants
- Ignoring pests
Peppers reward attentive but balanced care.
Final Thoughts
Growing peppers from seed to spice is one of the most satisfying gardening experiences. With proper warmth, sunlight, balanced nutrition, and consistent care, you can enjoy a continuous harvest of vibrant, flavorful peppers right at home.
Whether you prefer sweet bell peppers for stuffing or fiery chilies for hot sauce, the journey from seed to harvest connects you directly to your food in a meaningful way.
Once you taste a homegrown pepper — crisp, aromatic, and bursting with flavor — you’ll understand why so many gardeners dedicate space each year to this versatile and rewarding plant.
From seed trays to sizzling dishes, your pepper-growing adventure starts with a single seed — and ends with a garden full of spice.