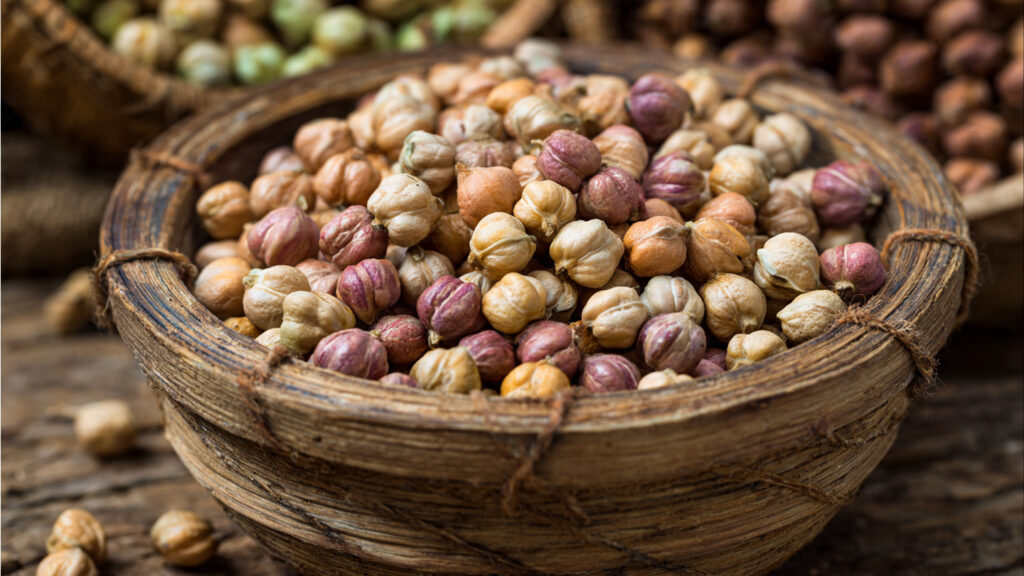
Chickpeas, also known as garbanzo beans, are among the most versatile and nutritious legumes in the world. Known scientifically as Cicer arietinum, chickpeas are celebrated for their high protein content, rich fiber, and abundance of vitamins and minerals. From hummus and curries to salads and soups, chickpeas have earned a place in kitchens globally. But what if you could grow your own fresh chickpeas at home, ensuring peak flavor and maximum nutrition?
Whether you have a backyard garden, balcony, or even a sunny windowsill, cultivating chickpeas is surprisingly straightforward. With the right preparation and care, you can enjoy a steady supply of fresh beans while also benefiting from the satisfaction of home gardening. This comprehensive guide will take you step-by-step through growing chickpeas successfully.
Why Grow Chickpeas at Home?
Growing chickpeas at home comes with several benefits:
1. Freshness and Flavor
Homegrown chickpeas taste fresher and have a richer, nuttier flavor than store-bought dried beans. You can harvest and cook them at peak maturity for optimal taste.
2. Nutritious and Healthy
Chickpeas are a powerhouse of protein, fiber, folate, iron, magnesium, and antioxidants. By growing your own, you control soil health and avoid chemical residues.
3. Cost-Effective
A small amount of chickpea seeds can produce a substantial harvest, reducing the need to buy packaged beans.
4. Sustainable and Eco-Friendly
Growing legumes like chickpeas helps improve soil fertility through nitrogen fixation, reducing the need for synthetic fertilizers.
5. Fun and Educational
Cultivating your own legumes teaches you about plant growth, soil health, and sustainable gardening practices.
Choosing the Right Chickpea Variety
There are two main types of chickpeas:
- Desi Chickpeas – Small, darker, and round. Often used in traditional Indian dishes.
- Kabuli Chickpeas – Larger, beige, and smoother. Commonly used in Mediterranean cuisine and for hummus.
Select a variety suited to your local climate and culinary preferences. Kabuli types perform well in temperate regions, while Desi types tolerate warmer, drier conditions. For beginners, Kabuli varieties are generally easier to handle for home gardens.
Preparing the Soil
Chickpeas thrive in well-draining, fertile soil with a neutral to slightly alkaline pH (6.0–7.5). They are moderately drought-tolerant and prefer sandy-loam soil enriched with organic matter.
Steps to Prepare:
- Clear weeds and debris from the planting area.
- Loosen the soil to a depth of 8–10 inches.
- Mix in compost or well-rotted manure to improve fertility.
- Optional: Add a handful of bone meal for phosphorus to encourage strong root development.
Good drainage is essential because chickpeas are prone to root rot in waterlogged conditions.
How to Sow Chickpeas
Chickpeas are easy to sow, whether in the ground or in containers.
Step 1: Seed Preparation
- Select healthy, dry seeds.
- Soak seeds in water for 8–12 hours to speed up germination.
Step 2: Planting
- Sow seeds 1–2 inches deep.
- Space seeds 3–4 inches apart in rows or individual pots.
- Rows should be spaced 12–18 inches apart to allow air circulation.
Step 3: Germination
- Seeds typically germinate within 7–10 days under optimal conditions (20–25°C).
- Keep the soil consistently moist until seedlings emerge.
Caring for Chickpea Plants
Once your seedlings have emerged, proper care ensures healthy growth and maximum yield.
1. Sunlight
Chickpeas require full sun—at least 6 hours per day. More light encourages strong stems and abundant pod formation.
➡️ How to Grow Malabar Spinach from Cuttings for Fast, Easy Greens
➡️ How to Grow Super Delicious Cabbage at Home Without a Garden
➡️ How to Grow Bean Sprouts at Home in Plastic Bottles Easily (Step‑by‑Step Guide)
➡️ Why is Your Lemon Tree Blooming in the Heart of Winter?
➡️ Why Should Your Garden Have a Dedicated Pollinator Highway?
➡️ Why Do Your Fruit Trees Need a Winter Wash to Thrive in Spring?
➡️ How Can Rice Water Transform Your Fruits into Sweeter Delights?
➡️ Jumpstart Your Winter Garden: Seed Starting Under Lights
2. Watering
- Water moderately; avoid overwatering.
- Reduce watering as plants approach flowering to prevent fungal diseases.
- Mulching helps retain moisture and regulates soil temperature.
3. Fertilization
Chickpeas are legumes that fix their own nitrogen, so they require minimal additional nitrogen. However, phosphorus and potassium support root growth and pod development. Use:
- Compost or organic fertilizer at planting
- Liquid seaweed or vermicompost during flowering
4. Pruning and Support
Chickpeas are generally bushy and don’t require staking, but in windy areas, light support helps prevent stem breakage. Remove weak or diseased leaves to improve airflow and prevent disease.
Flowering and Pollination
Chickpeas produce small, delicate flowers in shades of white, pink, or purple. These self-pollinate, but insects like bees can improve pollination and increase pod yield.
- Flowering begins 30–40 days after sowing.
- Pods start developing shortly after successful pollination.
- Each pod typically contains 1–3 seeds.
Managing Pests and Diseases
Common challenges in chickpea cultivation include:
1. Aphids
- Appear on young shoots and flower buds.
- Spray with neem oil or soapy water to control.
2. Fungal Diseases
- Root rot or blight can occur in waterlogged or humid conditions.
- Ensure proper drainage and avoid overhead watering.
3. Pod Borers
- Caterpillars can damage developing pods.
- Use organic pest control like Bacillus thuringiensis (Bt) or hand-pick pests.
Good hygiene, crop rotation, and proper spacing minimize risks.
Harvesting Chickpeas
Chickpeas are ready to harvest when pods turn brown and dry. The timeline varies by variety, but generally, it’s 90–100 days after sowing.
Steps:
- Pull the whole plant from the ground, or cut stems at the base.
- Spread the plant in a dry, airy area to allow pods to dry further.
- Once pods are completely dry, shell the seeds.
For fresh green chickpeas, harvest earlier when pods are still tender. These are excellent for cooking in curries or steaming like edamame.
Storing Chickpeas
- Dried seeds: Store in airtight containers in a cool, dry place. They can last up to a year.
- Fresh pods: Refrigerate for a few days or cook immediately.
- Freezing: Green chickpeas can be blanched and frozen for later use.
Proper storage preserves nutrition and flavor.
Benefits of Homegrown Chickpeas
Growing chickpeas at home has multiple advantages:
- Constant supply of fresh beans
- No preservatives or chemicals
- Nutrient-rich and flavorful
- Supports sustainable gardening practices
- Improves soil fertility naturally
Additionally, chickpea plants are visually attractive and can add greenery to your garden space.
Companion Planting with Chickpeas
Chickpeas grow well alongside other vegetables and herbs. Some ideal companions include:
- Spinach
- Carrots
- Cucumbers
- Tomatoes
Avoid planting near onions or garlic, which may inhibit growth. Companion planting can improve soil health and reduce pest problems.
Growing Chickpeas in Containers
If you have limited space, container gardening is ideal.
- Use deep pots (10–12 inches) with good drainage
- Ensure full sunlight for 6–8 hours daily
- Use high-quality potting soil with compost
- Water carefully to maintain moisture without waterlogging
Container-grown chickpeas can yield a surprising number of pods if cared for properly.
Tips for a Thriving Chickpea Garden
- Succession Planting: Sow seeds every few weeks to enjoy continuous harvests.
- Rotate Crops: Avoid planting legumes in the same spot every year to reduce soil-borne diseases.
- Monitor Growth: Regularly check for pests, diseases, and water stress.
- Harvest Timely: Don’t wait too long; overripe pods may shatter and lose seeds.
Culinary Uses of Chickpeas
Homegrown chickpeas are highly versatile:
- Cooked and added to salads, soups, and stews
- Ground into flour for baking
- Roasted as a crunchy snack
- Made into hummus or falafel
- Steamed as tender green chickpeas for side dishes
Having fresh chickpeas on hand allows for endless culinary creativity.
Final Thoughts
Growing chickpeas at home is rewarding, nutritious, and surprisingly simple. From selecting quality seeds to preparing soil, planting, caring, and harvesting, each step ensures a bountiful supply of fresh beans. By understanding your plant’s growth habits, providing adequate sunlight, proper watering, and pest management, you can enjoy a thriving home legume garden.
Whether for fresh cooking or dried storage, homegrown chickpeas deliver superior taste, texture, and nutrition. With a little patience and attention, your garden can produce a steady stream of this versatile and wholesome legume—turning your backyard or balcony into a sustainable source of healthy, delicious beans year-round.