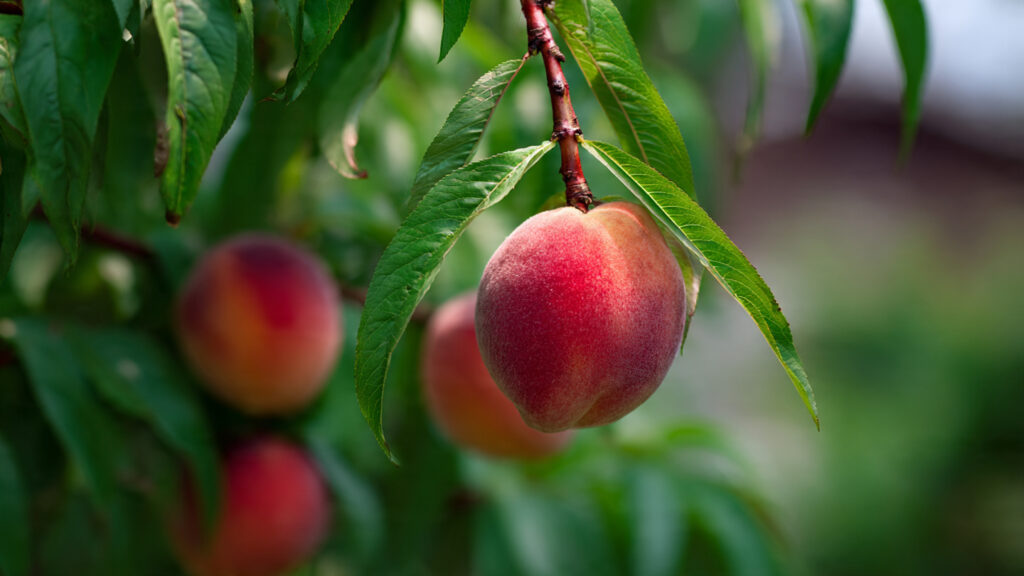
When it comes to growing fruit trees at home, few things are as satisfying as planting a peach seed and watching it transform into a thriving tree. Mama Judy, a seasoned home gardener, has perfected the art of growing peaches from seeds, combining simple techniques with patience and love. In this guide, we’ll share her proven methods, step by step, so you too can grow your own delicious peaches right in your backyard or garden.
Why Grow Peaches from Seeds?
Many gardeners shy away from planting fruit trees from seeds, believing that grafted or nursery-grown saplings are easier. However, growing peaches from seeds has unique advantages:
- Cost-Effective: Seeds are free, often coming from peaches you’ve already enjoyed at home.
- Fun and Educational: Watching a tree grow from a tiny seed teaches patience, care, and the wonders of nature.
- Custom Trees: Each seed produces a slightly different tree, giving you a chance to develop unique flavors or characteristics.
Mama Judy loves this process because it’s not just gardening—it’s a family tradition. She recalls planting seeds with her children, watching them sprout, and enjoying the first fruits years later.
Step 1: Selecting the Right Peach Seed
The first step is choosing a healthy seed. Here’s how Mama Judy does it:
- Choose Fresh Fruit: Pick a ripe, juicy peach from the store or your own tree. Fully ripened peaches have seeds with the highest chance of germination.
- Remove the Pit: Eat the peach (or save it for later), and carefully remove the hard pit from the fruit.
- Clean the Seed: Wash off any remaining fruit flesh to prevent mold or rotting. Mama Judy stresses that cleanliness is key—residual fruit can attract pests or cause fungal growth.
- Dry the Seed: Let the cleaned pit air dry for a day or two in a cool, dry place.
Pro Tip: Not all seeds will sprout. Mama Judy usually plants several pits at a time to increase the chance of success.
Step 2: Preparing the Seed for Planting
Peach seeds have a tough outer shell, and to encourage germination, they need a period of cold stratification. Mama Judy follows these steps:
- Crack the Pit (Optional): Using a small hammer or nutcracker, gently crack the hard shell without damaging the inner seed. This step is optional but can speed up germination.
- Cold Stratification: Place the cleaned seed in a damp paper towel or sand inside a plastic bag. Store it in the refrigerator at 34–41°F (1–5°C) for 8–12 weeks.
- Check Periodically: Ensure the paper towel remains damp, not wet, and look for any signs of sprouting.
Cold stratification mimics winter conditions, which the seed naturally requires before it can grow in spring. This step is crucial for success.
Step 3: Choosing the Right Planting Location
Once the seed is ready, Mama Judy carefully selects a location for planting:
- Sunlight: Peaches thrive in full sun. Pick a spot that receives at least 6–8 hours of direct sunlight daily.
- Soil: Well-draining soil is essential. Sandy loam or loamy soil with organic compost works best. Avoid areas prone to waterlogging.
- Space: Peach trees can grow 15–20 feet tall and wide. Ensure there’s enough room for future growth.
Mama Judy sometimes starts her seeds in small pots or containers before transferring them to the ground. This protects young seedlings from pests and allows her to control soil quality.
Step 4: Planting the Seed
Planting is simple, but attention to detail ensures healthy growth:
- Pot or Ground: If starting in a pot, choose one at least 6 inches deep with good drainage holes. For direct planting, dig a hole about 2–3 inches deep.
- Planting Depth: Place the sprouted seed with the root pointing downward and cover lightly with soil. Mama Judy advises not to bury it too deep—just enough to cover the seed.
- Watering: Water gently to settle the soil around the seed. Keep the soil consistently moist, but not soggy, especially during the early stages of germination.
Pro Tip: Mama Judy often marks each planting spot with a small stick or label to remember which seeds she planted and when.
Step 5: Caring for the Seedling
Once your seed sprouts, proper care is essential to help it grow into a strong tree:
- Watering: Keep soil moist during dry spells but avoid overwatering. Peach seedlings are prone to root rot if soil is soggy.
- Sunlight: Ensure seedlings receive plenty of sunlight. If growing in a pot, rotate regularly so all sides get light.
- Fertilizing: Use a balanced fertilizer with nitrogen, phosphorus, and potassium after 2–3 months of growth. Mama Judy prefers organic options like compost or well-rotted manure.
- Protection: Protect young seedlings from pests and animals. Simple netting or stakes around the seedling can prevent accidental damage.
With consistent care, the seedling will grow rapidly during the first year.
Step 6: Transplanting the Young Tree
If you started your peach seed in a pot, transplanting is the next step once it reaches 8–12 inches tall:
- Choose a Sunny Spot: Select the final planting location, ensuring enough space for growth.
- Prepare the Soil: Dig a hole twice as wide and deep as the root ball. Mix in compost to enrich the soil.
- Planting: Gently remove the seedling from the pot, keeping the soil around the roots intact. Place it in the hole and backfill with soil. Water thoroughly.
- Mulching: Apply a layer of mulch around the base to retain moisture, suppress weeds, and regulate temperature.
Mama Judy emphasizes patience at this stage. Transplanted seedlings may take time to adjust but will flourish with proper care.
➡️ How to Grow Malabar Spinach from Cuttings for Fast, Easy Greens
➡️ How to Grow Super Delicious Cabbage at Home Without a Garden
➡️ How to Grow Bean Sprouts at Home in Plastic Bottles Easily (Step‑by‑Step Guide)
➡️ Why is Your Lemon Tree Blooming in the Heart of Winter?
➡️ Why Should Your Garden Have a Dedicated Pollinator Highway?
➡️ Why Do Your Fruit Trees Need a Winter Wash to Thrive in Spring?
➡️ How Can Rice Water Transform Your Fruits into Sweeter Delights?
➡️ Jumpstart Your Winter Garden: Seed Starting Under Lights
Step 7: Pruning and Training
To ensure healthy growth and better fruit production, pruning is essential:
- First Year: Focus on removing weak or damaged branches and promoting a strong central stem.
- Subsequent Years: Shape the tree into an open-center form to allow sunlight to reach all branches. Mama Judy likes the vase shape because it encourages airflow and reduces disease.
- Fruiting: Peach trees grown from seeds may take 3–4 years to bear fruit. Don’t be discouraged—continued care will pay off.
Step 8: Harvesting Your Homegrown Peaches
Harvesting is the most rewarding step of all. Peaches are ready to pick when:
- They develop a rich, golden color with a slight blush.
- The fruit yields slightly to gentle pressure.
- They emit a sweet, fragrant aroma.
Mama Judy’s secret is to taste-test a few before harvesting fully, ensuring perfect ripeness. Freshly picked peaches from your own garden are far superior in flavor to store-bought varieties.
Extra Tips from Mama Judy
- Patience is Key: Growing peaches from seeds is a long-term project, but the satisfaction is worth it.
- Protect From Frost: Young trees are vulnerable to late frost. Cover with cloth or netting during cold snaps.
- Pest Management: Watch for aphids, borers, and leaf curl disease. Organic sprays or neem oil can help control issues.
- Regular Care: Consistent watering, pruning, and fertilizing make a huge difference in tree health and fruit yield.
Conclusion
Mama Judy’s approach to planting peaches from seeds shows that home gardening doesn’t need to be complicated. With simple steps, patience, and care, anyone can grow a beautiful peach tree that rewards years of effort with delicious, sun-ripened fruit.
From selecting a healthy seed to nurturing the seedling and finally harvesting sweet peaches, each stage is an opportunity to connect with nature and enjoy the satisfaction of growing something with your own hands. Whether you’re a beginner or an experienced gardener, following Mama Judy’s methods will help you cultivate healthy, productive peach trees at home.
By planting seeds today, you’re not just growing fruit—you’re creating memories, fostering patience, and establishing a legacy of homegrown goodness for years to come.