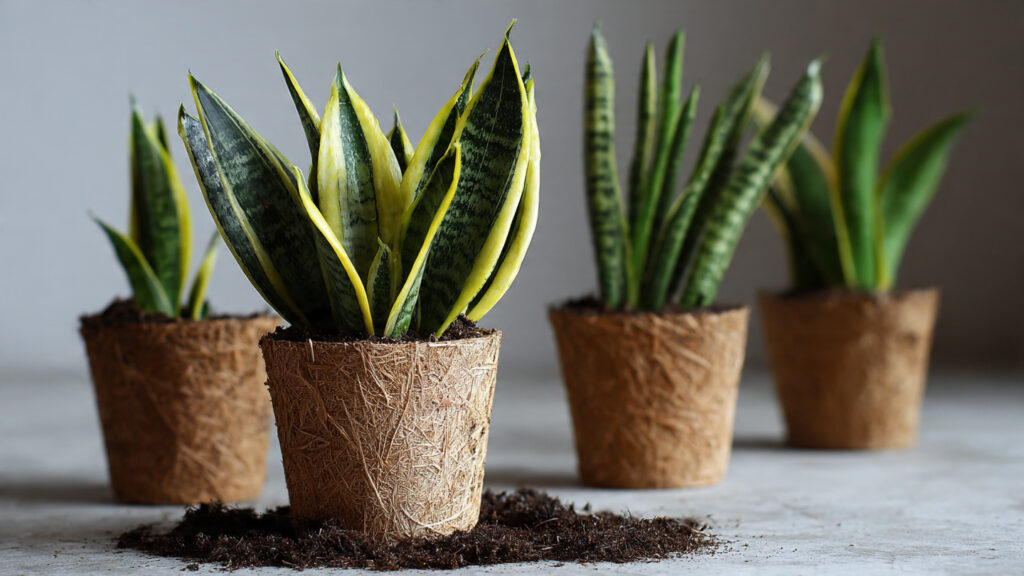
Snake plants, scientifically known as Sansevieria trifasciata, have become a staple in homes and offices worldwide. Their upright, sword-like leaves, striking variegation, and low-maintenance nature make them highly popular. Beyond aesthetics, snake plants are celebrated for their air-purifying qualities, resilience in low light, and adaptability to various indoor conditions.
For plant enthusiasts, learning how to propagate snake plants is a rewarding way to expand your collection or share plants with friends. Among the several propagation techniques—division, leaf cuttings in water, or leaf cuttings in soil—the soil-based method is particularly effective for producing healthy, strong new plants with robust roots. In this guide, we will explore step-by-step instructions, tips, and best practices for propagating snake plants in soil to ensure successful growth.
Why Choose the Soil-Based Method?
Propagation using soil offers several advantages over water propagation:
- Stronger Root Development – Roots form directly in the soil, reducing the risk of transplant shock.
- Faster Establishment – Plants acclimate directly to the growing medium they will remain in.
- Lower Risk of Rot – Unlike water propagation, soil reduces the likelihood of leaf rot when done correctly.
- Minimal Maintenance – Once planted, cuttings require minimal attention aside from occasional watering.
This method is ideal for beginners and experienced gardeners alike because it is straightforward and highly reliable.
Selecting the Right Parent Plant
The first step to successful propagation is choosing a healthy, mature snake plant. Look for:
- Vibrant, upright leaves without yellowing tips.
- Thick, fleshy leaves indicating good hydration.
- Absence of pests, fungal infections, or signs of disease.
Healthy parent plants are more likely to produce vigorous cuttings that root quickly and grow into strong new plants.
Preparing for Soil-Based Propagation
Materials Needed
- A sharp, sterilized knife or scissors
- Well-draining potting soil (cactus or succulent mix works best)
- Small pots or seedling trays with drainage holes
- Rooting hormone (optional but recommended)
- Clean water
Why Well-Draining Soil Matters
Snake plants are succulents and are highly sensitive to overwatering. A soil mix that drains well prevents waterlogging and root rot, which are common causes of failure in propagation. Mixing potting soil with perlite or coarse sand is ideal.
Propagation Techniques Using the Soil-Based Method
There are two primary soil-based techniques for propagating snake plants: leaf cuttings and division.
1. Leaf Cuttings
Leaf cuttings are the most common propagation method and are ideal for expanding a single plant.
Step 1: Cut a Healthy Leaf
Select a mature leaf and cut it near the base. Avoid using old or damaged leaves.
Step 2: Section the Leaf
Cut the leaf into 3–4 inch sections. Make sure to remember which end was the bottom, as placing it upside down will prevent rooting.
Step 3: Optional – Apply Rooting Hormone
Dip the bottom end of each leaf section in rooting hormone powder to encourage faster root formation.
Step 4: Prepare Pots with Soil
Fill small pots with well-draining soil. Create a small hole in the center to insert the cutting.
Step 5: Plant the Leaf Sections
Insert the bottom end of each section about 1–2 inches deep into the soil. Firm the soil gently around the cutting to eliminate air pockets.
Step 6: Water Lightly
Mist the soil lightly or water gently. The soil should be slightly moist but not soggy.
➡️ How to Grow Malabar Spinach from Cuttings for Fast, Easy Greens
➡️ How to Grow Super Delicious Cabbage at Home Without a Garden
➡️ How to Grow Bean Sprouts at Home in Plastic Bottles Easily (Step‑by‑Step Guide)
➡️ Why is Your Lemon Tree Blooming in the Heart of Winter?
➡️ Why Should Your Garden Have a Dedicated Pollinator Highway?
➡️ Why Do Your Fruit Trees Need a Winter Wash to Thrive in Spring?
➡️ How Can Rice Water Transform Your Fruits into Sweeter Delights?
➡️ Jumpstart Your Winter Garden: Seed Starting Under Lights
Step 7: Provide Proper Conditions
Place the pots in bright, indirect sunlight. Maintain temperatures between 20–28°C (68–82°F). Avoid direct sunlight, which can scorch the cuttings.
Step 8: Wait for Roots
Rooting can take anywhere from 4–8 weeks. Signs of success include new growth emerging from the base of the cutting. Be patient—snake plants are slow growers.
2. Division Method
Division is ideal for mature plants with multiple offsets or “pups.” This method produces new plants faster than leaf cuttings.
Step 1: Remove the Plant from the Pot
Gently take the snake plant out of its pot. Shake off excess soil to expose the root system.
Step 2: Identify Offsets
Look for small offshoots with their own root systems. Each pup can be separated into an individual plant.
Step 3: Separate Carefully
Use a clean knife if necessary to divide the rhizomes. Ensure each division has at least one healthy leaf and a portion of roots.
Step 4: Replant in Fresh Soil
Plant each division in a pot with well-draining soil. Firm the soil lightly around the roots.
Step 5: Water and Place
Water lightly and place the pots in bright, indirect light. Avoid overwatering during the initial weeks while the divisions establish themselves.
Watering Tips for Soil-Based Propagation
- Keep soil lightly moist for the first few weeks.
- Avoid overwatering, which can cause rot.
- Once roots are established, reduce watering to allow the soil to dry out slightly between waterings.
Light and Temperature Requirements
Snake plants thrive in:
- Light: Bright, indirect light is ideal. They tolerate low light but grow more slowly.
- Temperature: 20–28°C (68–82°F). Protect from drafts and cold temperatures below 10°C (50°F).
Proper light and warmth encourage faster rooting and healthier growth.
Common Mistakes to Avoid
- Planting Cuttings Upside Down – The bottom of the leaf must go into the soil.
- Using Heavy or Moisture-Retentive Soil – Can lead to rot.
- Overwatering – Snake plants prefer slightly dry soil; soggy soil is fatal for cuttings.
- Exposing to Direct Sunlight – Can scorch the tender cuttings before roots form.
- Using Diseased Parent Plants – Weak or infected leaves will likely fail to root.
Avoiding these mistakes increases the success rate and ensures healthier plants.
Fertilization for Young Plants
For the first 6–8 weeks, cuttings generally do not require fertilizer. After roots are established:
- Use a diluted, balanced succulent fertilizer once a month.
- Avoid over-fertilizing, which can burn young roots.
Slow, steady feeding encourages robust growth without stressing the plant.
Potting Up Propagated Snake Plants
Once your cuttings or divisions are established:
- Move them to larger pots or decorative containers.
- Ensure the new pot has drainage holes and a well-draining soil mix.
- Continue to provide bright, indirect light and minimal watering.
As they grow, you can enjoy the characteristic upright leaves and eventually use offsets to propagate even more plants.
Benefits of Soil-Based Propagation
- Produces strong, healthy roots from the start.
- Reduces transplant shock.
- Highly reliable for producing long-lasting plants.
- Works well for both leaf cuttings and divisions.
- Ideal for home gardeners without specialized propagation equipment.
Conclusion
Propagating snake plants using the soil-based method is a practical, reliable, and rewarding way to expand your collection. By selecting healthy leaves or offsets, using well-draining soil, and providing proper light, temperature, and moisture, you can cultivate vigorous new plants with strong root systems.
Whether you are a beginner or an experienced gardener, soil-based propagation ensures your snake plants thrive and maintain their signature upright, resilient growth. With patience and care, you’ll soon enjoy multiple healthy snake plants that enhance your indoor space, purify the air, and provide endless propagation opportunities for the future.
By mastering this simple method, you can multiply your snake plants efficiently, enjoy their aesthetic beauty, and share them with friends and family—all while ensuring healthy growth and minimal effort.