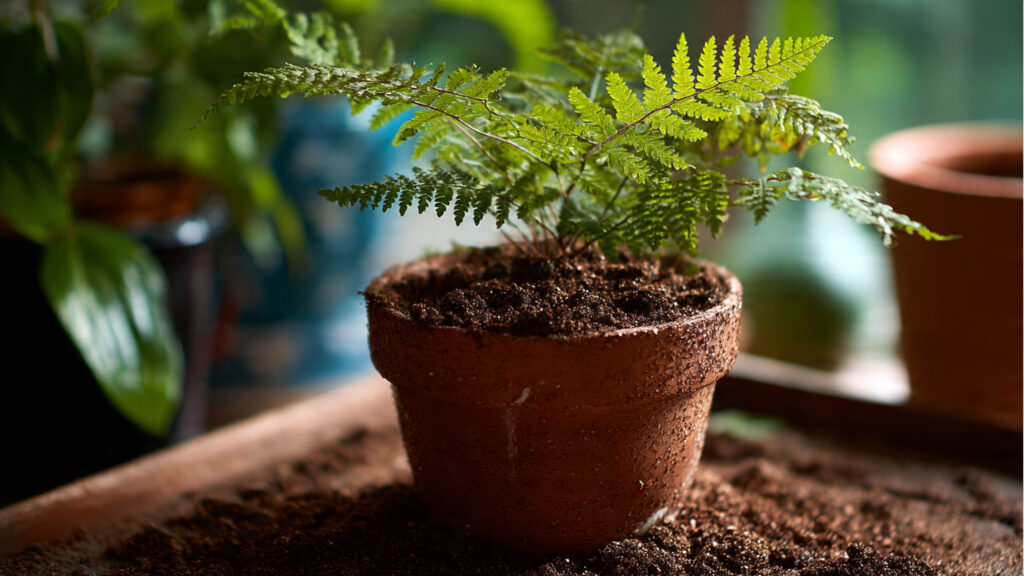
Ferns are timeless, elegant plants that bring lush greenery and a sense of tranquility to any indoor space. Their delicate fronds and graceful growth make them a favorite for home gardeners, interior decorators, and plant enthusiasts alike. While many people propagate ferns through division or purchasing nursery-grown plants, one of the most rewarding methods is growing them from spores. Not only is this method cost-effective, but it also allows you to experience the full life cycle of these fascinating plants.
If you’ve ever wondered how to grow ferns at home from spores, this step-by-step guide will walk you through everything you need to know for a thriving indoor fern garden.
Understanding Fern Reproduction
Unlike most flowering plants, ferns reproduce via spores rather than seeds. Spores are tiny, dust-like particles usually found on the undersides of mature fern fronds, often arranged in clusters called sori. When dispersed under the right conditions, spores germinate into a heart-shaped structure called a prothallus, which eventually develops into a mature fern plant.
Growing ferns from spores is a slow process compared to seed propagation, but it offers a unique and satisfying gardening experience. Patience and attention to detail are key to success.
Collecting and Preparing Fern Spores
The first step is obtaining viable spores. You can either collect them from existing fern plants or purchase them from reputable suppliers.
Collecting Spores from Mature Ferns:
- Look for mature fronds with visible sori on the undersides. The sori may appear brown, orange, or golden, depending on the fern species.
- Gently cut a frond and place it in a paper bag. Over a few days, the spores will drop onto the bag’s surface.
- Carefully collect the fine, dust-like spores and store them in a dry, cool place until ready for sowing.
Buying Spores:
Commercial spores are often sterilized and packaged for easy propagation. Buying spores is convenient and ensures viability, especially for beginners.
Choosing the Right Container and Medium
Successful spore germination relies on a clean environment and an appropriate growing medium. Contaminants such as mold or bacteria can quickly ruin your fern spores.
Container Options:
- Small, transparent containers like seed trays, plastic boxes, or glass jars work well.
- Ensure the container can be sealed to maintain high humidity.
Growing Medium:
- A sterile, fine-textured medium is ideal. Common choices include a mix of peat moss and sand, or a specialized seed-starting mix.
- Moisten the medium with distilled or boiled and cooled water. Avoid tap water with high chlorine content, which can inhibit spore growth.
Step-by-Step Sowing Process
- Sterilize Your Tools and Medium:
- Sterilize containers and tools by rinsing them with boiling water or a mild bleach solution. This minimizes the risk of mold and bacteria.
- Prepare the Medium:
- Fill your container with the moistened, sterile growing medium. Level the surface but avoid compacting it, as spores need light contact rather than deep planting.
- Sow the Spores:
- Gently sprinkle the spores evenly across the surface of the medium. Avoid clumping, as even distribution improves germination success.
- Seal the Container:
- Cover the container with a clear lid or plastic wrap. This creates a humid environment necessary for spore germination.
- Provide Indirect Light:
- Place the container in a bright area but avoid direct sunlight, which can scorch delicate spores. Ferns thrive in filtered light or partial shade.
- Maintain Constant Moisture:
- Mist the surface lightly with distilled water whenever it starts to dry. The medium should remain damp but not waterlogged.
Germination and Early Growth
Patience is essential at this stage. Spores typically take 2 to 8 weeks to germinate, depending on species and environmental conditions. During this period:
- You may notice tiny green specks on the medium; these are the developing prothalli.
- Prothalli are heart-shaped and very small, but they are the foundation of your future ferns.
Care for the prothalli carefully: keep humidity high, avoid touching them, and continue providing bright, indirect light.
Fertilization for Young Ferns
Once prothalli begin developing tiny fronds, you can start light feeding. Use a diluted, balanced liquid fertilizer:
- Dilute to one-quarter the strength recommended on the label.
- Fertilize every 3–4 weeks to avoid burning the young plants.
Proper nutrition at this stage encourages healthy growth and accelerates the transition from prothalli to mature fernlets.
Transplanting to Individual Pots
After several months, the young fernlets will have developed small root systems and multiple fronds. This is the time to transplant them into individual pots for further growth:
➡️ How to Grow Malabar Spinach from Cuttings for Fast, Easy Greens
➡️ How to Grow Super Delicious Cabbage at Home Without a Garden
➡️ How to Grow Bean Sprouts at Home in Plastic Bottles Easily (Step‑by‑Step Guide)
➡️ Why is Your Lemon Tree Blooming in the Heart of Winter?
➡️ Why Should Your Garden Have a Dedicated Pollinator Highway?
➡️ Why Do Your Fruit Trees Need a Winter Wash to Thrive in Spring?
➡️ How Can Rice Water Transform Your Fruits into Sweeter Delights?
➡️ Jumpstart Your Winter Garden: Seed Starting Under Lights
- Prepare small pots with a well-draining mix of peat moss and perlite.
- Gently lift the young fernlets with minimal disturbance to roots.
- Plant them in the new pots and water lightly.
- Keep them in a humid environment for a few weeks to minimize transplant shock.
Transplanting ensures each fern has adequate space, nutrients, and airflow to thrive indoors.
Caring for Indoor Ferns
Once established, indoor ferns require consistent care to flourish:
- Light: Place ferns in bright, indirect light. Avoid direct sun, which can scorch fronds.
- Humidity: Ferns thrive in high humidity. Mist regularly, use pebble trays, or place a humidifier nearby.
- Watering: Keep the soil consistently moist but not soggy. Overwatering can cause root rot.
- Temperature: Most indoor ferns prefer 60–75°F (15–24°C) and avoid sudden drafts.
- Pruning: Remove yellow or dead fronds to encourage new growth and maintain plant health.
Preventing Common Problems
Even with careful attention, indoor ferns can face challenges:
- Mold on the Medium: Often caused by poor ventilation or overwatering. Remove affected areas and increase airflow.
- Brown Leaf Tips: Usually due to low humidity or inconsistent watering. Adjust care routines accordingly.
- Pest Infestations: Scale insects and spider mites can occasionally affect ferns. Treat with insecticidal soap or neem oil if needed.
By monitoring your plants closely and maintaining optimal conditions, these issues can be minimized.
Benefits of Growing Ferns from Spores
Growing ferns from spores offers unique advantages:
- Cost-Effective: Spores are much cheaper than purchasing mature plants.
- Diverse Varieties: Spore propagation allows access to rare or exotic fern species.
- Educational Experience: Witnessing the full life cycle of ferns, from spore to mature plant, is fascinating and rewarding.
- Custom Indoor Gardens: You can cultivate multiple varieties to create a diverse and visually stunning indoor garden.
Conclusion
Growing ferns at home from spores is a patient but deeply rewarding process. By collecting or purchasing viable spores, preparing a sterile medium, maintaining high humidity, and carefully nurturing your young ferns, you can create a thriving indoor fern garden that brings lush greenery and serenity to your space.
From the first delicate prothalli to mature, elegant fronds, each stage offers a unique opportunity to observe and connect with the natural growth of plants. While spore propagation requires time, attention, and care, the result is a beautiful, home-grown indoor garden that will impress family, friends, and even yourself.
Whether you’re a seasoned plant enthusiast or a beginner looking to expand your indoor gardening skills, sowing ferns from spores is an incredibly rewarding endeavor. Start today, follow these step-by-step tips, and enjoy the satisfaction of cultivating your own verdant indoor oasis, one frond at a time.