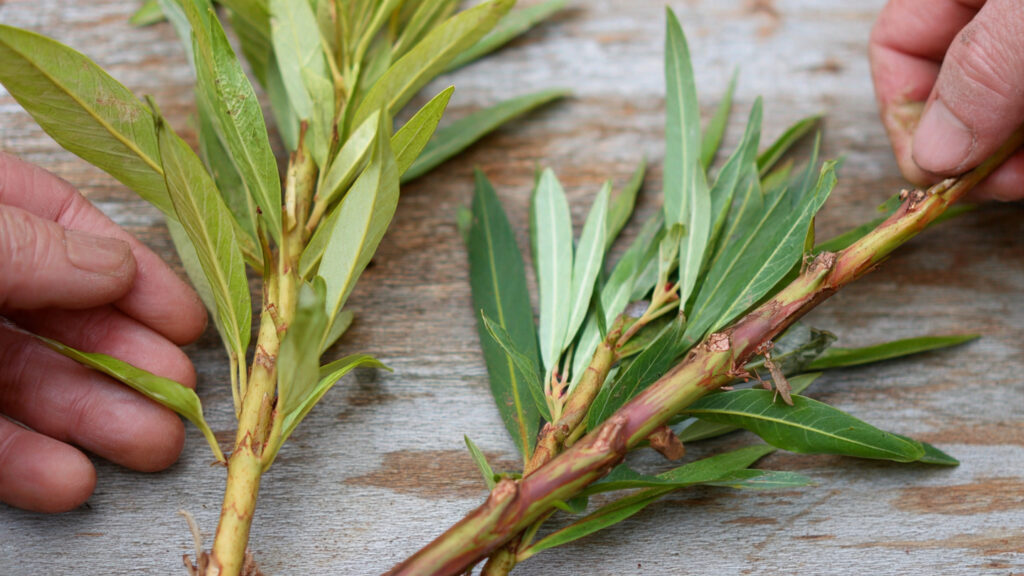
Oleander is a stunning flowering shrub admired for its lush foliage and vibrant blooms in shades of pink, white, red, and yellow. Known scientifically as Nerium oleander, this hardy ornamental plant is widely grown in warm climates for hedges, borders, and container displays. One of the easiest and most effective ways to multiply oleander plants is through cutting propagation.
If you want fast rooting, strong development, and healthy new plants, this complete guide will walk you through every step of oleander cutting propagation — from selecting the right stems to transplanting rooted cuttings successfully.
Why Propagate Oleander from Cuttings?
Propagation from cuttings offers several advantages:
- Faster results than growing from seeds
- Identical clones of the parent plant
- Preserves flower color and growth habit
- Cost-effective method for expanding your garden
Since oleander is a vigorous grower, stem cuttings root readily under the right conditions, making it ideal even for beginner gardeners.
Important Safety Note
Before starting, it’s essential to understand that oleander is toxic if ingested. All parts of the plant contain toxic compounds.
Safety Tips:
- Wear gloves when handling cuttings
- Avoid touching your face while working
- Wash hands thoroughly afterward
- Keep cuttings away from pets and children
With proper precautions, propagation is completely safe.
Best Time to Take Oleander Cuttings
Timing significantly affects rooting success.
Ideal Season:
- Late spring to mid-summer
During this period, the plant is actively growing, and stems contain enough energy to produce roots quickly.
Avoid taking cuttings during cold or dormant seasons, as rooting will be slower and less reliable.
Choosing the Right Stem for Cutting
Selecting a healthy stem is crucial for fast rooting.
Look for:
- Semi-hardwood stems (not too soft, not fully woody)
- Green, healthy growth
- No signs of disease or pest damage
- Non-flowering shoots for best energy focus
A cutting length of 6–8 inches is ideal.
Use sharp, sterilized pruning shears to make a clean cut just below a leaf node.
Preparing the Cutting
Proper preparation increases success rates.
Step-by-Step Preparation:
- Remove lower leaves, leaving 2–3 leaves at the top.
- Trim large leaves in half to reduce moisture loss.
- Make a fresh angled cut at the base.
- Optionally dip the cut end in rooting hormone powder.
Although oleander often roots without hormone, using one can speed up the process.
Rooting Methods: Water vs Soil
Oleander cuttings can root successfully in both water and soil. Each method has its advantages.
➡️ How to Grow Malabar Spinach from Cuttings for Fast, Easy Greens
➡️ How to Grow Super Delicious Cabbage at Home Without a Garden
➡️ How to Grow Bean Sprouts at Home in Plastic Bottles Easily (Step‑by‑Step Guide)
➡️ Why is Your Lemon Tree Blooming in the Heart of Winter?
➡️ Why Should Your Garden Have a Dedicated Pollinator Highway?
➡️ Why Do Your Fruit Trees Need a Winter Wash to Thrive in Spring?
➡️ How Can Rice Water Transform Your Fruits into Sweeter Delights?
➡️ Jumpstart Your Winter Garden: Seed Starting Under Lights
Method 1: Rooting in Water
This is the simplest and most popular method.
Steps:
- Place the prepared cutting in a glass jar filled with clean water.
- Ensure only the lower stem is submerged, not the leaves.
- Place the jar in bright, indirect sunlight.
- Change water every 3–4 days.
Roots usually appear within 2–3 weeks.
Once roots reach 1–2 inches long, the cutting is ready for transplanting into soil.
Method 2: Rooting Directly in Soil
This method produces stronger root systems from the beginning.
Steps:
- Fill a small pot with well-draining potting mix.
- Insert the cutting about 2 inches deep.
- Firm soil gently around the stem.
- Water lightly to settle the soil.
- Cover loosely with a plastic bag to maintain humidity (optional).
Place the pot in bright indirect light and keep the soil slightly moist.
Roots typically develop within 3–4 weeks.
Ideal Conditions for Fast Rooting
Creating the right environment speeds up success.
Light:
Bright, indirect sunlight is best. Avoid harsh direct sun that can stress the cutting.
Temperature:
- 20°C to 30°C (68°F to 86°F)
Warm conditions stimulate root growth.
Humidity:
Moderate humidity encourages quicker establishment.
Air Circulation:
Good airflow prevents fungal issues.
Signs of Successful Rooting
You’ll know your cutting has rooted when:
- New leaves begin to emerge
- The stem resists gentle pulling
- Visible roots form (in water method)
Avoid disturbing the cutting too often, as new roots are delicate.
Transplanting Rooted Cuttings
Once roots are established, transplant carefully.
Steps:
- Prepare a pot with well-draining soil.
- Gently remove the cutting from water or propagation pot.
- Plant at the same depth as before.
- Water thoroughly.
Keep the plant in partial shade for one week to reduce transplant shock.
Gradually introduce it to more sunlight.
Best Soil for Oleander Growth
Oleander prefers:
- Sandy or loamy soil
- Excellent drainage
- Slightly acidic to neutral pH
Heavy, waterlogged soil increases the risk of root rot.
If planting in the ground, ensure proper drainage before transplanting.
Watering After Transplanting
Oleander is drought-tolerant once established, but young plants require consistent moisture.
Watering Tips:
- Keep soil lightly moist initially
- Avoid soggy conditions
- Reduce watering as roots strengthen
After establishment, water deeply but infrequently.
Fertilizing Young Oleander Plants
Newly propagated plants benefit from light feeding.
Fertilizer Guidelines:
- Use balanced fertilizer every 4–6 weeks
- Avoid excessive nitrogen
- Feed during active growing season only
Over-fertilizing can lead to excessive foliage with fewer flowers.
Pruning for Healthy Growth
Pruning encourages bushier growth.
Once the plant reaches 12–18 inches tall:
- Pinch the growing tips
- Remove weak or crossing branches
- Shape lightly for compact structure
Pruning also increases flower production in mature plants.
Common Propagation Mistakes to Avoid
Even though oleander is easy to propagate, mistakes can slow success.
1. Overwatering
Too much moisture can cause stem rot.
2. Using Old Woody Stems
Fully mature wood roots slower than semi-hardwood stems.
3. Insufficient Light
Low light delays rooting.
4. Poor Sanitation
Unclean tools introduce disease.
Maintaining clean conditions and balanced moisture is key.
Growing Oleander in Containers vs Ground
Both options work well.
Containers:
- Easy to move
- Ideal for patios and balconies
- Controlled growth
Ground Planting:
- Larger growth potential
- Better drought tolerance
- Ideal for hedges
Choose based on your garden space and climate.
Long-Term Care for Healthy Oleander Plants
Once established, oleander is remarkably resilient.
Provide:
- Full sun for abundant blooms
- Occasional deep watering
- Annual pruning
- Protection from frost in colder regions
With proper care, propagated oleander plants bloom within 1–2 years.
Final Thoughts
Oleander cutting propagation is a straightforward and rewarding gardening project. By selecting healthy semi-hardwood stems, providing warm and bright conditions, and maintaining balanced moisture, you can achieve fast rooting and strong plant development.
Whether you root your cuttings in water or soil, patience and proper care will result in vibrant, flowering shrubs that enhance your landscape beautifully.