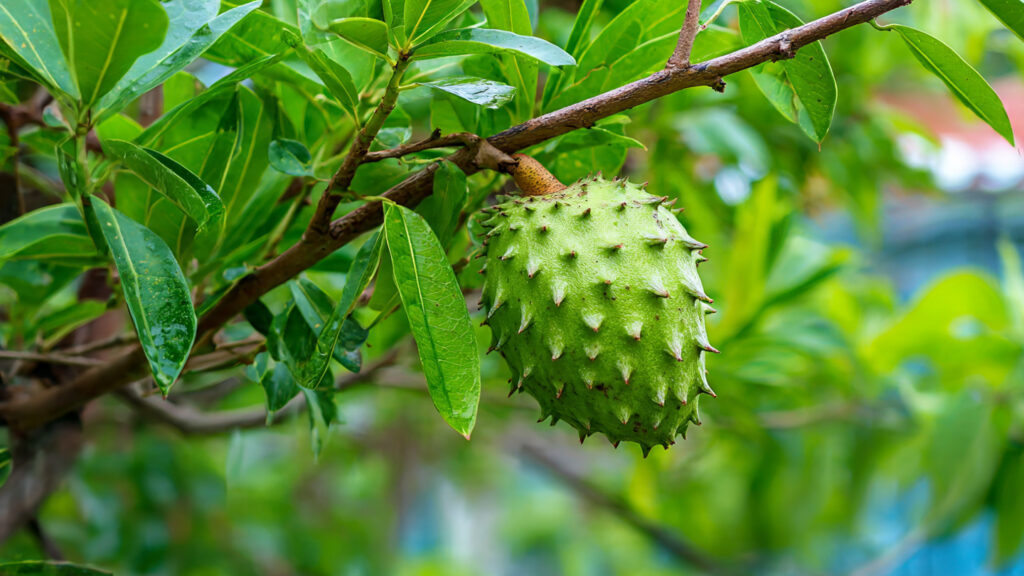
If you love tropical fruit, few trees are as rewarding as the soursop. Known for its creamy texture and sweet-tangy flavor, Soursop (Annona muricata) is a prized addition to warm-climate gardens. But growing soursop from seed can test your patience. Seed-grown trees may take years to fruit—and the quality can vary.
That’s where grafting becomes the smart gardener’s secret.
By grafting a proven, high-producing variety onto a healthy rootstock, you can accelerate growth, ensure fruit quality, and dramatically improve harvest size. In this guide, you’ll learn why grafting works, the best techniques to use, and step-by-step instructions to succeed.
Why Graft a Soursop Tree?
Grafting combines two plants into one:
- Rootstock – the lower part that provides roots and vigor
- Scion – the upper cutting taken from a mature, high-quality fruiting tree
This technique offers several advantages:
1. Faster Fruiting
Seed-grown soursop trees can take 3–5 years (or more) to bear fruit. A grafted tree often fruits much sooner because the scion comes from mature wood.
2. Predictable Fruit Quality
Seeds don’t grow “true to type.” That means fruit size, sweetness, and texture may vary. Grafting ensures you get the exact variety you want.
3. Stronger Growth
When you choose a vigorous rootstock, the grafted tree grows faster and adapts better to soil conditions.
4. Higher Yields
Healthy graft unions support better nutrient flow, resulting in improved flowering and fruit production.
For gardeners serious about productivity, grafting is a game-changer.
When Is the Best Time to Graft?
Timing is critical.
The ideal time to graft soursop is:
- During warm weather
- When the tree is actively growing
- When sap flow is strong
In tropical and subtropical climates, late spring to early summer is ideal.
Avoid grafting during:
- Cold spells
- Heavy rain periods
- Dormant phases
Active growth promotes faster healing and better success rates.
➡️ How to Grow Malabar Spinach from Cuttings for Fast, Easy Greens
➡️ How to Grow Super Delicious Cabbage at Home Without a Garden
➡️ How to Grow Bean Sprouts at Home in Plastic Bottles Easily (Step‑by‑Step Guide)
➡️ Why is Your Lemon Tree Blooming in the Heart of Winter?
➡️ Why Should Your Garden Have a Dedicated Pollinator Highway?
➡️ Why Do Your Fruit Trees Need a Winter Wash to Thrive in Spring?
➡️ How Can Rice Water Transform Your Fruits into Sweeter Delights?
➡️ Jumpstart Your Winter Garden: Seed Starting Under Lights
Choosing the Right Rootstock
A successful graft starts below the surface.
Your rootstock should be:
- Healthy and disease-free
- 6–12 months old
- Pencil-thick in diameter
- Actively growing
Seedlings grown from strong, local soursop trees often make excellent rootstocks. Choose plants with straight stems and well-developed root systems.
Selecting a Quality Scion
The scion determines fruit quality, so choose carefully.
Look for:
- A healthy branch from a productive tree
- Semi-hardwood (not too soft, not too woody)
- 3–6 inches long
- At least 2–3 healthy buds
Cut the scion early in the morning when moisture levels are highest. Use sterilized pruning tools to prevent disease.
If not grafting immediately, wrap the scion in a moist paper towel and store it in a cool place temporarily.
Tools You’ll Need
Prepare everything before you start:
- Sharp grafting knife or pruning blade
- Grafting tape or plastic wrap
- Clean cloth
- Disinfectant (alcohol)
Clean tools are essential. Even small infections can ruin a graft.
The Best Grafting Method for Soursop
Several grafting methods work for soursop, but cleft grafting and splice grafting are among the most reliable for beginners.
Let’s walk through cleft grafting step by step.
Step-by-Step Guide to Cleft Grafting
Step 1: Prepare the Rootstock
Cut the rootstock stem cleanly at about 8–12 inches above the soil.
Then:
- Make a vertical split (about 1–2 inches deep) down the center of the cut surface.
- Ensure the split is straight and clean.
Step 2: Shape the Scion
Trim the base of the scion into a wedge shape.
- Make two clean cuts forming a sharp “V” at the bottom.
- Ensure the wedge is even and smooth.
This shape allows better contact between scion and rootstock.
Step 3: Insert the Scion
Carefully place the wedge-shaped scion into the split of the rootstock.
Important:
- Align at least one side of the cambium layers (the thin green layer beneath the bark).
- Proper cambium contact is crucial for union success.
Even if diameters differ slightly, aligning one side improves the chances of success.
Step 4: Secure the Graft
Wrap the graft tightly with grafting tape or plastic wrap.
- Seal the union completely.
- Prevent air and moisture from entering.
- Ensure the scion is firmly held in place.
You may cover the scion loosely with a plastic bag to maintain humidity, but ensure airflow to prevent fungal growth.
Aftercare: The Key to Success
Grafting doesn’t end once the scion is inserted.
Proper aftercare determines whether your effort pays off.
Keep in Partial Shade
Protect the graft from harsh sun for the first 2–3 weeks.
Maintain Moist Soil
Water consistently but avoid waterlogging.
Watch for New Growth
Within 2–4 weeks, buds on the scion should begin to swell and grow.
Remove Rootstock Shoots
If new shoots appear below the graft union, remove them. These compete for energy.
Remove Wrapping Carefully
Once the graft has healed and new growth is strong, gently remove the tape to prevent constriction.
Signs of a Successful Graft
You’ll know your graft is working when:
- Buds swell and produce leaves
- The scion remains green and firm
- The union area begins to fuse
If the scion turns brown or shrivels, the graft likely failed.
Don’t be discouraged—practice improves success rates dramatically.
Common Mistakes to Avoid
Even experienced gardeners make errors. Here are common pitfalls:
1. Poor Cambium Alignment
Without proper contact, the graft won’t heal.
2. Using Dull Tools
Jagged cuts reduce healing success.
3. Grafting in Cold Weather
Low temperatures slow cellular activity.
4. Loose Wrapping
Air exposure dries out tissues.
5. Neglecting Aftercare
Sunburn or drought stress can ruin a graft.
Avoiding these mistakes greatly increases your chances of success.
How Grafting Leads to Bigger Harvests
The magic of grafting lies in plant physiology.
A vigorous rootstock:
- Absorbs nutrients efficiently
- Develops a strong root system
- Tolerates soil conditions better
Meanwhile, the scion:
- Produces high-quality fruit
- Flowers reliably
- Maintains consistent characteristics
Together, they form a more productive tree than either would alone.
Grafted soursop trees often:
- Flower earlier
- Set more fruit
- Produce larger fruits
- Yield more consistently year after year
For gardeners focused on maximizing space and productivity, this makes a huge difference.
Long-Term Care for Grafted Soursop Trees
Once established, maintain your grafted tree properly.
Pruning
- Shape the tree for airflow and sunlight penetration.
- Remove dead or weak branches annually.
Feeding
- Apply balanced fertilizer during active growth.
- Incorporate compost for steady nutrient supply.
Pest Monitoring
- Watch for fruit borers and scale insects.
- Maintain garden hygiene to prevent disease.
Healthy trees reward consistent care.
Is Grafting Worth It?
If you want faster growth, reliable fruit quality, and larger harvests—the answer is yes.
While growing from seed is simple, it lacks predictability. Grafting requires a little skill, but the payoff is substantial:
- Reduced waiting time
- Improved vigor
- Superior fruit
- Higher yields
For serious tropical fruit gardeners, it’s one of the smartest techniques to master.
Final Thoughts
Grafting a soursop tree may seem advanced at first, but with the right tools, proper timing, and careful technique, it becomes a powerful skill in your gardening toolkit.
By combining a strong root system with a proven fruiting variety, you create a tree designed for performance. The result? Faster growth, bigger harvests, and the satisfaction of mastering a professional propagation method.
The smart gardener doesn’t just plant and wait—they optimize. And grafting soursop is one of the best ways to do exactly that.