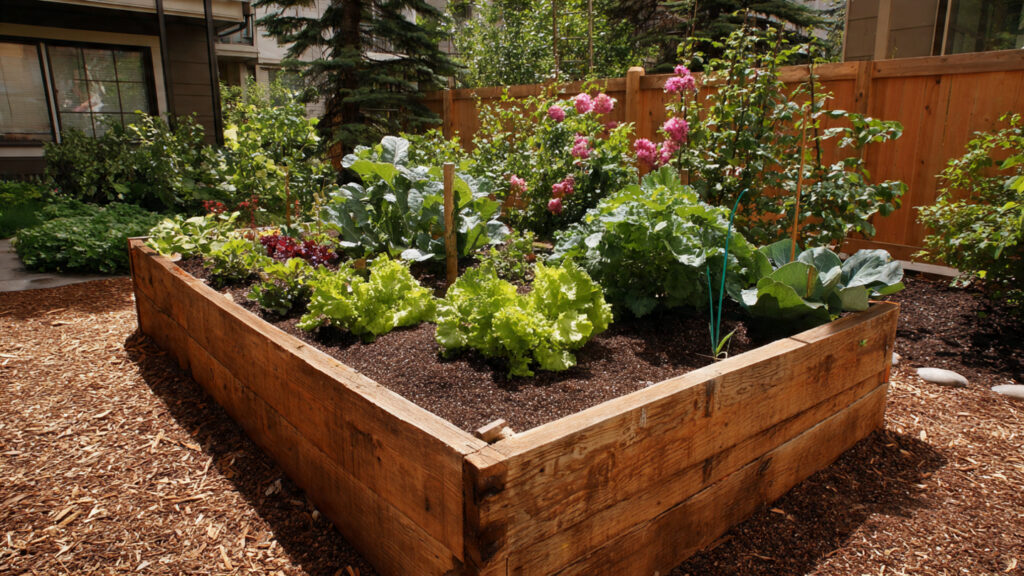
If you want healthier plants, better soil control, fewer weeds, and bigger harvests, building a raised bed garden is one of the smartest gardening decisions you can make. Raised beds are simple structures that lift your soil above ground level, creating a controlled growing environment that promotes strong root development and higher productivity.
Whether you have a small backyard, a terrace, or an open patch of land, this step-by-step guide will walk you through how to build a raised bed garden successfully and maximize your harvests.
Why Choose a Raised Bed Garden?
Before we get into construction, let’s understand why raised beds are so effective.
1. Improved Soil Quality
You control what goes into the bed, ensuring nutrient-rich, well-draining soil.
2. Better Drainage
Elevated beds prevent waterlogging and root rot.
3. Fewer Weeds
Because you add fresh soil, you significantly reduce weed pressure.
4. Higher Yields
Healthy soil and proper spacing lead to stronger plants and bigger harvests.
5. Easier Maintenance
Less bending, clearer pathways, and organized planting make gardening more enjoyable.
Step 1: Choose the Right Location
Location is critical for productivity.
Look for:
- 6–8 hours of direct sunlight daily
- Good air circulation
- Access to water
- Level ground
Most vegetables thrive in full sun. Avoid shaded areas under large trees, as they compete for nutrients and water.
Step 2: Decide the Size of Your Raised Bed
Proper dimensions improve accessibility and plant health.
Ideal Dimensions:
- Width: 3–4 feet (so you can reach the center from both sides)
- Length: 6–8 feet (or based on available space)
- Height: 10–18 inches
If growing root vegetables like carrots, deeper beds (12–18 inches) work best.
Keep the width manageable — you should never need to step inside the bed, as compacted soil reduces plant growth.
Step 3: Choose Materials for the Frame
You can build raised beds using various materials depending on your budget.
Common Options:
Wood (Most Popular)
➡️ How to Grow Malabar Spinach from Cuttings for Fast, Easy Greens
➡️ How to Grow Super Delicious Cabbage at Home Without a Garden
➡️ How to Grow Bean Sprouts at Home in Plastic Bottles Easily (Step‑by‑Step Guide)
➡️ Why is Your Lemon Tree Blooming in the Heart of Winter?
➡️ Why Should Your Garden Have a Dedicated Pollinator Highway?
➡️ Why Do Your Fruit Trees Need a Winter Wash to Thrive in Spring?
➡️ How Can Rice Water Transform Your Fruits into Sweeter Delights?
➡️ Jumpstart Your Winter Garden: Seed Starting Under Lights
- Cedar (naturally rot-resistant)
- Pine (budget-friendly but shorter lifespan)
Bricks or Concrete Blocks
- Long-lasting
- Strong and stable
Recycled Materials
- Old planks
- Metal sheets
- Repurposed wood
Avoid treated wood that contains harmful chemicals, especially if growing vegetables.
Step 4: Gather Tools and Supplies
Here’s what you’ll need:
- Wooden boards or chosen material
- Screws or nails
- Drill or hammer
- Measuring tape
- Level
- Cardboard or landscape fabric
- Soil mix
Preparation makes the building process smooth and efficient.
Step 5: Build the Frame
Step-by-Step Assembly:
- Cut boards to your desired length.
- Attach corners securely using screws.
- Ensure the frame is square and level.
- Place the frame in the selected location.
- Remove grass or weeds beneath.
If the ground is uneven, level it before placing the frame. A stable foundation prevents shifting over time.
Step 6: Prepare the Base
Before adding soil, prepare the bottom layer.
Option 1: Cardboard Layer
Lay flattened cardboard at the base to suppress weeds. It will decompose naturally over time.
Option 2: Landscape Fabric
Use fabric if you want longer-lasting weed protection.
Avoid plastic sheets, as they block drainage.
Step 7: Fill the Raised Bed with High-Quality Soil
The soil mix determines your success.
Ideal Soil Blend (The 60-30-10 Method):
- 60% topsoil
- 30% compost
- 10% sand or coco peat
This mixture ensures:
- Good drainage
- Strong nutrient content
- Healthy root development
Compost is the key ingredient for bigger harvests. It feeds plants naturally and improves soil structure.
Step 8: Plan Your Plant Layout
Smart spacing increases productivity.
Tips:
- Follow square-foot gardening principles.
- Plant taller crops on the north side.
- Group plants with similar watering needs.
- Avoid overcrowding.
Raised beds allow intensive planting while still maintaining airflow and light penetration.
Step 9: Install a Simple Irrigation System
Efficient watering boosts yields.
Budget-Friendly Options:
- Drip irrigation lines
- Soaker hoses
- Manual watering with a watering can
Drip irrigation conserves water and delivers moisture directly to roots, reducing fungal issues.
Water deeply but less frequently to encourage strong root systems.
Step 10: Add Mulch
Mulching is essential for bigger harvests.
Benefits of Mulch:
- Retains moisture
- Suppresses weeds
- Regulates soil temperature
- Adds organic matter
Use:
- Straw
- Dry leaves
- Grass clippings
- Wood chips
Mulching reduces maintenance and improves soil health over time.
Step 11: Feed Plants Regularly
Raised beds require regular feeding since nutrients can wash out faster.
Fertilizer Options:
- Compost every 4–6 weeks
- Vermicompost
- Fish emulsion
- Organic liquid fertilizers
Avoid over-fertilizing, especially with nitrogen-heavy products, as this may promote leafy growth over fruit production.
Step 12: Practice Crop Rotation
Rotate crops each season to prevent nutrient depletion and disease buildup.
For example:
- Year 1: Leafy greens
- Year 2: Root vegetables
- Year 3: Legumes
Rotation keeps soil fertile and reduces pest problems naturally.
Step 13: Manage Pests Naturally
Raised beds already reduce many pest issues, but you should still monitor regularly.
Natural Pest Control Methods:
- Neem oil spray
- Companion planting (marigolds, basil)
- Hand removal
- Row covers
Healthy soil leads to stronger plants that resist pests better.
Step 14: Extend the Growing Season
One advantage of raised beds is faster soil warming in spring.
You can:
- Add hoop covers
- Use shade nets in summer
- Protect crops during light frost
This extends your harvest window and increases annual yield.
Step 15: Maintain and Improve Soil Each Season
At the end of the growing season:
- Remove old plant debris.
- Add compost.
- Loosen soil gently (avoid deep digging).
- Cover with mulch.
Each year your soil improves, leading to bigger and better harvests.
Best Crops for Raised Beds
Raised beds work especially well for:
- Tomatoes
- Peppers
- Lettuce
- Spinach
- Carrots
- Cucumbers
- Beans
- Herbs
Deep-rooted vegetables benefit greatly from loose, rich soil.
Common Mistakes to Avoid
Making Beds Too Wide
You should never step into the bed.
Using Poor Soil
Quality soil equals quality harvest.
Overcrowding Plants
Plants need airflow and light.
Ignoring Watering Needs
Consistent watering prevents stress and improves yield.
Final Thoughts
Building a raised bed garden is one of the most effective ways to increase harvests while simplifying maintenance. By choosing the right location, building a sturdy frame, filling it with nutrient-rich soil, and practicing smart planting techniques, you create an ideal growing environment for vegetables and herbs.
Raised beds give you complete control over soil quality, drainage, spacing, and nutrients — all key factors in producing bigger, healthier harvests. With proper care and seasonal improvements, your raised bed garden will continue to become more productive year after year.