Growing garlic at home is a simple yet rewarding gardening project, but most people assume they need to plant an entire bulb for a successful harvest. The truth is, with the right techniques, you can get maximum yield from just a single clove—and even explore some advanced methods that improve growth, flavor, and size of your garlic bulbs. This guide will cover everything you need to know, from planting techniques to soil preparation, advanced tricks, and comparisons of methods for getting the most out of your garlic garden.
Why Growing Garlic at Home Makes Sense
Garlic is more than just a kitchen staple. Growing your own provides several advantages:
- Flavor: Freshly grown garlic has a stronger, more nuanced flavor than store-bought bulbs.
- Cost savings: One bulb can provide multiple plantings over a season.
- Health benefits: Garlic contains compounds like allicin, known for antioxidant and immune-boosting properties.
- Sustainability: Reduces packaging and transportation footprint compared to commercial garlic.
Garlic is versatile in the garden as well. It’s a low-maintenance crop, naturally deters pests, and can even improve soil quality when rotated with other crops.
Selecting the Right Garlic
Garlic comes in many varieties, mainly softneck and hardneck:
- Softneck: Best for warmer climates, these have multiple cloves per bulb and store longer.
- Hardneck: Better for cold climates, they produce fewer cloves but stronger flavor and hard, stiff flower stalks called scapes.
Choosing the right variety for your climate and taste preference is crucial for maximum harvest. Local nurseries or seed catalogs often offer region-specific recommendations.
You Don’t Need a Whole Bulb
Here’s the secret: you only need one clove from a garlic bulb to start a new plant. Each clove is capable of growing into a full bulb, provided it’s planted correctly.
Steps to Plant a Single Clove:
- Choose a healthy clove – Avoid damaged or diseased cloves.
- Separate carefully – Don’t peel off the protective skin.
- Planting depth – Place the clove 2 inches deep in loose, well-draining soil, with the pointed end facing up.
- Spacing – Leave at least 4-6 inches between cloves for softneck varieties and 6-8 inches for hardneck.
- Mulch and water – Cover with a light layer of mulch to retain moisture and protect from extreme temperatures.
With just one clove, a single bulb can give you multiple cloves for future planting, making it a highly efficient method for continuous garlic production.
Soil Preparation: The Key to a Giant Garlic Harvest
Garlic thrives in fertile, loose, and well-drained soil. Here’s how to prep your plot for maximum harvest:
- pH balance: Ideal soil pH is 6.0–7.0.
- Amend the soil: Add compost or well-rotted manure to increase fertility.
- Aeration: Loosen soil to allow roots to penetrate easily, which supports bulb growth.
- Drainage: Garlic doesn’t like wet feet. Raised beds or ridges work well in wetter climates.
Healthy soil ensures that each clove develops into a robust bulb with large, plump cloves inside.
Advanced Tricks for Maximum Garlic Yield
Beyond basic planting, there are several advanced techniques that experienced gardeners use to boost yield and improve bulb size.
1. Pre-Sprouting (Chitting)
Pre-sprouting your cloves encourages faster growth. Place cloves in a cool, light environment until small green shoots appear before planting. This jumpstarts root and shoot development once in the soil.
2. Row Covers and Protection
Use floating row covers to protect young plants from pests like onion maggots and thrips. Covers also help maintain a stable microclimate, promoting faster growth.
3. Fertilization Timing
- Early growth: Use nitrogen-rich fertilizer to stimulate leaf growth.
- Bulb development: Reduce nitrogen and focus on phosphorus and potassium to maximize bulb size and clove number.
4. Watering Techniques
Water consistently but avoid overwatering. During bulb formation, moderate water encourages sugar concentration, resulting in sweeter, more flavorful garlic.
5. Removing Scapes (for Hardneck Varieties)
If growing hardneck garlic, remove the flowering stalks (scapes) when they appear. This redirects the plant’s energy into the bulb instead of flowering, producing larger cloves.
Comparing Garlic Growing Methods
Different planting methods can influence your garlic harvest. Let’s compare the most common approaches:
➡️ How to Grow Malabar Spinach from Cuttings for Fast, Easy Greens
➡️ How to Grow Super Delicious Cabbage at Home Without a Garden
➡️ How to Grow Bean Sprouts at Home in Plastic Bottles Easily (Step‑by‑Step Guide)
➡️ Why is Your Lemon Tree Blooming in the Heart of Winter?
➡️ Why Should Your Garden Have a Dedicated Pollinator Highway?
➡️ Why Do Your Fruit Trees Need a Winter Wash to Thrive in Spring?
➡️ How Can Rice Water Transform Your Fruits into Sweeter Delights?
➡️ Jumpstart Your Winter Garden: Seed Starting Under Lights
| Method | Pros | Cons | Best Use |
|---|---|---|---|
| Single Clove Planting | Efficient, minimal seed cost | Slow start if cloves are small | Home gardens and small spaces |
| Whole Bulb Planting | Quick establishment, uniform growth | Wastes extra cloves | When fast results are needed |
| Raised Beds | Excellent drainage, easier soil prep | Higher initial setup | Heavy, fertile soils |
| Container Growing | Space-saving, mobile | Limited bulb size | Balcony or patio gardening |
| Pre-Sprouted Cloves | Faster growth, earlier harvest | Extra step required | Maximum yield from few cloves |
The single clove method, combined with pre-sprouting and careful soil management, often yields the best balance between efficiency and size of the harvest.
Timing Your Garlic Planting
Planting at the right time is critical. Garlic prefers cool, moist winters for root development and warmer springs for bulb formation.
- Fall planting: Common in cold climates. Plant cloves 4-6 weeks before the first frost to allow roots to establish.
- Spring planting: Possible in milder climates. Plant as soon as soil can be worked, but expect slightly smaller bulbs compared to fall-planted garlic.
Knowing your local climate helps you maximize both bulb size and flavor.
Harvesting Your Garlic
Knowing when to harvest is key to getting large, flavorful bulbs.
Signs that garlic is ready:
- Lower leaves start to brown, while upper leaves remain green.
- Bulbs are firm when gently squeezed.
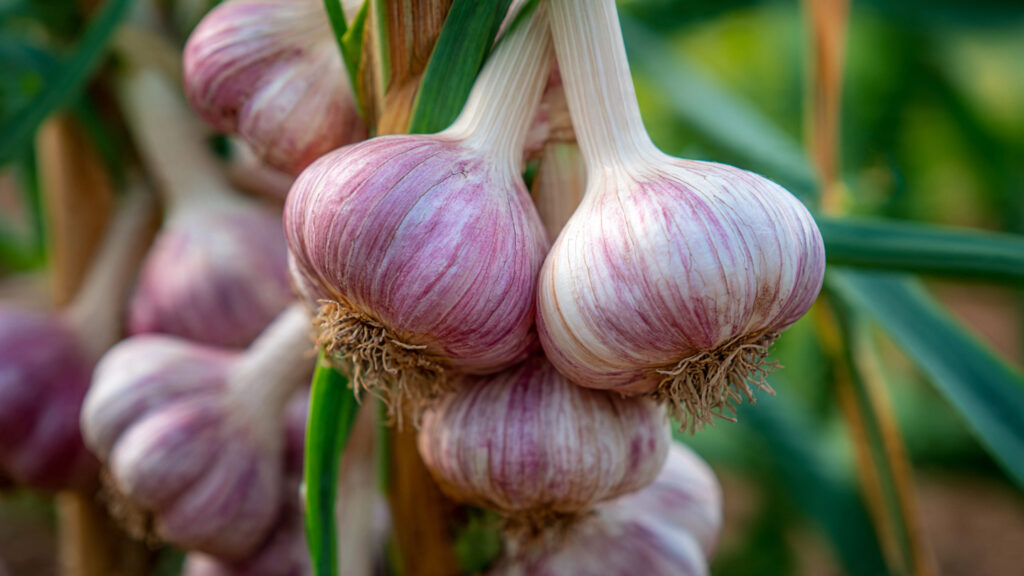
Harvest carefully to avoid bruising. Use a garden fork to loosen soil, then lift bulbs gently. Avoid washing bulbs until ready to use—curing is essential for long-term storage.
Curing for Maximum Shelf Life:
- Hang garlic in a cool, dry, and airy place for 2–4 weeks.
- Keep bulbs out of direct sunlight.
- Once cured, trim roots and leaves for storage.
Properly cured garlic keeps for months while maintaining flavor.
Benefits of Growing Garlic from a Single Clove
- Cost-effective: One bulb can give dozens of future plantings.
- Space-efficient: Only one clove per hole is needed.
- Improved control: You can select the strongest cloves for planting, ensuring robust growth.
- Continuous supply: You can stagger plantings and enjoy multiple harvests throughout the year.
By starting small and using advanced tricks, gardeners can achieve yields comparable to professional farms without the need for dozens of bulbs upfront.
Final Tips for Maximum Garlic Success
- Keep track of planting dates and methods in a garden journal.
- Rotate crops to prevent soil-borne diseases.
- Mulch generously to conserve moisture and suppress weeds.
- Monitor plants for pests and intervene early.
- Experiment with varieties to find the best flavor and size for your region.
Growing garlic from a single clove is not just possible—it’s an advanced gardening technique that maximizes efficiency and yield. By combining careful soil preparation, pre-sprouting, proper spacing, timely watering, and fertilization, you can enjoy a bumper harvest of large, sweet, and aromatic garlic bulbs right from your backyard.
With patience and attention to detail, even novice gardeners can transform a single garlic clove into a thriving, productive patch, creating a steady supply of homegrown garlic for months to come.