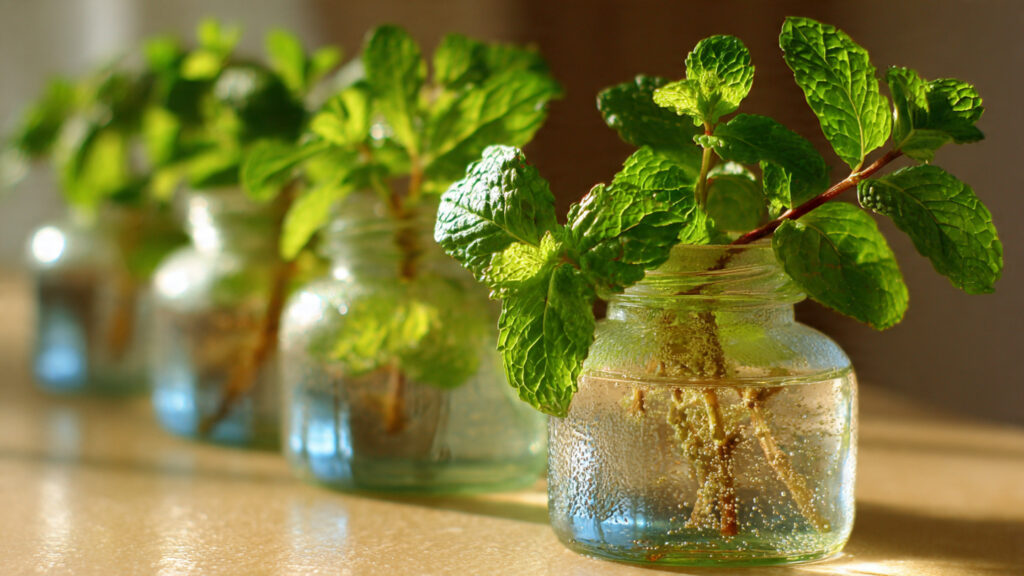
Mint is one of the most versatile and rewarding herbs to grow at home. Its vibrant green leaves, refreshing aroma, and culinary flexibility make it a must-have in every kitchen. Whether you want to garnish dishes, make teas, or infuse water, nothing beats fresh mint harvested directly from your home garden. The good news is that you don’t need a green thumb or a large backyard to enjoy this aromatic herb. Growing mint from cuttings is not only simple but also incredibly efficient. This guide will walk you through the easiest method for cultivating fresh mint from cuttings at home, step by step.
Why Grow Mint From Cuttings?
Before diving into the practical steps, let’s understand why propagating mint from cuttings is often preferred over growing from seeds.
- Faster Growth: Seeds take time to germinate and may be unpredictable in terms of quality. Cuttings, on the other hand, root quickly and begin producing leaves sooner.
- Cost-Effective: You can multiply your mint supply from just a single plant, making it a sustainable and budget-friendly approach.
- Guaranteed Quality: By using cuttings from a healthy plant, you ensure that the new plants inherit the same desirable traits, such as leaf flavor and aroma.
- Ease of Maintenance: Mint is a hardy plant, and cuttings often adapt well to indoor environments, making them suitable for homes with limited space.
With these advantages in mind, let’s explore how to propagate mint effortlessly.
Materials You Will Need
To start growing mint from cuttings at home, gather the following items:
- Healthy mint plant (source for cuttings)
- A sharp pair of scissors or pruning shears
- Small glass or jar
- Clean water (preferably room temperature)
- Small pots or containers with drainage holes
- Potting mix or a combination of soil, sand, and compost
Having these items ready ensures that your mint cuttings have the best chance to develop strong roots and thrive.
Selecting the Right Cuttings
The success of your mint propagation largely depends on the quality of the cuttings you choose. Follow these guidelines:
- Healthy Stem: Look for stems that are firm, green, and free from disease or discoloration. Avoid woody or overly mature stems, as they are less likely to root.
- Optimal Length: Cuttings of 3 to 5 inches in length are ideal. These are long enough to develop roots while remaining manageable for planting.
- Leaf Nodes: Ensure your cutting has at least 2-3 sets of leaves. Roots will grow from the nodes, so the presence of multiple nodes is essential.
Once you’ve identified a healthy stem, use sterilized scissors to make a clean cut just below a leaf node.
Preparing the Cuttings
After selecting your cuttings, preparation is key to promoting root growth. Here’s how to do it:
- Remove Lower Leaves: Strip off the leaves from the bottom 1-2 inches of the stem. This part will be submerged in water or soil and should be leaf-free to prevent rotting.
- Optional Rooting Hormone: Although not necessary for mint, dipping the cut end in a rooting hormone can accelerate root development. However, many gardeners successfully root mint in plain water without additives.
- Immediate Placement: Place the cuttings in water or plant them in a soil mix immediately after preparation. This reduces stress and increases survival rates.
Rooting Mint in Water (Simplest Method)
Rooting in water is the easiest way to start mint cuttings at home, especially for beginners. Here’s the step-by-step process:
- Select a Container: Use a small glass, jar, or even a cup filled with clean water. Ensure the container is deep enough to cover the bottom nodes of the cutting.
- Insert Cuttings: Place the prepared cuttings in the water so that at least 1-2 nodes are submerged. Keep the leaves above water to prevent decay.
- Optimal Location: Position the container in a spot with bright, indirect sunlight. Direct sun may be too harsh and could damage the tender cuttings.
- Change Water Regularly: Replace the water every 2-3 days to keep it fresh and oxygen-rich. This helps prevent fungal growth and encourages healthy root development.
- Monitor Root Growth: Within 7-14 days, you should see tiny white roots emerging from the nodes. Mint is a vigorous grower, so roots may lengthen quickly.
Once the roots reach 1-2 inches in length, your cutting is ready to be transplanted into soil.
Transplanting to Soil
While water-rooted cuttings can continue to grow in jars, transferring them to soil ensures robust growth and long-term survival. Here’s how to transplant successfully:
- Choose a Suitable Pot: Use a small container with drainage holes. Mint prefers moist but well-drained soil, so proper drainage is crucial to avoid root rot.
- Prepare the Soil: A mix of potting soil and compost works well. You can also add a bit of sand to improve aeration.
- Plant the Cutting: Make a small hole in the soil and gently place the water-rooted cutting inside. Cover the roots and firm the soil lightly to provide stability.
- Water Thoroughly: After planting, water generously to help settle the soil around the roots.
- Provide Indirect Sunlight: Place the pot in a location that receives bright, indirect sunlight for 4-6 hours daily. Avoid harsh midday sun, which may stress the young plant.
Caring for Your Mint Plants
Mint is low-maintenance, but a few care practices ensure healthy growth:
- Regular Watering: Keep the soil consistently moist, but not soggy. Mint thrives in slightly damp conditions.
- Pruning: Regularly pinch off the top leaves to encourage bushier growth. Harvest leaves as needed for cooking or beverages.
- Pest Control: Mint is relatively pest-resistant, but watch for aphids or spider mites. A mild soap solution can manage infestations.
- Fertilization: Feed your mint every 4-6 weeks with a balanced, water-soluble fertilizer for vigorous growth.
- Containment: Mint spreads rapidly. If planting in a garden bed, consider using containers or barriers to prevent it from overtaking other plants.
Harvesting Fresh Mint
The best part of growing mint at home is enjoying the harvest. Follow these tips for optimal flavor:
- Harvest Frequently: Regular harvesting promotes new growth. Snip stems just above a leaf node.
- Use Young Leaves: Young leaves are tender and flavorful, perfect for teas, salads, or garnishes.
- Preserve Excess Mint: If you have more than you can use, freeze or dry the leaves for later use.
Advantages of Growing Mint at Home
Growing mint from cuttings offers several benefits beyond the obvious culinary uses:
- Continuous Supply: With proper care, your mint plant can produce fresh leaves year-round.
- Natural Air Freshener: Mint has a refreshing aroma that naturally deodorizes your home.
- Therapeutic Qualities: Mint is known for its soothing effects on digestion, headaches, and minor ailments.
- Sustainable Gardening: By propagating cuttings, you reduce waste and create an eco-friendly garden solution.
Troubleshooting Common Problems
Even though mint is hardy, some issues may arise:
➡️ How to Grow Malabar Spinach from Cuttings for Fast, Easy Greens
➡️ How to Grow Super Delicious Cabbage at Home Without a Garden
➡️ How to Grow Bean Sprouts at Home in Plastic Bottles Easily (Step‑by‑Step Guide)
➡️ Why is Your Lemon Tree Blooming in the Heart of Winter?
➡️ Why Should Your Garden Have a Dedicated Pollinator Highway?
➡️ Why Do Your Fruit Trees Need a Winter Wash to Thrive in Spring?
➡️ How Can Rice Water Transform Your Fruits into Sweeter Delights?
➡️ Jumpstart Your Winter Garden: Seed Starting Under Lights
- Yellowing Leaves: Usually a sign of overwatering or poor drainage. Allow soil to dry slightly before watering again.
- Leggy Growth: If the plant becomes tall and sparse, it may need more light or regular pruning.
- Fungal Issues: Ensure good air circulation and avoid wetting leaves excessively to prevent mildew or rot.
Conclusion
Growing fresh mint from cuttings at home is truly one of the simplest and most rewarding gardening projects. With minimal effort, you can propagate a small cutting into a thriving plant that provides endless culinary, medicinal, and aromatic benefits. The process—from selecting healthy cuttings, rooting in water, transplanting to soil, to regular care—is straightforward, making it accessible to beginners and seasoned gardeners alike.
By following this simple method, you’ll enjoy the satisfaction of watching your mint flourish and the delight of plucking fresh, aromatic leaves whenever you need them. Whether in teas, salads, cocktails, or desserts, homegrown mint adds a burst of flavor and freshness that store-bought herbs can rarely match. Start today, and in just a few weeks, your kitchen or balcony will be graced with a lush, fragrant mint plant—a true testament to the joy of home gardening.