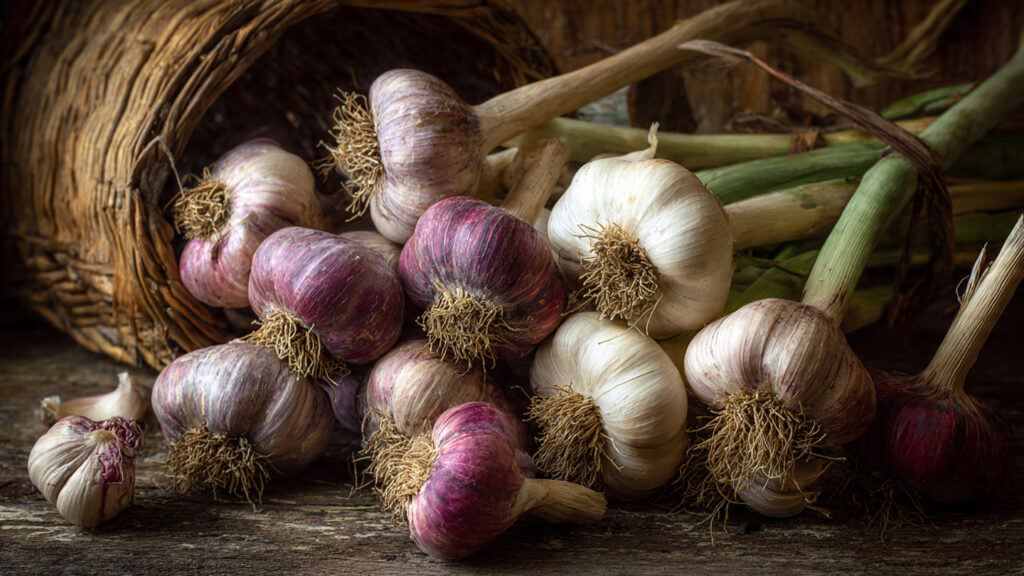
Garlic is one of the most rewarding crops you can grow at home. With minimal space, simple care, and a bit of patience, you can harvest large, flavorful bulbs that far surpass store-bought garlic in taste and freshness. Whether you have a spacious backyard or a few containers on a balcony, growing garlic is easier than you might think.
This complete step-by-step guide will walk you through everything you need to know to grow big, healthy garlic bulbs right at home.
Why Grow Garlic at Home?
Homegrown garlic offers several benefits:
- Superior flavor: Fresh garlic has a stronger, richer taste.
- Cost-effective: One bulb can produce several new plants.
- Low maintenance: Garlic requires minimal care once planted.
- Natural pest resistance: Garlic naturally deters many garden pests.
- Long storage life: Properly cured garlic can last for months.
Best of all, garlic doesn’t demand constant attention, making it ideal for beginners and busy gardeners alike.
Step 1: Choose the Right Type of Garlic
There are two main types of garlic you can grow:
1. Hardneck Garlic
- Produces a central flower stalk called a scape.
- Stronger, more complex flavor.
- Better suited for cooler climates.
- Shorter storage life.
2. Softneck Garlic
- No central scape.
- Milder flavor.
- Stores longer.
- Ideal for warmer climates.
If you live in a region with mild winters, softneck varieties may perform better. In colder areas, hardneck types are usually more reliable.
Always choose organic or seed garlic from a nursery. Avoid supermarket garlic, as it may be treated to prevent sprouting.
Step 2: Pick the Perfect Planting Time
Garlic is typically planted in the fall, about 4–6 weeks before the ground freezes. This allows roots to establish before winter dormancy.
In warmer climates, garlic can also be planted in late winter or early spring, though fall planting usually results in larger bulbs.
As a general guide:
- Cold climates: Plant in October–November.
- Mild climates: Plant in November–December.
- Warm climates: Plant in December–January.
Step 3: Prepare the Soil Properly
Garlic thrives in:
- Well-draining soil
- Loose, crumbly texture
- Rich organic matter
- pH between 6.0 and 7.0
How to Prepare the Bed:
- Choose a sunny location (6–8 hours of sunlight daily).
- Loosen soil 8–10 inches deep.
- Mix in compost or well-rotted manure.
- Remove rocks and compacted clumps.
Avoid planting garlic in soil where onions or other alliums were recently grown to prevent disease buildup.
If growing in containers, use a deep pot (at least 8–10 inches) with drainage holes and high-quality potting mix.
Step 4: Break Apart the Bulbs
A day before planting:
- Gently separate the garlic bulb into individual cloves.
- Keep the papery skin intact.
- Select the largest, healthiest cloves.
- Avoid small or damaged ones.
Remember: The bigger the clove, the bigger the bulb.
➡️ How to Grow Malabar Spinach from Cuttings for Fast, Easy Greens
➡️ How to Grow Super Delicious Cabbage at Home Without a Garden
➡️ How to Grow Bean Sprouts at Home in Plastic Bottles Easily (Step‑by‑Step Guide)
➡️ Why is Your Lemon Tree Blooming in the Heart of Winter?
➡️ Why Should Your Garden Have a Dedicated Pollinator Highway?
➡️ Why Do Your Fruit Trees Need a Winter Wash to Thrive in Spring?
➡️ How Can Rice Water Transform Your Fruits into Sweeter Delights?
➡️ Jumpstart Your Winter Garden: Seed Starting Under Lights
Do not peel the cloves.
Step 5: Planting Garlic the Right Way
Planting Depth and Spacing:
- Plant cloves 2–3 inches deep.
- Place with the pointed end facing upward.
- Space cloves 4–6 inches apart.
- Keep rows 8–12 inches apart.
Cover with soil and gently firm it down.
After planting, water thoroughly to help roots begin developing.
Step 6: Mulching for Success
Mulching is crucial, especially in colder regions.
Apply 2–4 inches of mulch such as:
- Straw
- Dry leaves
- Grass clippings
Benefits of mulching:
- Protects from extreme temperatures
- Suppresses weeds
- Retains moisture
- Improves soil structure over time
In spring, remove or thin mulch once shoots begin emerging.
Step 7: Watering and Care
Garlic needs consistent moisture during active growth but dislikes soggy soil.
Watering Guidelines:
- Water regularly during spring.
- Keep soil moist but not waterlogged.
- Reduce watering once bulbs begin forming.
- Stop watering 1–2 weeks before harvest.
Overwatering can cause rot and small bulbs.
Step 8: Fertilizing for Bigger Bulbs
Garlic is a moderate feeder.
Best Fertilizer Options:
- Compost
- Fish emulsion
- Balanced organic fertilizer
Feed lightly every 3–4 weeks during spring growth. Avoid heavy nitrogen once bulbs start developing, as it encourages leaf growth over bulb formation.
Step 9: Remove Scapes (For Hardneck Garlic)
If growing hardneck varieties, curly flower stalks called scapes will appear in late spring.
Cut scapes when they curl once or twice.
Removing scapes:
- Redirects energy to bulb growth
- Increases bulb size
- Provides delicious edible greens
Scapes are excellent in stir-fries, pesto, or soups.
Step 10: Know When to Harvest
Garlic is usually ready 8–9 months after planting.
Signs It’s Ready:
- Lower leaves turn yellow or brown.
- Top leaves remain partially green.
- About 50–60% of leaves have dried.
Avoid waiting too long, as overripe bulbs may split open.
To harvest:
- Loosen soil with a garden fork.
- Gently lift bulbs.
- Do not pull directly by the stem.
Handle carefully to avoid bruising.
Step 11: Cure Garlic Properly
Curing improves flavor and extends storage life.
How to Cure:
- Brush off excess soil (do not wash).
- Hang in bundles or lay flat in a dry, airy place.
- Keep out of direct sunlight.
- Cure for 2–3 weeks.
Once fully dry:
- Trim roots.
- Cut stems (or braid softneck garlic).
- Store in a cool, dry location.
Step 12: Store for Long-Term Use
Properly cured garlic can last:
- 4–6 months (hardneck)
- 6–8 months (softneck)
Store in:
- Mesh bags
- Baskets
- Paper bags
Avoid refrigeration, as it encourages sprouting.
Ideal storage temperature: 55–60°F (13–16°C).
Common Garlic Growing Mistakes to Avoid
- Planting too shallow
- Using small cloves
- Overwatering
- Harvesting too early
- Skipping curing
- Planting in compacted soil
Avoiding these mistakes can significantly increase your bulb size and yield.
Growing Garlic in Containers
If space is limited, garlic grows beautifully in pots.
Container Tips:
- Use deep containers (10 inches minimum).
- Ensure excellent drainage.
- Plant fewer cloves per pot to avoid crowding.
- Keep in full sun.
- Water more frequently than garden beds.
Container-grown garlic may produce slightly smaller bulbs but still offers excellent flavor.
Saving Garlic for Replanting
One of the best parts of growing garlic is sustainability.
Select the largest, healthiest bulbs from your harvest and save them for next season’s planting. Over time, your garlic adapts to your local climate, often producing even better results year after year.
Final Thoughts
Growing garlic at home is simple, affordable, and incredibly satisfying. With the right timing, healthy soil, proper spacing, and a little patience, you can enjoy large, flavorful bulbs that elevate every meal.
Garlic doesn’t require constant care, expensive tools, or advanced gardening skills. It rewards consistency and basic good practices. Whether planted in garden beds or containers, this resilient crop offers a dependable harvest season after season.
Start with a few cloves this year, follow these step-by-step instructions, and soon you’ll be harvesting your own robust, aromatic garlic bulbs — fresh from your garden to your kitchen.