Fresh mint is one of the easiest and most rewarding herbs you can grow at home. Its refreshing aroma, vibrant green leaves, and fast growth make it a favorite among home gardeners. Whether you enjoy mint chutney, herbal tea, mojitos, or garnishing your dishes, having a steady supply right outside your kitchen is incredibly satisfying.
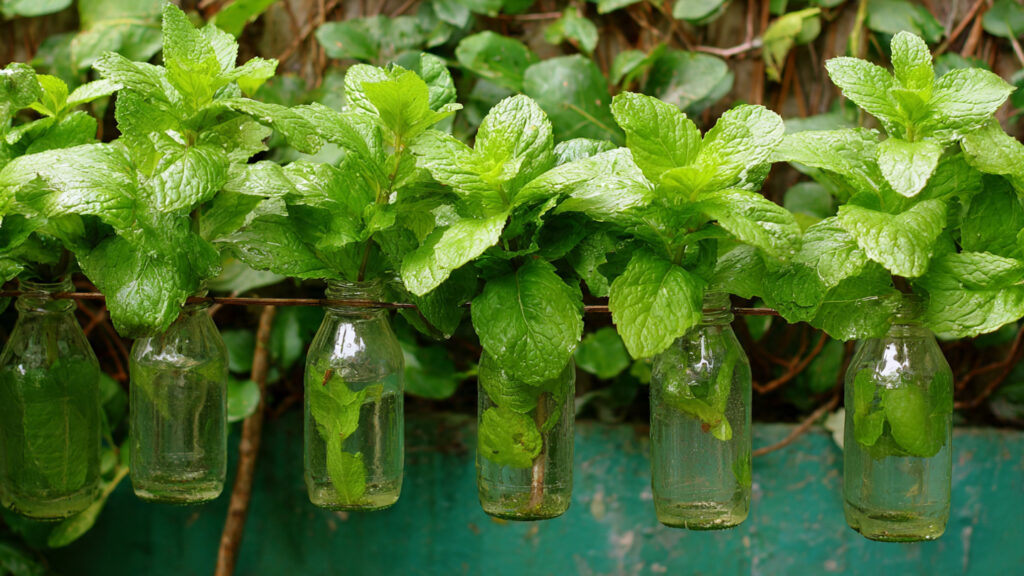
The best part? You don’t need a big garden or fancy containers. With just a simple plastic bottle, some soil, and a mint cutting, you can create a thriving mini herb garden almost anywhere — from a sunny window in your kitchen to a small balcony.
This ultimate guide will show you how to turn an ordinary plastic bottle into a productive mint planter and enjoy a fresh harvest again and again.
Why Grow Mint in a Plastic Bottle?
Growing mint in a recycled plastic bottle offers several advantages:
1. Perfect for Small Spaces
If you live in an apartment or have limited outdoor space, bottle gardening is ideal. You can hang it, place it on a windowsill, or line several bottles along a balcony railing.
2. Budget-Friendly
There’s no need to buy expensive pots. Reusing plastic bottles reduces waste and saves money.
3. Easy to Maintain
Mint is a hardy herb that thrives with minimal effort. Even beginners can succeed.
4. Controls Mint’s Spread
Mint is known for being invasive when planted directly in the ground. Growing it in a bottle keeps it contained and manageable.
What You’ll Need
Before starting, gather these simple materials:
- A large plastic bottle (1–2 liters)
- Sharp scissors or a cutter
- Potting soil (well-draining)
- Mint cuttings or small mint plant
- Water
- A nail or heated skewer (for drainage holes)
- Optional: twine or wire for hanging
That’s it! No complicated tools required.
Step-by-Step Guide to Growing Mint in a Plastic Bottle
Step 1: Prepare the Bottle
Start by washing the plastic bottle thoroughly. Remove any labels and residue.
Next, cut the bottle horizontally (about one-third from the top). You can use the bottom portion as a planter. Alternatively, you can cut a rectangular window along the side if you want a horizontal planter.
Make several small drainage holes at the bottom using a heated nail or sharp object. Drainage is crucial because mint doesn’t like soggy soil.
If you plan to hang the bottle, punch two holes near the rim and thread twine through them.
Step 2: Add Soil
Fill the bottle about three-quarters full with well-draining potting soil. Mint prefers loose, slightly moist soil that drains excess water easily.
➡️ How to Grow Malabar Spinach from Cuttings for Fast, Easy Greens
➡️ How to Grow Super Delicious Cabbage at Home Without a Garden
➡️ How to Grow Bean Sprouts at Home in Plastic Bottles Easily (Step‑by‑Step Guide)
➡️ Why is Your Lemon Tree Blooming in the Heart of Winter?
➡️ Why Should Your Garden Have a Dedicated Pollinator Highway?
➡️ Why Do Your Fruit Trees Need a Winter Wash to Thrive in Spring?
➡️ How Can Rice Water Transform Your Fruits into Sweeter Delights?
➡️ Jumpstart Your Winter Garden: Seed Starting Under Lights
You can improve soil quality by mixing in:
- Compost
- Coco peat
- A small amount of sand (for better drainage)
Avoid compacting the soil too tightly. Roots need air to grow.
Step 3: Plant the Mint
You can grow mint from either cuttings or small nursery plants.
Option A: Growing from Cuttings
- Cut a healthy 4–6 inch stem from an existing mint plant.
- Remove the lower leaves.
- Place the stem in water for 5–7 days until roots appear.
- Plant the rooted cutting into the prepared soil.
Option B: Using a Small Plant
Simply remove the plant from its original container and gently place it into your bottle planter. Cover the roots with soil and press lightly.
Step 4: Water Properly
Water immediately after planting. The soil should be moist but not flooded.
Mint loves moisture but dislikes standing water. Check the soil daily and water when the top inch feels dry.
In hot climates, especially during Indian summers, mint may require daily watering.
Step 5: Choose the Right Location
Mint grows best in:
- Partial sunlight
- 4–6 hours of indirect sunlight daily
A bright balcony or sunny window works perfectly. Avoid placing it under harsh afternoon sun, which may scorch the leaves.
Caring for Your Mint Plant
Once your mint is established, ongoing care is simple.
1. Regular Watering
Keep soil consistently moist but never soggy.
2. Pruning for Growth
Regular trimming encourages bushier growth. Pinch off the tips once the plant reaches about 6 inches tall. This prevents legginess and promotes fuller leaves.
3. Feeding
Mint doesn’t require heavy fertilization. Adding compost once a month is enough. Overfeeding can reduce flavor intensity.
4. Pest Control
Mint is relatively pest-resistant, but occasionally you may see aphids or spider mites. Spray with diluted neem oil or mild soapy water if needed.
Harvesting Mint for Maximum Yield
The best part of growing mint is harvesting fresh leaves whenever needed.
- Start harvesting once the plant is at least 6–8 inches tall.
- Cut stems just above a leaf node.
- Never remove more than one-third of the plant at a time.
Regular harvesting encourages continuous growth. In fact, the more you trim, the bushier your mint becomes.
Creative Ways to Use Your Homegrown Mint
With your bottle garden thriving, here are delicious and refreshing ways to enjoy your harvest:
- Mint tea
- Mint chutney
- Fresh garnish for salads
- Mint lemonade
- Herbal detox water
- Flavoring for curries and rice dishes
Fresh mint leaves have stronger aroma and flavor compared to store-bought varieties.
Common Mistakes to Avoid
Even though mint is easy to grow, beginners sometimes make simple errors.
Overwatering
Too much water causes root rot. Ensure proper drainage.
Too Little Sunlight
Mint becomes weak and leggy in dark corners.
Ignoring Pruning
Without trimming, mint grows tall and sparse instead of bushy.
Using Heavy Garden Soil
Compact soil prevents healthy root development.
Benefits of Growing Mint at Home
Growing mint in a plastic bottle isn’t just practical — it offers additional advantages:
1. Fresh and Chemical-Free
You control what goes into your soil. No pesticides or harmful chemicals.
2. Stress Relief
Gardening, even on a small scale, reduces stress and improves mental well-being.
3. Sustainable Living
Reusing plastic bottles reduces environmental waste.
4. Cost Savings
One mint plant can provide leaves for months, saving money on grocery bills.
Expanding Your Bottle Garden
Once you master mint, you can expand your bottle garden with other herbs such as:
- Coriander
- Basil
- Spinach
- Green onions
You can even create a vertical herb wall using multiple bottles.
Seasonal Tips for Better Growth
Summer
- Provide partial shade during peak heat.
- Water daily if needed.
Monsoon
- Ensure excellent drainage to prevent waterlogging.
Winter
- Reduce watering frequency.
- Place in a sunny spot for warmth.
Mint generally grows year-round in warm climates.
Final Thoughts: Small Bottle, Big Harvest
Growing mint in a plastic bottle proves that you don’t need a large garden to enjoy fresh herbs. With minimal space, effort, and cost, you can transform a simple recycled container into a productive mini herb garden.
This method is perfect for beginners, apartment dwellers, students, or anyone looking to embrace small-space gardening. In just a few weeks, you’ll see vibrant green leaves flourishing in your homemade planter — ready to enhance your meals and drinks.