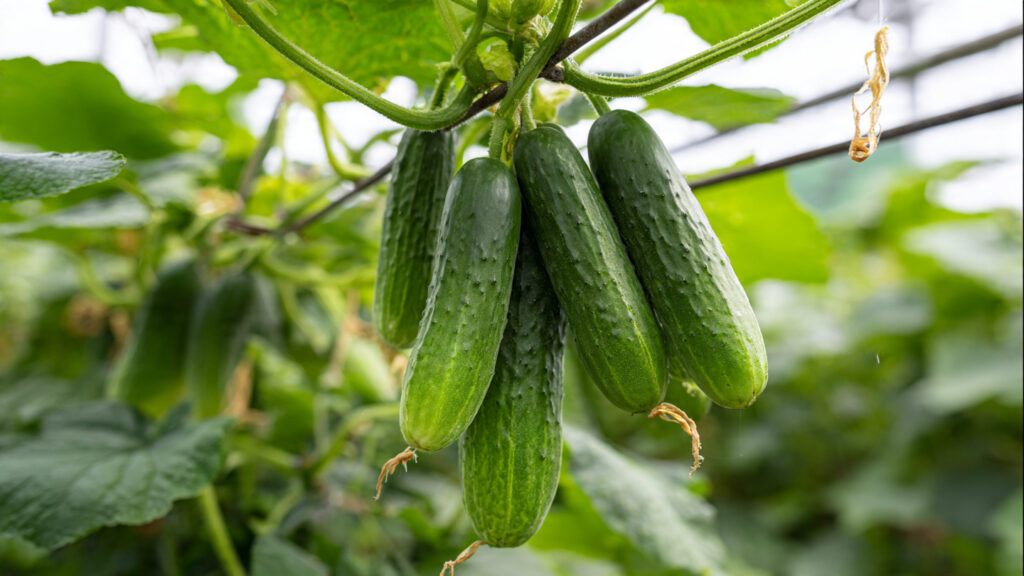
Cucumbers (Cucumis sativus) are among the most popular and rewarding vegetables to grow in home gardens. With their crisp texture and refreshing flavor, they are perfect for salads, pickles, and snacking straight from the vine. While cucumbers are relatively easy to grow, achieving a bountiful harvest of uniform, juicy fruits requires careful planning, proper care, and knowledge of the plant’s specific needs. This complete guide will take you through every step of growing cucumbers successfully—from selecting seeds to harvesting.
Why Grow Your Own Cucumbers?
Growing cucumbers at home offers several advantages:
- Freshness and Flavor: Store-bought cucumbers may lose flavor during transit. Homegrown cucumbers are crisp, sweet, and aromatic.
- Health Benefits: Cucumbers are rich in water, vitamins, and antioxidants. Growing your own ensures chemical-free produce.
- Cost-effective: A few plants can yield a significant amount of cucumbers over the season.
- Satisfaction: Watching seeds germinate and vines grow into fruit-bearing plants is highly rewarding.
Whether you have a garden, balcony, or small patio, cucumbers can thrive in containers or traditional garden beds with the right care.
Step 1: Choosing the Right Cucumber Variety
Cucumber varieties fall into two main types:
- Slicing cucumbers: Best for fresh eating, salads, and sandwiches. They are typically larger and have smoother skin.
- Pickling cucumbers: Shorter, thicker, and ideal for pickles.
When selecting a variety, consider your growing space and climate:
- Bush varieties: Compact and suitable for containers or small gardens.
- Vining varieties: Require trellises or supports but produce higher yields.
Popular options for beginners include ‘Marketmore,’ ‘Lemon,’ and ‘Bush Champion.’
Tip: Choose disease-resistant varieties if you live in humid climates prone to powdery mildew or cucumber mosaic virus.
Step 2: Preparing the Soil
Cucumbers are heavy feeders and require nutrient-rich, well-draining soil.
Ideal soil conditions:
- pH: 6.0–7.0 (slightly acidic to neutral)
- Texture: Loamy and loose to allow root expansion
- Nutrients: High in organic matter
Soil preparation steps:
- Loosen soil to a depth of 12–15 inches.
- Incorporate compost or well-rotted manure to enhance fertility.
- Add a balanced fertilizer (NPK 10:10:10) before planting.
- Ensure good drainage to prevent waterlogging, which can lead to root rot.
For container gardeners, use a mix of garden soil, compost, and perlite or sand to maintain drainage and nutrient levels.
Step 3: Starting Seeds
Cucumber seeds can be sown directly into the garden or started indoors for an early harvest.
Direct sowing:
- Plant seeds ½–1 inch deep and 12 inches apart in rows 3–4 feet apart.
- Ideal soil temperature: 70–95°F (21–35°C) for germination.
- Water gently to keep soil moist until seeds sprout.
Indoor sowing:
- Use seed trays or small pots filled with seed-starting mix.
- Sow 1–2 seeds per pot and cover lightly with soil.
- Keep the tray in a warm, bright location with temperatures around 70°F (21°C).
- Transplant seedlings outdoors when they have 2–3 true leaves and no risk of frost.
Tip: Soaking seeds in water for 4–6 hours before sowing can speed up germination.
➡️ How to Grow Malabar Spinach from Cuttings for Fast, Easy Greens
➡️ How to Grow Super Delicious Cabbage at Home Without a Garden
➡️ How to Grow Bean Sprouts at Home in Plastic Bottles Easily (Step‑by‑Step Guide)
➡️ Why is Your Lemon Tree Blooming in the Heart of Winter?
➡️ Why Should Your Garden Have a Dedicated Pollinator Highway?
➡️ Why Do Your Fruit Trees Need a Winter Wash to Thrive in Spring?
➡️ How Can Rice Water Transform Your Fruits into Sweeter Delights?
➡️ Jumpstart Your Winter Garden: Seed Starting Under Lights
Step 4: Providing Proper Sunlight and Temperature
Cucumbers thrive in warm, sunny conditions.
- Sunlight: At least 6–8 hours of direct sunlight daily.
- Temperature: Daytime 70–85°F (21–29°C), nighttime not below 60°F (15°C).
Cold soil or low temperatures slow growth and may cause stunted or misshapen fruits. In cooler regions, consider using black plastic mulch or row covers to warm the soil.
Step 5: Watering Cucumbers
Consistent moisture is critical for cucumbers to produce crisp, juicy fruits.
Watering tips:
- Keep soil evenly moist but not waterlogged.
- Water deeply 1–2 times per week, depending on rainfall and container size.
- Avoid wetting the leaves excessively to reduce the risk of fungal diseases.
- Mulch around the base with straw or coconut husk to retain moisture and suppress weeds.
Tip: Morning watering is preferable to allow leaves to dry during the day and minimize disease risk.
Step 6: Supporting Vines
Vining cucumber varieties benefit from trellises, cages, or fences. Vertical growth has several advantages:
- Saves space in small gardens or patios.
- Improves air circulation, reducing the risk of fungal diseases.
- Makes harvesting easier.
- Keeps fruits clean and straight.
Tip: Tie vines gently with soft twine or plant ties to avoid damaging stems.
Step 7: Fertilizing for High Yields
Cucumbers are heavy feeders, especially during flowering and fruiting.
Fertilizing schedule:
- Apply a balanced fertilizer every 3–4 weeks during early growth.
- Once flowering starts, switch to a fertilizer higher in potassium and phosphorus to support fruit development.
Tip: Avoid excessive nitrogen, which encourages leaf growth but reduces flowering and fruiting.
Step 8: Pest and Disease Management
Cucumbers are susceptible to several pests and diseases, but preventive measures can minimize problems:
Common pests:
- Aphids
- Spider mites
- Cucumber beetles
Solutions: Use neem oil, insecticidal soap, or introduce beneficial insects like ladybugs.
Common diseases:
- Powdery mildew: White powdery spots on leaves. Avoid overhead watering and provide good air circulation.
- Downy mildew: Yellow patches on leaves. Remove infected leaves and use fungicidal sprays if necessary.
- Root rot: Caused by waterlogged soil; ensure proper drainage.
Tip: Rotate cucumber crops each season to reduce soil-borne diseases.
Step 9: Flowering and Pollination
Cucumber plants produce male and female flowers. Proper pollination is essential for fruit development.
- Pollinators: Bees are the main pollinators. Encourage them by planting flowers nearby.
- Hand pollination: If pollinators are scarce, use a small brush to transfer pollen from male to female flowers.
Tip: Female flowers can be identified by the small fruit at the base of the flower; these are the ones that develop into cucumbers.
Step 10: Harvesting Cucumbers
Cucumbers mature quickly and should be harvested regularly to encourage continued production.
Harvesting guidelines:
- Pick cucumbers when they reach the desired size, typically 6–8 inches for slicing varieties.
- Use a sharp knife or scissors to cut the fruit from the vine rather than pulling.
- Harvest every few days to prevent overripe cucumbers, which can slow plant growth.
Tip: Frequent harvesting promotes the production of more flowers and fruits throughout the season.
Step 11: Container Growing Tips
For gardeners using pots or containers:
- Ensure containers are at least 12–18 inches deep and wide enough for root development.
- Use high-quality potting soil with added compost.
- Place containers in a sunny location and rotate periodically for even growth.
- Consider using a trellis or stake for vining varieties even in pots.
Container-grown cucumbers may need more frequent watering and fertilization compared to garden-grown plants.
Conclusion
Growing cucumbers at home is both enjoyable and rewarding. By following these step-by-step guidelines—from selecting the right variety and preparing soil to watering, fertilizing, supporting vines, and harvesting—you can enjoy crisp, juicy cucumbers all season long.
Remember, cucumbers thrive in warm, sunny conditions with consistent moisture, nutrient-rich soil, and proper care. With patience and attention, even beginner gardeners can achieve abundant harvests of fresh, homegrown cucumbers for salads, pickles, or snacking.