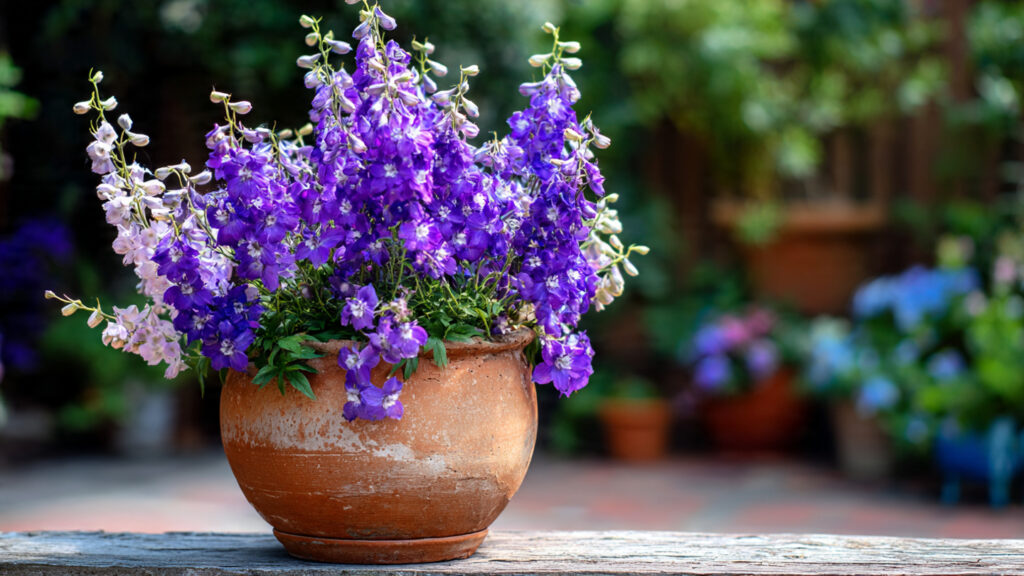
Larkspur, known for its tall spikes of vibrant flowers and delicate fragrance, is a favorite among gardeners looking to add height and color to their gardens or patios. Traditionally grown in flower beds, larkspur can also thrive in pots, offering flexibility for urban gardeners, balcony enthusiasts, or anyone with limited garden space. With a few simple techniques, you can achieve stunning blooms without the usual complications of soil preparation or extensive care.
This guide will walk you through effortless methods to grow larkspur in pots, from selecting seeds to harvesting vibrant, long-lasting flowers.
Understanding Larkspur and Its Appeal
Larkspur (Consolida ajacis) is an annual or biennial plant that belongs to the buttercup family. Its tall, elegant flower spikes come in shades of blue, purple, pink, and white, adding vertical interest and charm to any garden space. Besides their beauty, larkspur flowers are known for attracting pollinators like bees and butterflies, contributing to a healthy garden ecosystem.
Growing larkspur in pots has several advantages:
- Allows control over soil conditions
- Protects plants from pests and ground diseases
- Makes it easy to move plants to ideal sunlight or decorative locations
- Offers a visually striking display on patios, balconies, or near doorways
Step 1: Choosing the Right Pot
The right pot is crucial for healthy larkspur growth. Larkspur develops a long taproot, so a deep container is necessary.
Potting Tips:
- Depth: At least 12–16 inches deep to accommodate the taproot
- Width: 10–12 inches wide per plant
- Drainage: Ensure holes at the bottom to prevent waterlogging
- Material: Clay or terracotta pots allow airflow, but plastic pots retain moisture longer
A well-chosen container ensures roots grow unimpeded and prevents water accumulation that could lead to root rot.
Step 2: Preparing the Potting Mix
Larkspur thrives in well-draining, fertile soil. You don’t need fancy mixtures—simple ingredients work effectively.
Recommended Mix:
- 1 part garden soil or loam
- 1 part compost or well-rotted manure
- 1 part perlite or coarse sand
The compost provides nutrients, while perlite ensures drainage, preventing root diseases.
Before planting, lightly moisten the mix. Larkspur seeds prefer slightly damp soil, but overly wet soil can cause rot.
Step 3: Sowing Seeds for Success
Larkspur is grown from seeds, but germination can be tricky if conditions aren’t right. Follow these simple steps for reliable results:
- Soak Seeds: Soak seeds in water for 12–24 hours to soften the hard seed coat.
- Planting Depth: Sow seeds ¼–½ inch deep in the potting mix.
- Spacing: Plant 3–4 seeds per pot to increase germination chances. Thin later to the strongest seedling.
- Light: Larkspur seeds need light to germinate, so don’t cover them too deeply. A thin layer of soil or vermiculite is sufficient.
Germination usually occurs within 10–14 days, depending on temperature and moisture.
Step 4: Optimal Growing Conditions
Larkspur prefers cool, temperate climates. Even in pots, you can create ideal conditions with minimal effort.
Sunlight:
- Provide 4–6 hours of morning sun daily
- Partial shade in hot afternoons prevents wilting
Temperature:
- Germination is best at 55–65°F (13–18°C)
- Mature plants tolerate a range of 50–75°F (10–24°C)
Watering:
- Keep the soil consistently moist but not soggy
- Water at the base to prevent fungal infections on foliage
- Reduce watering slightly as plants mature to encourage stronger stems
Step 5: Fertilizing Larkspur in Pots
While larkspur is not a heavy feeder, occasional nutrients boost flower production.
Fertilizer Tips:
- Use a balanced liquid fertilizer every 2–3 weeks during active growth
- Avoid high-nitrogen fertilizers, which promote leaf growth over flowers
- Organic alternatives like compost tea or diluted fish emulsion work well
Consistent, light feeding encourages strong spikes and vibrant blossoms.
Step 6: Supporting the Flower Stalks
Larkspur produces tall flower spikes that may require support, especially in windy conditions.
➡️ How to Grow Malabar Spinach from Cuttings for Fast, Easy Greens
➡️ How to Grow Super Delicious Cabbage at Home Without a Garden
➡️ How to Grow Bean Sprouts at Home in Plastic Bottles Easily (Step‑by‑Step Guide)
➡️ Why is Your Lemon Tree Blooming in the Heart of Winter?
➡️ Why Should Your Garden Have a Dedicated Pollinator Highway?
➡️ Why Do Your Fruit Trees Need a Winter Wash to Thrive in Spring?
➡️ How Can Rice Water Transform Your Fruits into Sweeter Delights?
➡️ Jumpstart Your Winter Garden: Seed Starting Under Lights
Easy Support Hack:
- Insert a bamboo stake or small garden stick into the pot at planting time
- Tie the growing stem gently with soft garden ties as it grows
- Remove supports after flowering if desired
This method prevents bending or breaking, keeping your blooms upright and visually striking.
Step 7: Thinning and Pruning
Once seedlings have developed 2–3 sets of leaves, thin to the strongest plant per pot. This reduces competition for nutrients and ensures robust growth.
Pruning is minimal for larkspur:
- Remove yellowing leaves at the base to maintain appearance
- Deadhead spent flowers to encourage secondary blooms
This simple care step extends the flowering period and keeps plants tidy.
Step 8: Pest and Disease Management
Growing larkspur in pots reduces many pest issues, but occasional problems may occur.
Common Issues:
- Aphids: Small insects feeding on leaves; spray with water or insecticidal soap.
- Powdery Mildew: White powdery growth on leaves; ensure good air circulation and avoid overhead watering.
- Slugs and Snails: Can be removed manually or controlled with barriers.
Traditional methods like neem oil or a mild soap spray are safe and effective for potted larkspur.
Step 9: Ensuring Continuous Blooms
For a constant display of larkspur flowers:
- Sow seeds in succession every 2–3 weeks
- Rotate pots to maintain consistent light exposure
- Keep soil fertile and moist
By staggering sowing, you can enjoy continuous blooms for months.
Step 10: Harvesting and Display
Larkspur makes excellent cut flowers. Harvesting tips include:
- Cut stems when flowers begin to open
- Leave some lower buds for continued blooming
- Use a sharp knife or scissors to avoid crushing stems
- Place cut stems in water immediately to preserve freshness
Potted larkspur can also brighten patios, balconies, and window sills without cutting, providing long-lasting color.
Bonus Hack: Companion Planting in Pots
Larkspur pairs beautifully with other container-friendly flowers like:
- Marigolds
- Sweet alyssum
- Petunias
Companion planting adds visual interest and can help deter pests naturally.
Why Potted Larkspur Is So Effective
Growing larkspur in pots simplifies gardening while maximizing results:
- Easier control over soil and moisture
- Flexibility to move plants for optimal sun exposure
- Reduced pest pressure
- Stunning vertical blooms without dedicating garden beds
Even beginners can achieve vibrant results with minimal effort.
Common Mistakes to Avoid
- Planting in shallow containers
- Overwatering leading to root rot
- Neglecting sunlight requirements
- Using high-nitrogen fertilizers that favor leaves over flowers
- Overcrowding seedlings
Avoiding these errors ensures strong, healthy plants with abundant blooms.
Conclusion
Larkspur is an enchanting addition to any garden or patio, and growing it in pots makes it accessible to everyone—even those with limited space or gardening experience. By following simple steps such as selecting the right container, preparing a nutrient-rich mix, sowing seeds correctly, and providing basic care, you can enjoy tall, colorful flower spikes with minimal effort.
Using practical hacks like staking for support, successive sowing for continuous blooms, and companion planting for added beauty ensures that your potted larkspur remains healthy and visually striking. With a bit of patience and consistent care, these elegant flowers can transform your home garden into a vibrant display that attracts pollinators and delights the senses.
Effortless, easy-to-grow, and rewarding, potted larkspur is the perfect choice for anyone looking to bring a splash of color and charm to their living space.