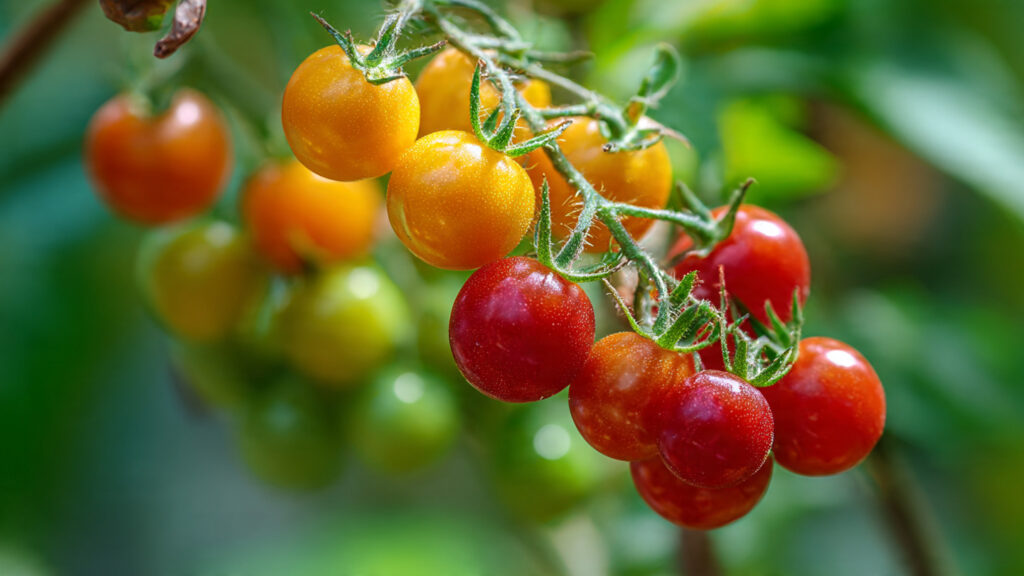
Growing tomatoes at home is one of the most satisfying experiences for gardeners, both beginners and experts alike. While large beefsteak or heirloom varieties often steal the spotlight, small tomatoes—such as cherry and grape types—can be far more rewarding. They are prolific, resilient, and ideal for home gardens, containers, or even balconies. With proper care, you can enjoy a bumper harvest that keeps your kitchen stocked with juicy, flavorful tomatoes all season long.
This step-by-step guide will show you how to grow small tomatoes at home for maximum yield.
Why Grow Small Tomatoes?
Small tomatoes offer several unique advantages:
- High yield: Small fruits mean more per plant, translating into abundant harvests.
- Fast growth: Many small tomato varieties mature quicker than larger types.
- Versatile use: Perfect for salads, snacking, roasting, or making sauces.
- Disease resistance: Many cherry and grape varieties are naturally resistant to common tomato diseases.
- Space efficiency: Ideal for small gardens, containers, or vertical gardens.
Because of their compact size, small tomatoes thrive in nearly any space, making them perfect for urban gardeners and balcony growers.
Step 1: Choosing the Right Variety
Selecting the right variety is crucial for maximizing yield. Popular small tomato types include:
- Cherry tomatoes: Round, bite-sized, sweet, and perfect for snacking or salads. Varieties like ‘Sweet 100’ and ‘Sun Gold’ are highly productive.
- Grape tomatoes: Small, oval-shaped, firm, and perfect for roasting or fresh eating. Varieties like ‘Juliet’ and ‘Red Grape’ are commonly grown.
- Patio or dwarf tomatoes: Compact plants suitable for containers. Varieties like ‘Tiny Tim’ and ‘Tumbling Tom’ produce abundantly in small spaces.
When selecting seeds or seedlings, choose disease-resistant varieties adapted to your climate for the best results.
Step 2: Start Seeds Indoors
Starting tomatoes indoors gives plants a head start on the growing season and improves yield.
Steps to start seeds:
- Use seed trays or small pots with a seed-starting mix.
- Plant seeds ¼ inch deep.
- Keep the soil consistently moist but not waterlogged.
- Provide 12–16 hours of light daily (sunlight or grow lights).
- Maintain a temperature of 70–75°F (21–24°C) for germination.
Seeds typically sprout in 5–14 days. Once seedlings develop their first true leaves, you can begin gentle fertilization with a diluted liquid fertilizer.
Step 3: Harden Off Seedlings
Before transplanting seedlings outdoors, they need to acclimate to outdoor conditions:
- Place seedlings outdoors for a few hours daily, gradually increasing the time over 7–10 days.
- Protect them from strong sun and wind initially.
- Ensure the soil is warm (above 60°F/16°C) before planting.
Hardening off reduces transplant shock and sets the stage for vigorous growth.
Step 4: Choose the Perfect Growing Location
Small tomatoes need:
- Full sunlight: At least 6–8 hours daily.
- Well-draining soil: Loose, rich in organic matter.
- Good air circulation: Helps prevent disease.
If space is limited, containers, hanging baskets, or vertical structures work wonderfully for small tomatoes. For garden beds, ensure adequate spacing to avoid overcrowding and encourage airflow.
Step 5: Soil Preparation
Tomatoes are heavy feeders, so preparing nutrient-rich soil is key:
- Loosen the soil 12–18 inches deep.
- Mix in compost or well-rotted manure.
- Add balanced organic fertilizer with equal nitrogen, phosphorus, and potassium.
- Maintain a slightly acidic to neutral pH (6.0–7.0).
Proper soil preparation encourages strong roots and abundant flowering, both essential for maximum yield.
➡️ How to Grow Malabar Spinach from Cuttings for Fast, Easy Greens
➡️ How to Grow Super Delicious Cabbage at Home Without a Garden
➡️ How to Grow Bean Sprouts at Home in Plastic Bottles Easily (Step‑by‑Step Guide)
➡️ Why is Your Lemon Tree Blooming in the Heart of Winter?
➡️ Why Should Your Garden Have a Dedicated Pollinator Highway?
➡️ Why Do Your Fruit Trees Need a Winter Wash to Thrive in Spring?
➡️ How Can Rice Water Transform Your Fruits into Sweeter Delights?
➡️ Jumpstart Your Winter Garden: Seed Starting Under Lights
Step 6: Transplanting Seedlings
Once seedlings are hardened off and the risk of frost has passed:
- Dig holes slightly deeper than the root ball.
- Plant seedlings up to the first true leaves; buried stems will grow additional roots.
- Space plants 12–24 inches apart, depending on the variety.
- Water immediately after planting to settle the soil.
Planting deeply encourages stronger root systems, which support larger yields over the season.
Step 7: Watering and Mulching
Consistent moisture is vital for high-yield tomato plants:
- Water deeply once or twice a week, depending on rainfall.
- Avoid wetting foliage to prevent fungal diseases.
- Apply 2–3 inches of organic mulch (straw, leaves, or compost) to conserve moisture, regulate soil temperature, and suppress weeds.
Uneven watering can cause fruit cracking or blossom-end rot, so keep the soil consistently moist but not waterlogged.
Step 8: Support Your Plants
Even small tomatoes benefit from support to maximize yield:
- Stakes: Tie the main stem loosely to a stake.
- Cages: Keep plants upright and prevent sprawling.
- Trellises or vertical systems: Ideal for balcony or container gardening.
Supporting plants keeps fruits off the ground, reduces disease risk, and allows for better light penetration, which encourages more flowering.
Step 9: Fertilization During Growth
Tomatoes need extra nutrients during fruit development:
- Apply a balanced fertilizer every 3–4 weeks.
- Use a high-phosphorus formula once flowers appear to boost fruiting.
- Consider foliar feeding with liquid seaweed or fish emulsion to stimulate growth.
Avoid excessive nitrogen, as it encourages leaf growth at the expense of fruit production.
Step 10: Pruning and Pinching
Pruning small tomatoes increases airflow and light exposure, leading to higher yields:
- Remove suckers: These are shoots that emerge between the main stem and branches.
- Pinch off yellow or diseased leaves: Prevents disease spread.
- Limit excessive growth: Focus the plant’s energy on fruit production.
Dwarf or patio varieties may need minimal pruning, but cherry and grape tomatoes benefit greatly from light pruning.
Step 11: Pollination
Small tomatoes require pollination to set fruit. Outdoors, wind and bees naturally help. Indoors or in greenhouses:
- Gently shake flower clusters to move pollen.
- Use a small brush or electric toothbrush on flowers to mimic pollination.
Proper pollination ensures more fruits per plant, maximizing your harvest.
Step 12: Harvesting for Maximum Yield
Small tomatoes are ready to harvest when fully colored, firm, and slightly soft to the touch:
- Cherry tomatoes: Usually 50–70 days after transplanting.
- Grape tomatoes: Often 60–75 days.
Frequent harvesting encourages the plant to produce more fruit. Pick ripe fruits daily rather than letting them stay on the vine.
Step 13: Common Problems and Solutions
- Blossom-end rot: Caused by inconsistent watering; maintain even moisture.
- Yellowing leaves: May indicate nutrient deficiency; apply balanced fertilizer.
- Pests: Aphids, whiteflies, and tomato hornworms can be managed with organic sprays or manual removal.
- Fungal diseases: Good spacing, proper watering, and mulching prevent powdery mildew and blight.
Monitoring plants regularly ensures issues are caught early, keeping yields high.
Step 14: Maximizing Yield Tips
- Plant multiple varieties with staggered maturity for continuous harvest.
- Rotate crops each year to prevent soil-borne diseases.
- Use companion planting (basil, marigolds) to deter pests naturally.
- Grow in containers for mobility and better sun exposure.
- Provide consistent care—small tomatoes reward attention with huge harvests.
Step 15: Storing Your Harvest
Small tomatoes are best consumed fresh but can also be preserved:
- Store ripe tomatoes at room temperature for 5–7 days.
- Refrigerate only if necessary, but allow to come to room temperature before eating for better flavor.
- Preserve excess harvest by drying, freezing, or making sauces and salsas.
Final Thoughts
Growing small tomatoes at home is incredibly rewarding. With the right variety, soil preparation, watering, and care, you can harvest a remarkable quantity of sweet, juicy tomatoes in a small space. Cherry, grape, and dwarf varieties offer the perfect combination of productivity, flavor, and versatility, making them ideal for gardeners of all skill levels.
By following these steps and paying attention to the needs of your plants, you can turn a few small seedlings into a lush, productive garden, bursting with tiny tomatoes that deliver a huge harvest.
Your homegrown tomatoes will not only taste better than store-bought ones but also give you the satisfaction of nurturing your plants from seed to delicious fruit—a true reward for any home gardener.